Table of Contents
As an online seller, you may need to sell your products as packages. Bundling products is an efficient way to increase cart value and sales. There are various ways to bundle products in WooCommerce. This article will guide you through various steps and methods to bundle products in your WooCommerce store.
Before we begin, let’s take a look at what are product bundles and why you should consider bundling products in your store.
What are bundled products?
Bundled products or grouped products is an option in WooCommerce that can be used to sell different products together in a single order. In this way, you can increase the chance of customers spending more on a single purchase. Online sellers often use this method to sell more. More selling means more profits, so this is a useful way to increase your profits.
Why you should consider product bundles in your WooCommerce store?
There are many benefits to offering bundled products to your customers.
- As said earlier, you can increase sales which in turn results in increased profits.
- You can sell accessories as product bundles. For example, when ordering a mobile phone, you can give an option to add accessories such as a case and charger.
- You can increase the average order value
- Sell off slow-moving inventory and thus reduce inventory waste
- You can give coupon discounts to the product bundles based on the cart value. (10% off on a minimum spend of $1000)
How to create bundled products in WooCommerce?
Using the default grouped products option
Step 1: Adding simple products
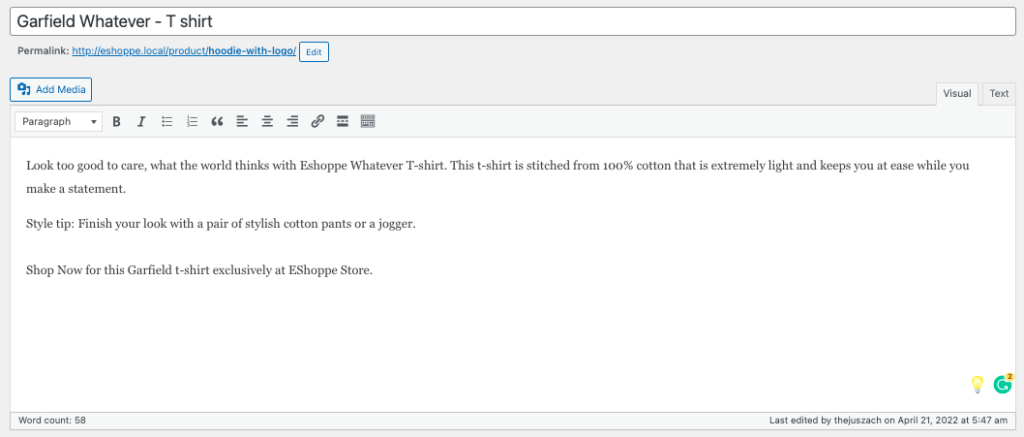
Let’s say we want to bundle the following products in our WooCommerce store.


Add the products one by one as simple products in your WooCommerce store.
Give proper product descriptions, tags, categories, and images.
Note: WooCommerce does not support adding variable products in a bundle out-of-the-box.
Publish the products.
Step 2: Creating grouped product
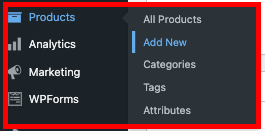
Open your WordPress dashboard. Click on Products > Add New.
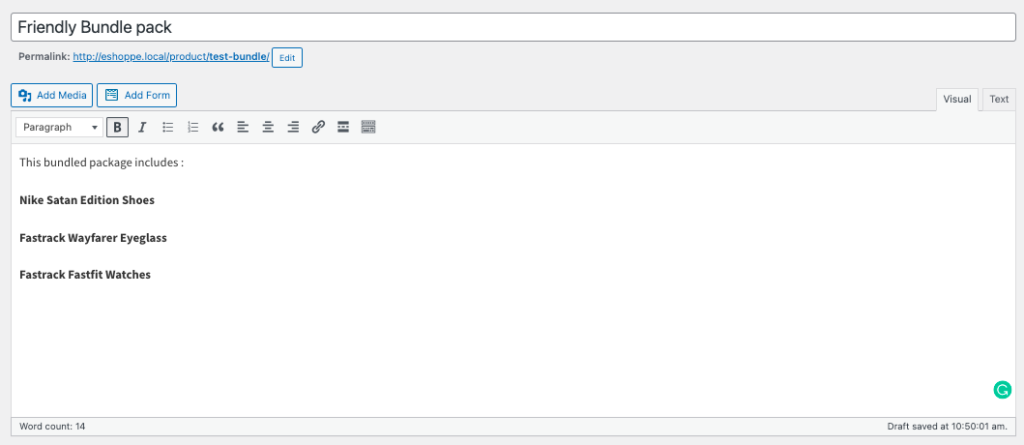
Just like adding a simple product, create the grouped product with a title, description, and all the required fields.
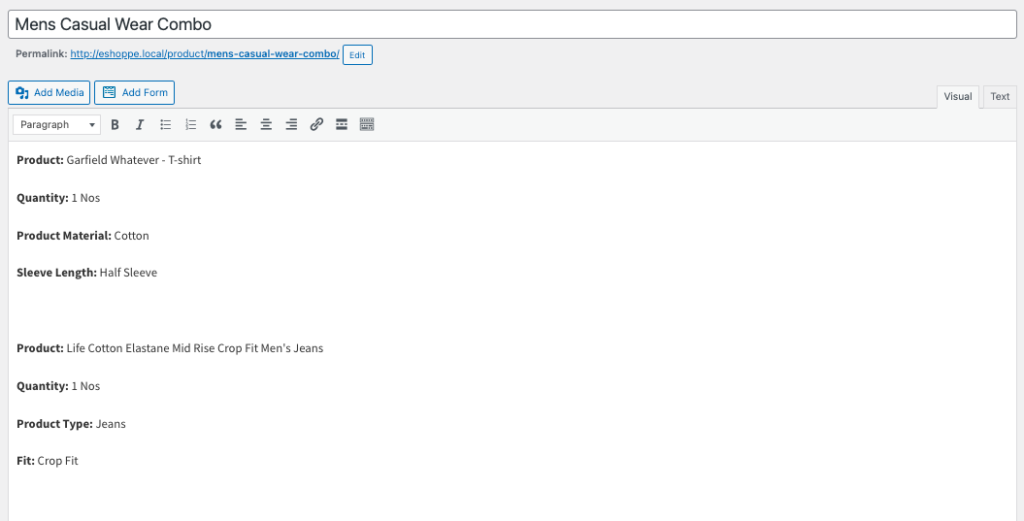
It’s good if you use ‘bundle’ or ‘combo’ as the product name. Mention the product description of each product differently. If you are adding clothes as a bundle, give proper details like clothing material, fit, etc.
Step 3: Edit Product Data
- Scroll down to the Product Data meta box.
- Select Grouped Product as the Product data from the drop-down menu.
- Select Linked Products from the menu.
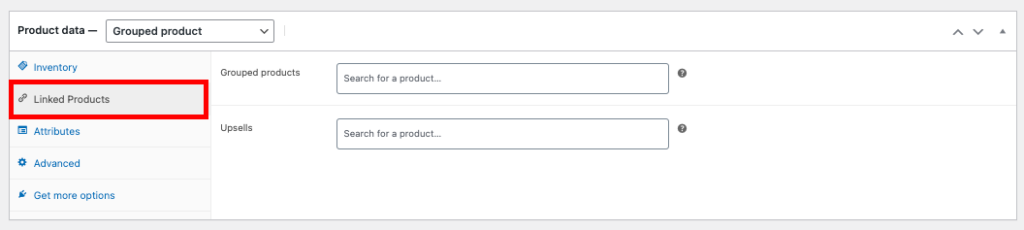
- In the Grouped Product text box, enter the products you want to bundle.
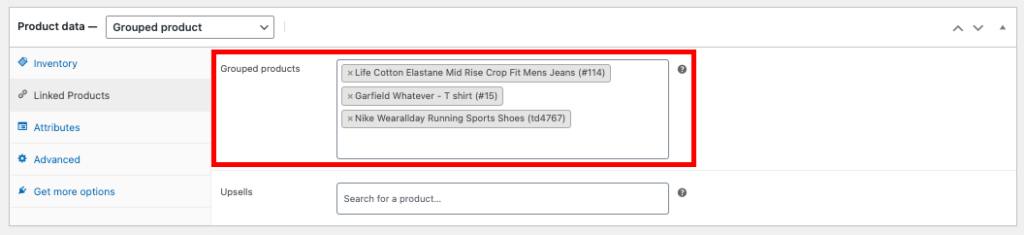
You can only add products already added in your store.
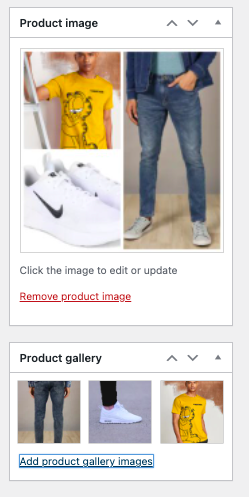
Step 4: Add images and categories
It’s important to add a featured image with all the bundled products. The featured image will help attract the customer’s eye. You can either use collages of all the bundled products. Most online stores usually use the image of a model wearing all the bundled products.
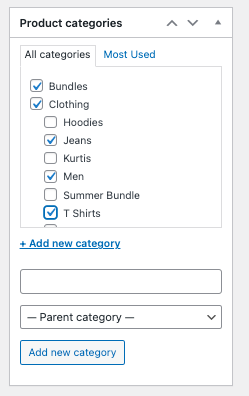
After adding images, you should choose the categories in which you want to display your product. Also, add a ‘bundles’ category to your existing list.
Now click on Save Draft.
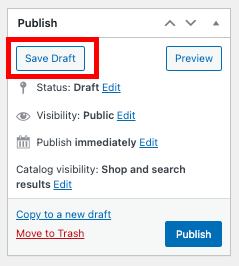
You can edit later if you want to add more products to your bundle.
Step 5: Preview and Publish
Now let’s move to the final step. Before publishing the product, preview to check how the customer will view the bundle.
Click on the View Product tab.

This will display how the product will be viewed by the customer.
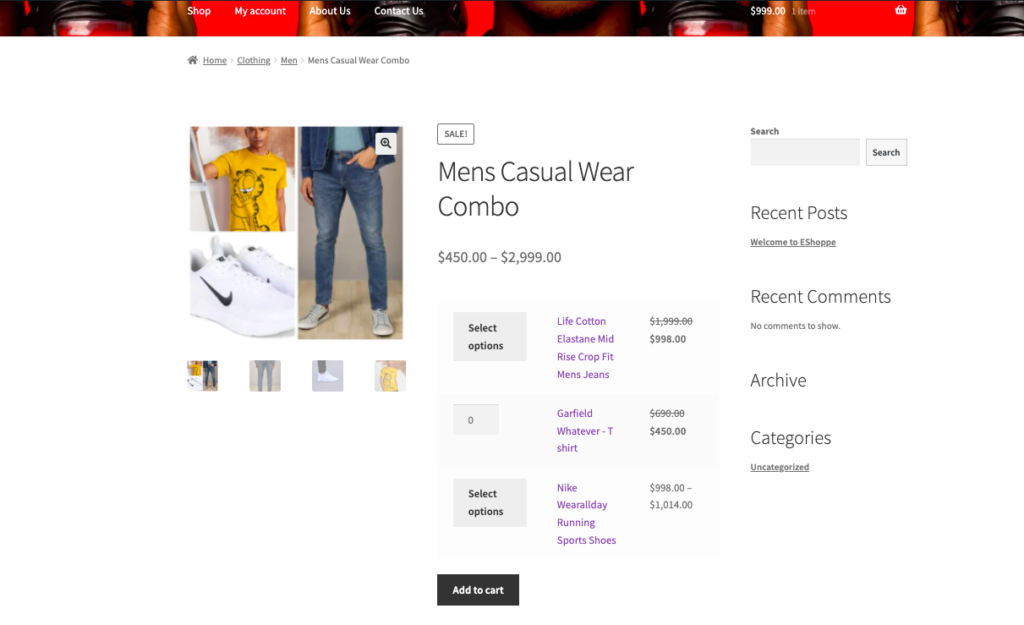
If you found everything to be okay and don’t need to edit or change anything you can publish the product.
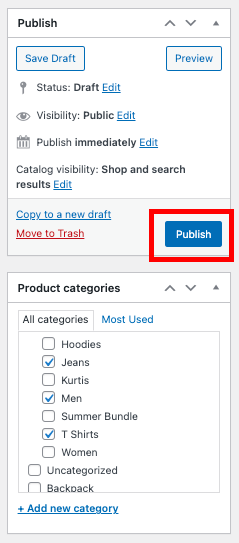
Click on Publish. This will add your bundled products to your product list.
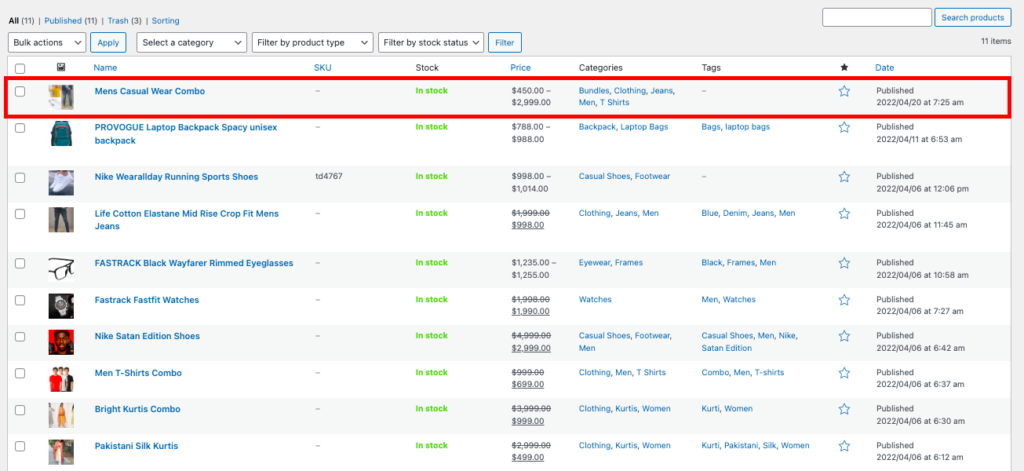
You can find your bundled product among other products in the All Products menu.
Using Plugins
The default grouped products option in WooCommerce offers only limited features. If you want to add extensive options you can use different plugins and extensions. Following is a list of some plugins and extensions that lets you add bundled products to your WooCommerce store.
- WPC Product bundles – Gives you advanced features like rearranging bundled product orders, set a default, minimum, and maximum quantity for each product in the bundle, advanced customization, etc.
- Composite products – Built-in support for simple and variable product bundles. Ideal for bundling assembled products like computers, and camera equipment.
- Chained Products – Preconfigured product bundles that automatically add “chained products” to the cart when a user adds a “main” product.
- Mix and Match Products – Lets you add products in bulk quantity. For example, a pack of 6 T-shirts.
- Custom Product Boxes – This allows users to select items as bundles of their own choice from a collection of products.
In this article, we will be using the WPC Product bundles plugin, as it offers pretty much everything for grouping products.
Step 1: Install the plugin
Go to Plugins > Add New.
Search for WPC Product Bundles for WooCommerce.
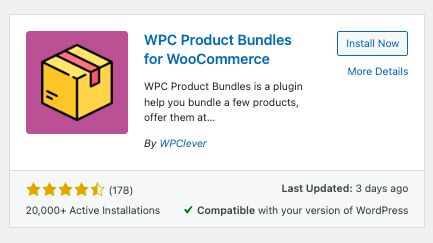
Install and Activate the plugin.
Step 2: Creating Product bundles using WPC Product Bundles
Select Product > Add New.
Add a bundle name, and description and upload images.
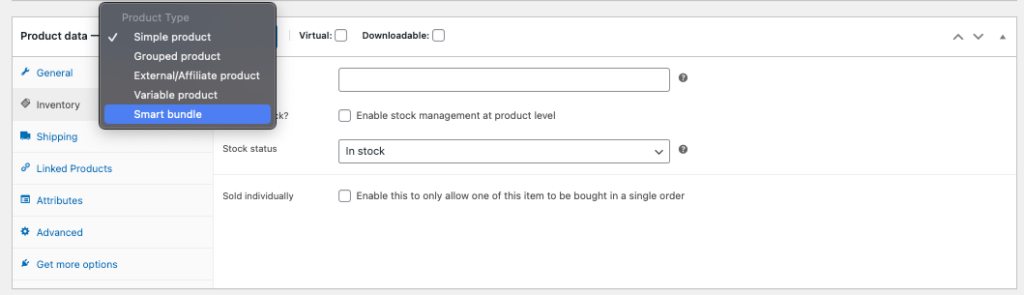
Scroll down to Product Data meta box.
Select Smart Bundle from the product data to drop down box.
Click on the Bundled products tab.
In the Search text box, enter the products you want to add. Here you can set the default quantity for each product.
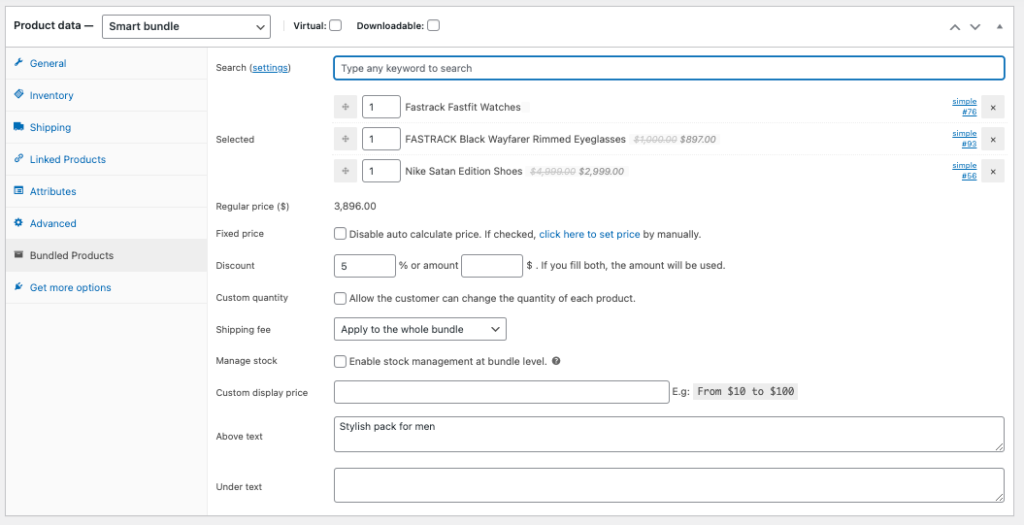
The plugin will automatically add the price of the bundle. You can add a custom price to the bundle by checking the Fixed price check box and enter the price manually.
You can set discounts if you want. Remember, there are 2 ways you can add a discount, either offering a percentage discount or a fixed discount. Enter the discount percentage or discount amount. If you add both fields, then the fixed discount will be applied.
After finishing the bundle set up you can now Publish your bundled product.
Click on View product to preview your bundle pack.
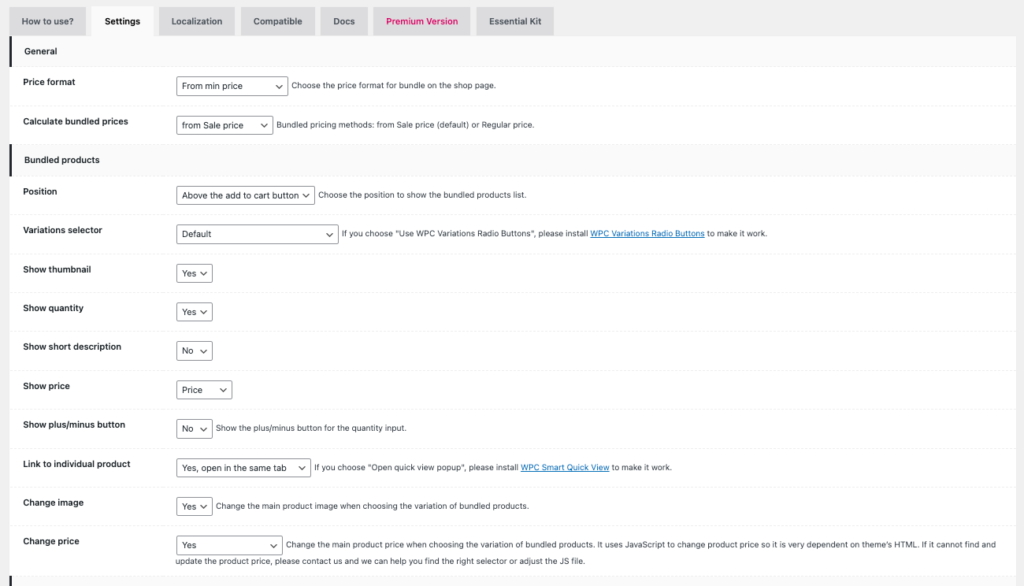
The plugin comes with a handful of features for creating bundled products. You can play around with the options by clicking WPClever > Product Bundles.
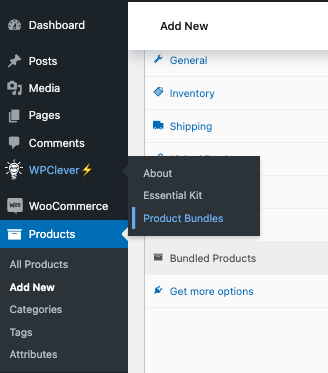
This will take you to the plugin’s options page. You can customize a lot of things here. Try these features on your needs.
How to give coupon discounts on WooCommerce bundled products?
Adding bundled products is the first step, but without giving good discounts, bundled products may not be useful to your WooCommerce store. You can add various discount options for bundled products, but the most effective way is to give coupons. You can set the minimum order value to your coupons so that when a customer removes one or two products from the bundle he/she won’t be eligible for the discount.
The default coupon system on WooCommerce only gives you basic features. If you want extended features for coupons you can make use of different coupon plugins.
In this article, we will be discussing how to use the default coupon system in your WooCommerce store for bundled products.
Step 1: Create a new coupon
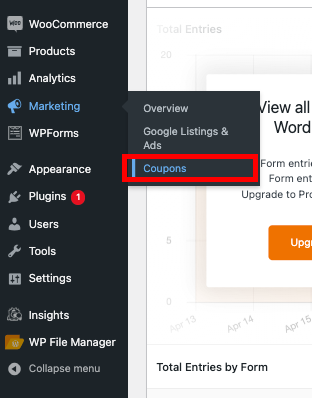
- Go to Marketing > Coupons from your WordPress dashboard.
- Click on Add coupon.
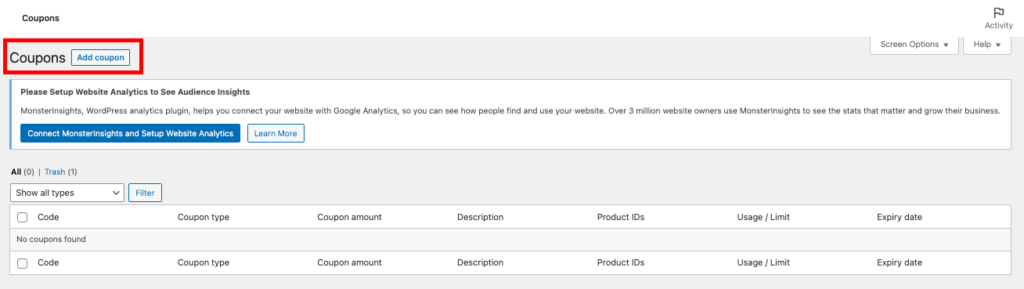
- Enter the Coupon Code and Description.

Step 2: Edit Coupon Data
- Select the General tab from the Coupon data meta box.
- Select Discount type as Fixed cart discount.
- Enter the Coupon amount (10 gives a discount of 10$ to the cart value).
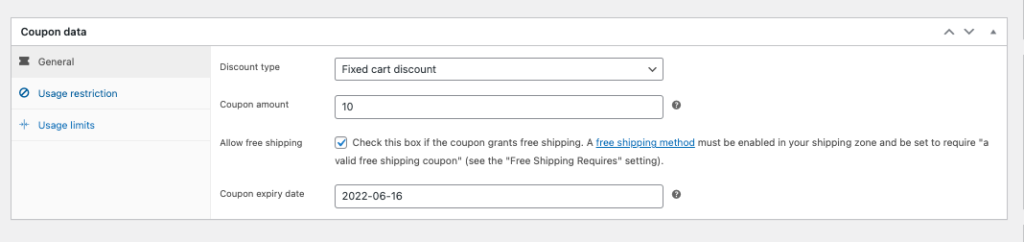
You can also set the Coupon expiry date and free shipping option.
Step 3: Set Usage Restrictions
- Select the Usage restrictions tab from the Coupon data meta box.
- Set the Minimum spend amount.
- Check the Individual use only checkbox if you don’t want your customer to use this coupon with other coupons.
- Add the products you want to bundle in the Products text field.
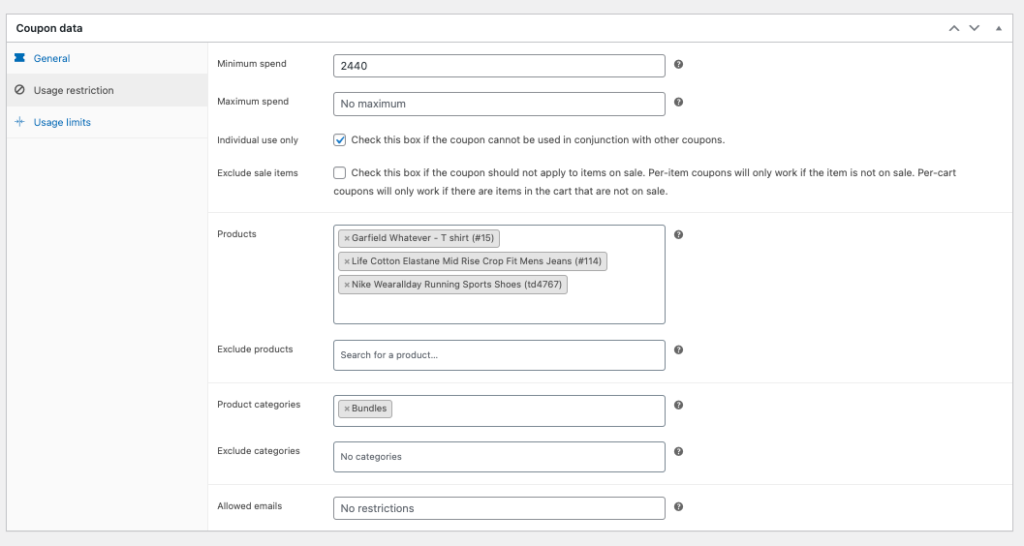
Select the Product categories. You can also exclude other categories.
- Click on the Usage limits tab.
- Set the coupon usage limits.

- Click on Publish.
Step 4: Testing the Coupon
Now with the discount coupons set for the bundled products let’s test our coupon.
- Add the bundled products to your cart.
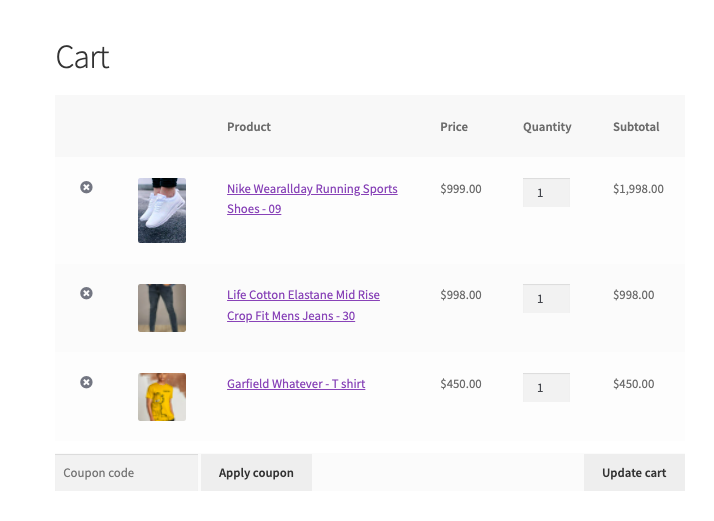
- Enter the Coupon code and click Apply Coupon.
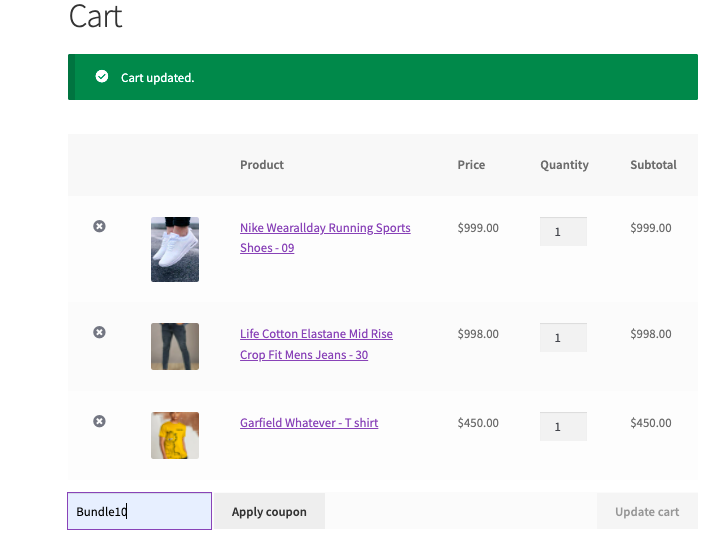
You can see a prompt message showing the Coupon code applied successfully.
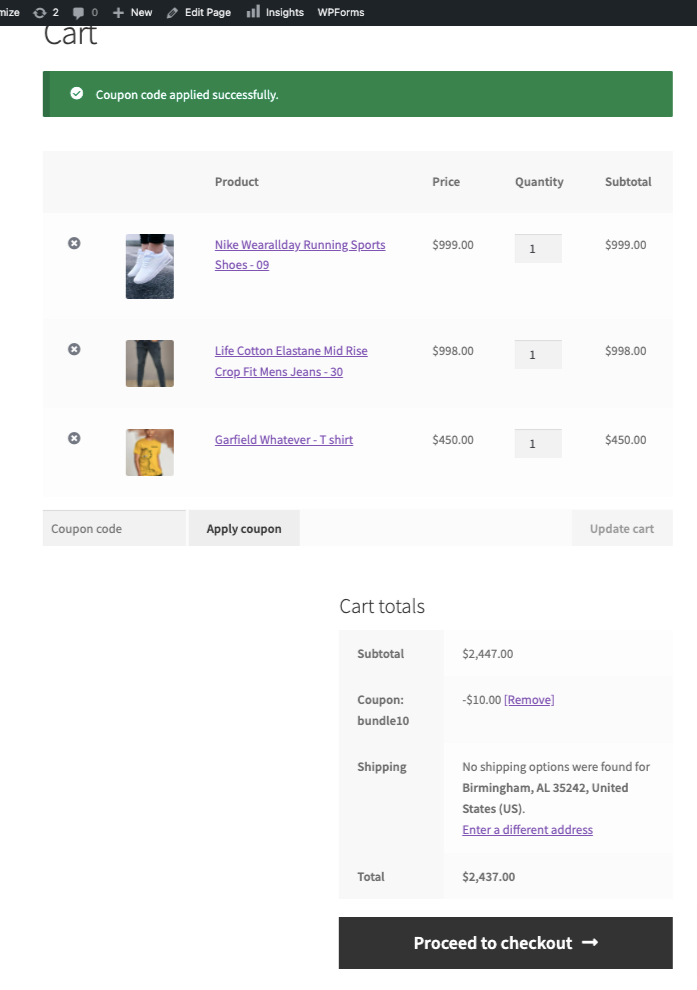
The coupon code is accepted and the discount is applied to the cart value.
Let’s see what will happen if a customer removes a product from the bundle.
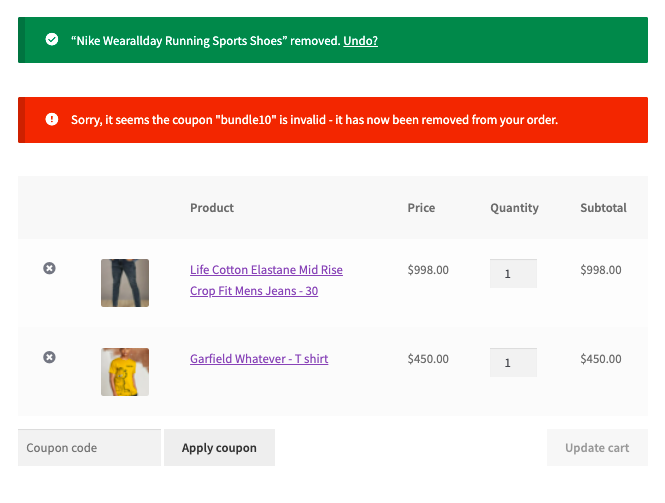
Removing a product from the bundle will remove the applied coupon automatically. In this way, you can restrict ineligible customers from using the coupon.
Starting own e-commerce business? Hope this article helped you in creating bundled products for your WooCommerce site. If you want to start from scratch refer to the following articles:
How to create an e-commerce store using WordPress and WooCommerce?
The Ultimate List of plugins you need to scale your e-commerce business.
Is this article helpful? Please leave a comment below.
