Table of Contents
More and more people are going online for shopping for clothes, groceries, electronics and pretty much everything. Selling products online is a very good way to reach a larger number of people. And more and more traders are moving online for setting up a business and expanding their business.
Creating an e-commerce website is not as much work as it seems. Especially if you are using WordPress and WooCommerce. You can set up a complete online store in less than a day. This article will guide you through creating an e-commerce website from the ground up on WordPress using the WooCommerce plugin.
Where to begin?
WooCommerce is a free WordPress plugin that can make your WordPress website into an e-commerce website. WooCommerce is the most popular plugin for creating e-commerce stores and it powers 21% of all online stores, ahead of Shopify and Magento, according to the stats from BuiltWith.
Some of the advantages of using WooCommerce plugin are listed below
- You can sell both digital and physical goods
- Gives complete control over your site. You can manage everything and anything in your store. You will be in charge of managing the taxes, your customers, products, etc.
- You can ship or limit shipping to wherever you like.
- WooCommerce comes bundled with the ability to accept major credit cards, PayPal, BACS (bank transfers), and cash on delivery
- WooCommercce’s functionalities are very easily extendable and there are a lot of extensions available.
You can set up a WooCommerce store in just the following steps.
Step 1: Get a domain name and hosting
Step 2: Install WordPress
Step 3: Install WooCommerce plugin
Step 4: Get a WooCommerce compatible theme
Step 5: Add products to your online store
Step 6: Make some changes in the Shop page
Step 7: Extend your WooCommerce store
Now, let’s go through the steps one-by-one, in detail.
Step 1: Get a domain name and hosting
These are the primary requirements to get any website online. When you are using WordPress, the only cost that you are going to have is for registering a domain name and getting a hosting space.
First, you need to come up with a domain name that best describes your online store. Your domain name will be the identity of your website. So take your time and choose carefully.
The domain name is the address that the users use to get to your website. So keep it unique. Also, keep it short and brandable so that it is easy to remember. Once you have decided upon a domain name that’s unique to you, you have to register the domain name with the domain name registrar. Most of the time your hosting provider will act as your domain name registrar in case you don’t have a registered domain name.
Next, you would need a web server to host your website. You would require the services of a web service provider to get a plan that suits your requirements. For an e-commerce website, it is imperative that you choose a website that is the most secure. There are a lot of transactions that take place between you and your customer in the e-commerce store. And it is not the best idea to compromise on the security. So choose a host and hosting plans being well aware of the needs of your website.
Step 2: Install WordPress
WordPress has the famous 5-minute installation. Most of the hosting service providers give tools and scripts that allows you to install and setup WordPress in a matter of clicks. This will only require you to create and name a database, create a database user, connect the database to WordPress, and create an admin account for WordPress. This might sound scary, but it really is not. Most of the time this is a one-step process.
Also, you can install WordPress manually using an FTP client. Download WordPress for WordPress.org. You will get the WordPress software package in the form of a zip file. Using the FTP client, upload the WordPress file to the web server and create the database for your WordPress website. Installing WordPress manually will help you understand how WordPress works on the basic level. Instaling WordPress has been explained in more detail this article.
Step 3: Install WooCommerce plugin
The minimum requirements for WooCommerce are:
- PHP version 7.0 or greater
- MySQL version 5.6 or greater or MariaDB 10 or greater
- WordPress 4.4+ for WooCommerce 2.6
- WordPress 4.1+ for WooCommerce 2.5
- The WordPress memory limit of 128MB or higher
You can install WooCommerce like any other WordPress plugin. WooCommerce is a free plugin and you can install it from the WordPress plugin directory.
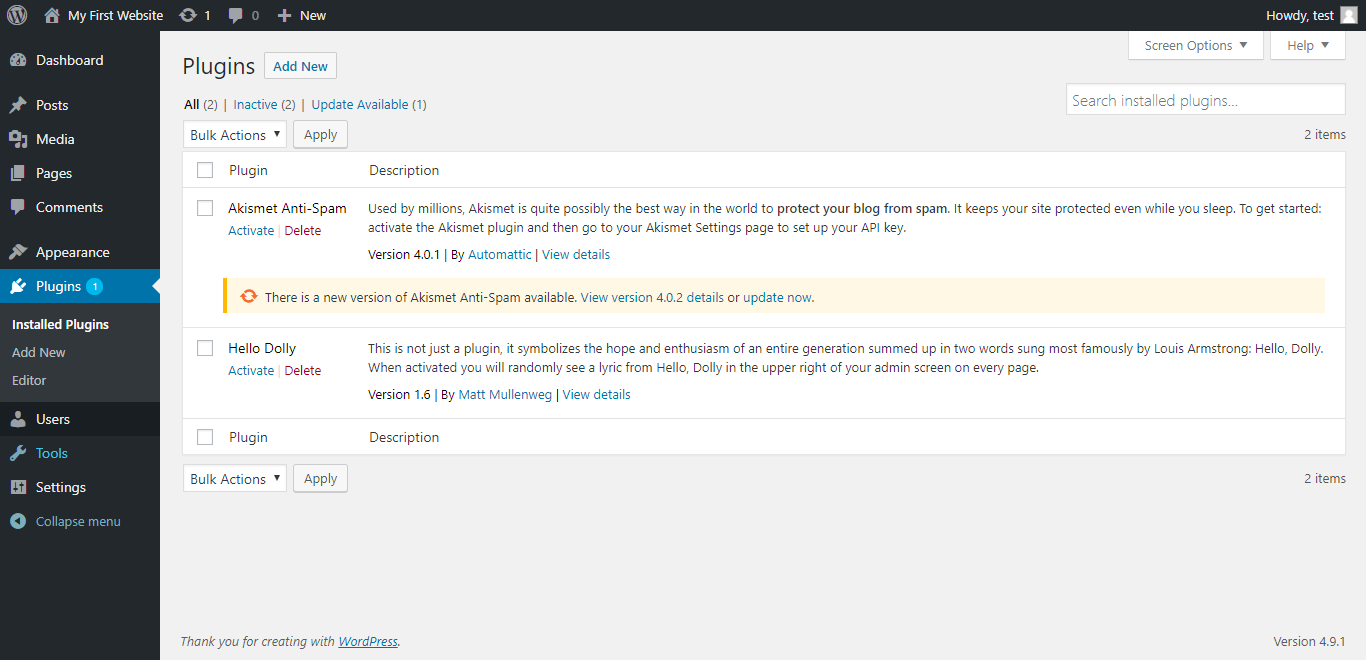
To install WooCommerce to your website, go to the WordPress dashboard, on the left sidebar click on Plugins > Add New.
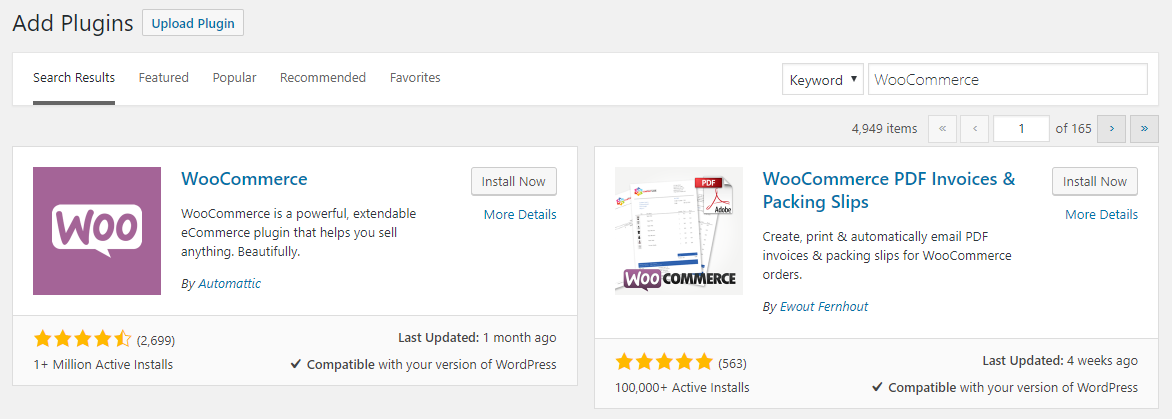
In the search field type WooCommerce. You will find the plugin WooCommerce by Automattic.
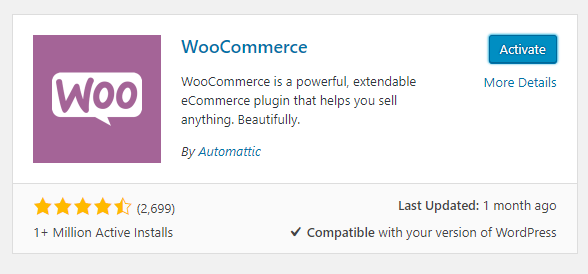
Next, install and activate the plugin.
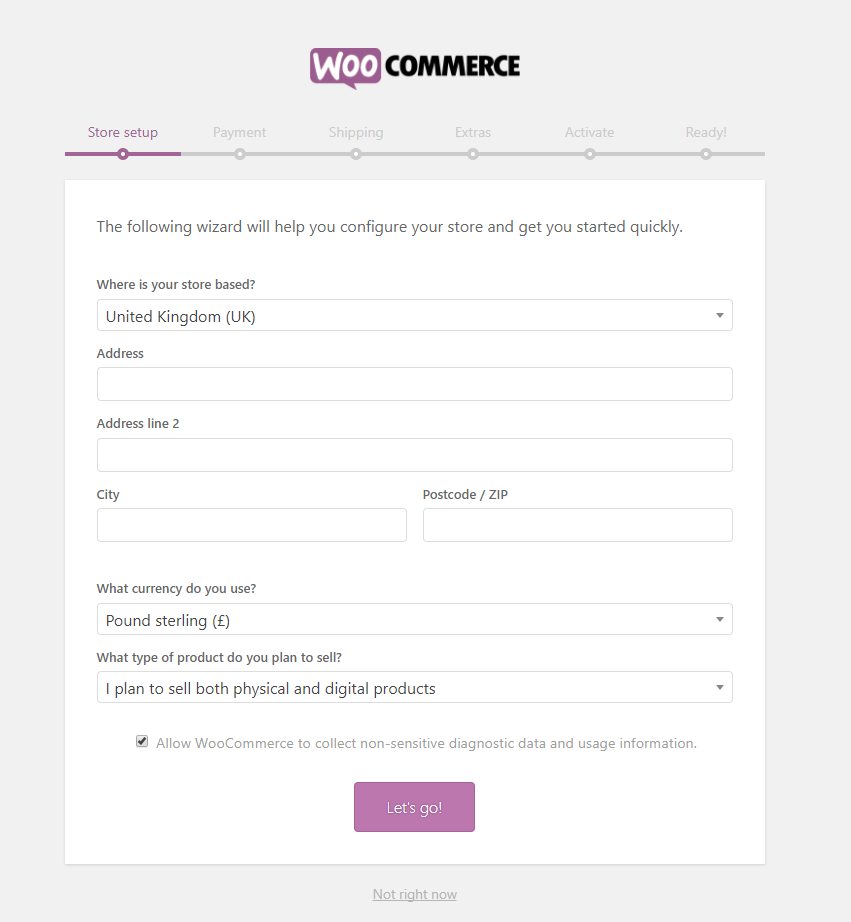
The next step is the setup of the plugin in the WooCommerce setup wizard.
The first step in the set up of the plugin is the Store Setup. This is where you configure your store. you will need to provide basic and important information like where your store is located, which currency you use and what type of products you sell.
The second step is the Payment Setup. For an online store, you will need an online payment method. WooCommerce allows you to add payment methods for the most popular payment methods Paypal and Stripe. To integrate them into your store, just enable the toggle button. But you will need to have signed up for these two payment methods. Also, if your store serves a particular locality, then it only makes sense which payment method is popular in that area.
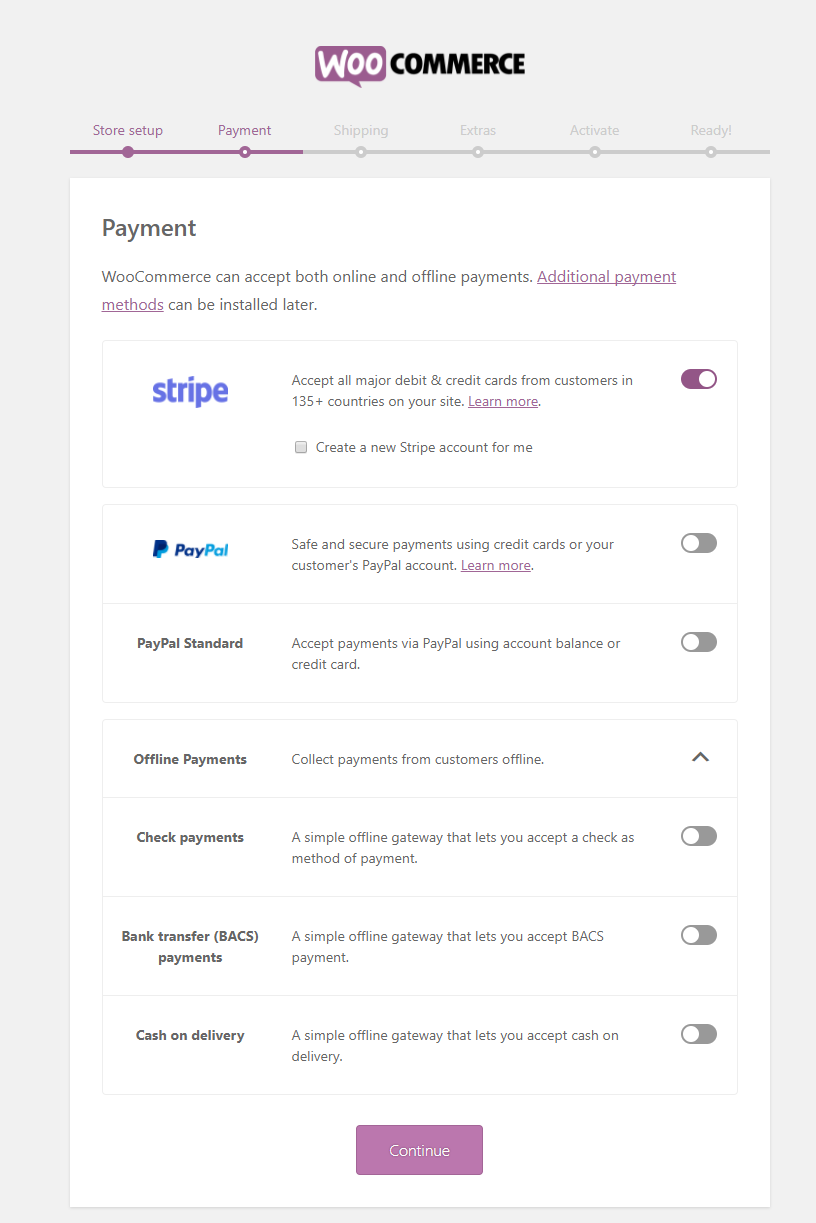
Note: You would need to incorporate other payments methods to your store, depending on the market you serve. For this, you would need the right plugins compatible with WooCommerce.
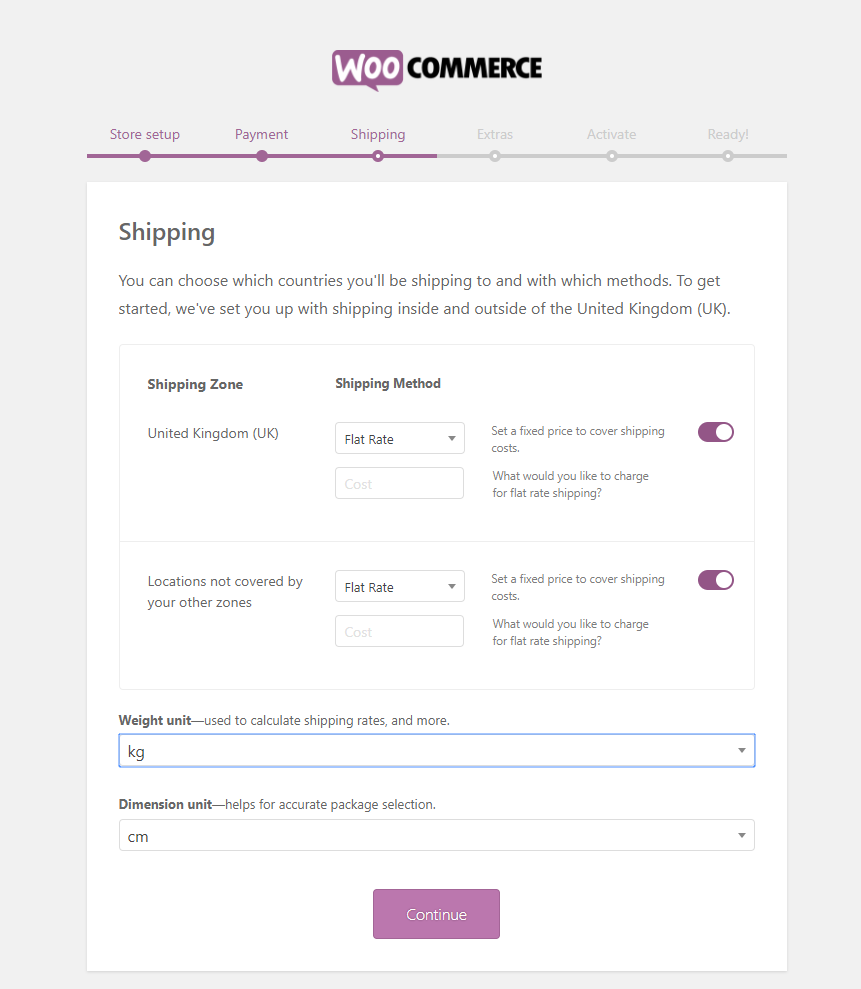
In the next step, you fill out the Shipping details – your shipping rate, and the shipping units
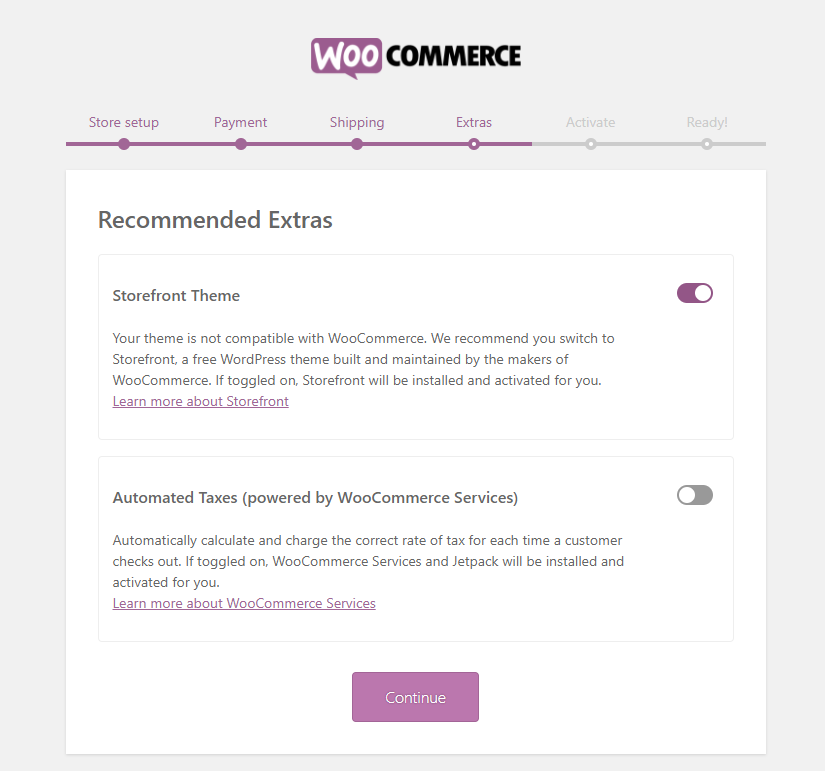
The fourth step in the wizard is Extras where you get to decide whether you want to keep the recommended extra settings.
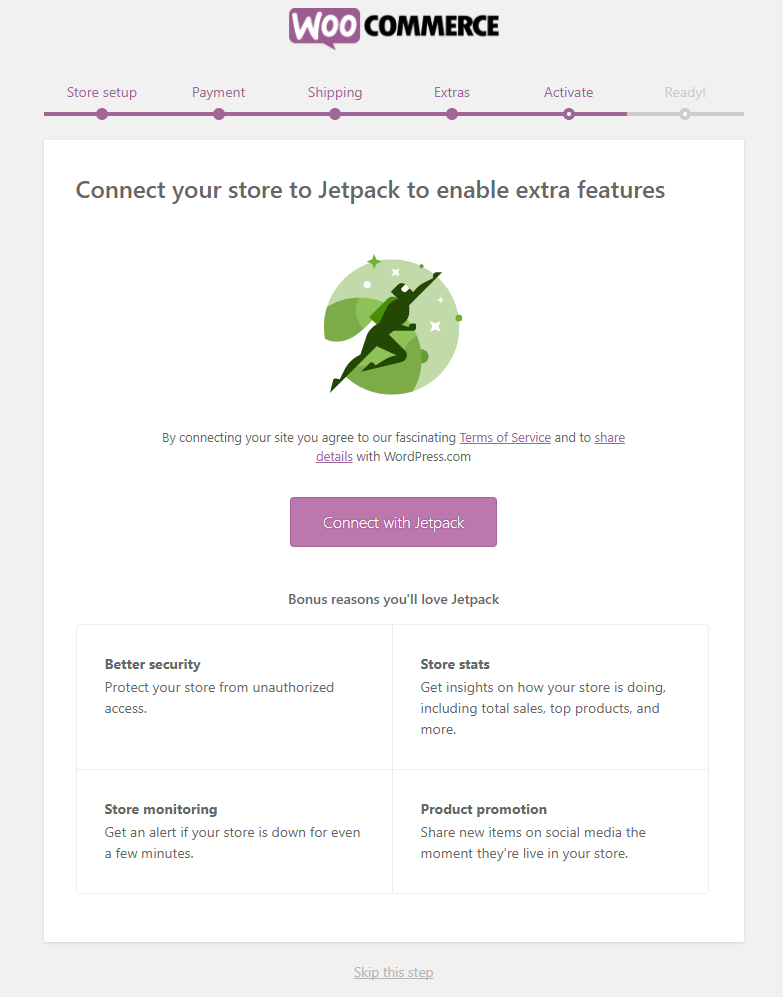
The fifth step is to Activate where you connect your store to JetPack, a popular WordPress plugin that gives you extra features.
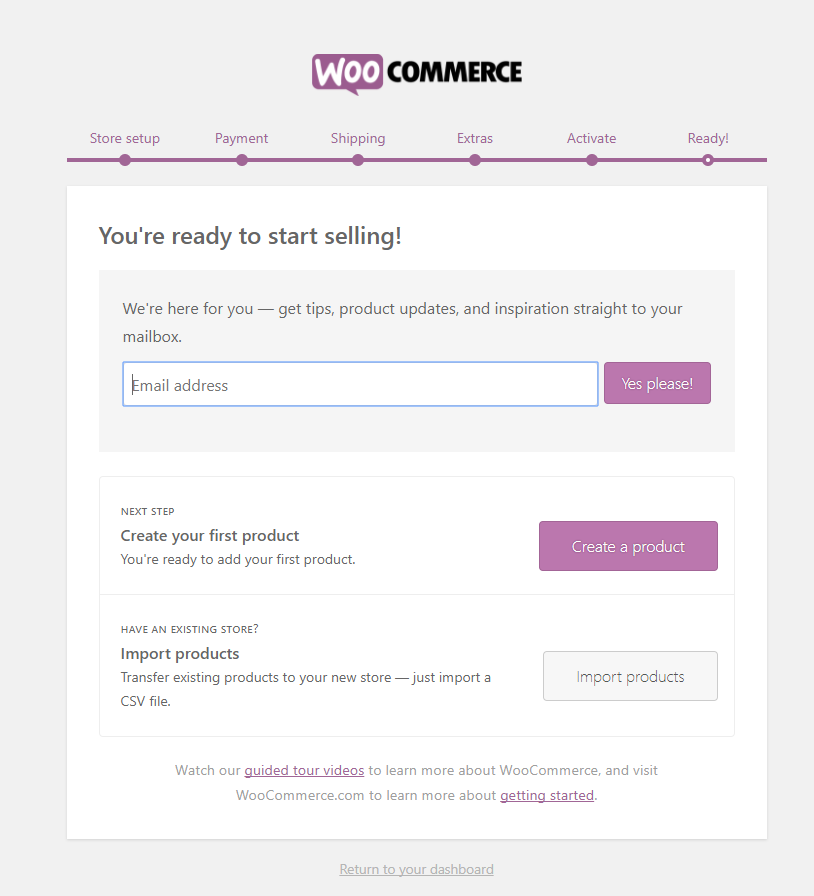
In the next step, you are Ready to start your store with WooCommerce. Enter your email address if you want to get tips and updates into your mailbox.
More on the WooCommerce plugin settings
The details added in the setup wizard are just the basics. For an online business to function properly you are going to need to add more details than that. Also, you can change some of the settings that WooCommerce has already set that best fits your online store.
To do that go to the WordPress dashboard click on WooCommerce > Settings. In the Settings page, you can see some settings tabs as following
General
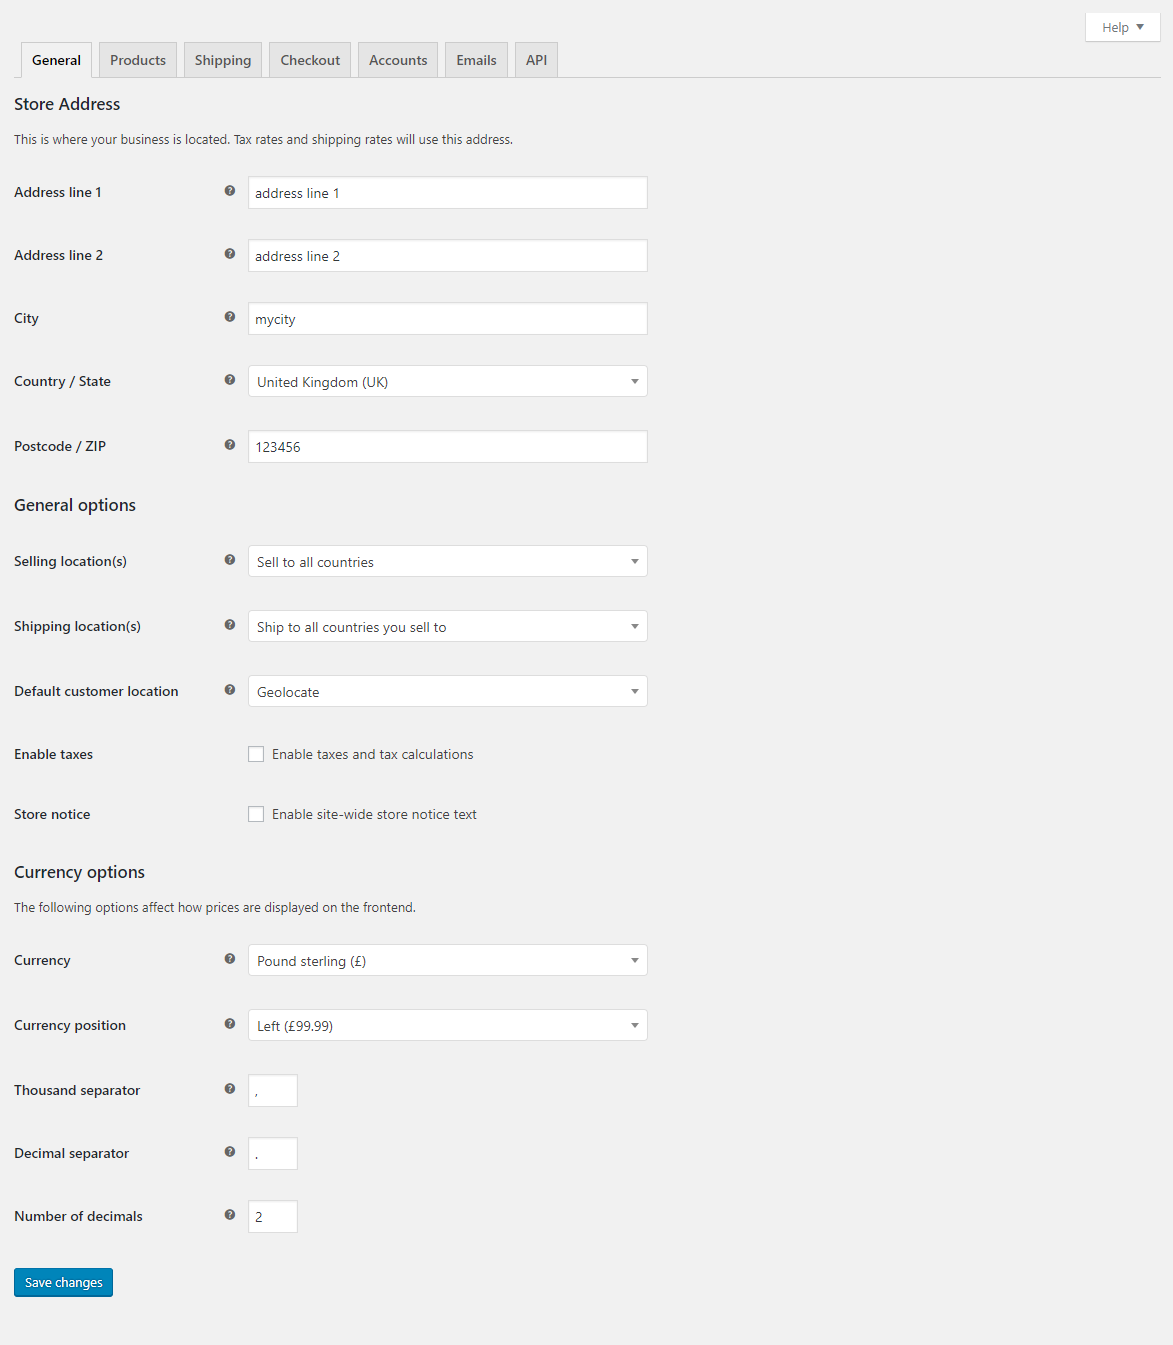
In the general tab, as the name indicates, you can set the location of the store and the currency that your store uses. This is for WooCommerce to calculate the tax rates. Although WooCommerce takes care of the tax rates based on your store’s location and currency, it would be good if you do a double check.
Products
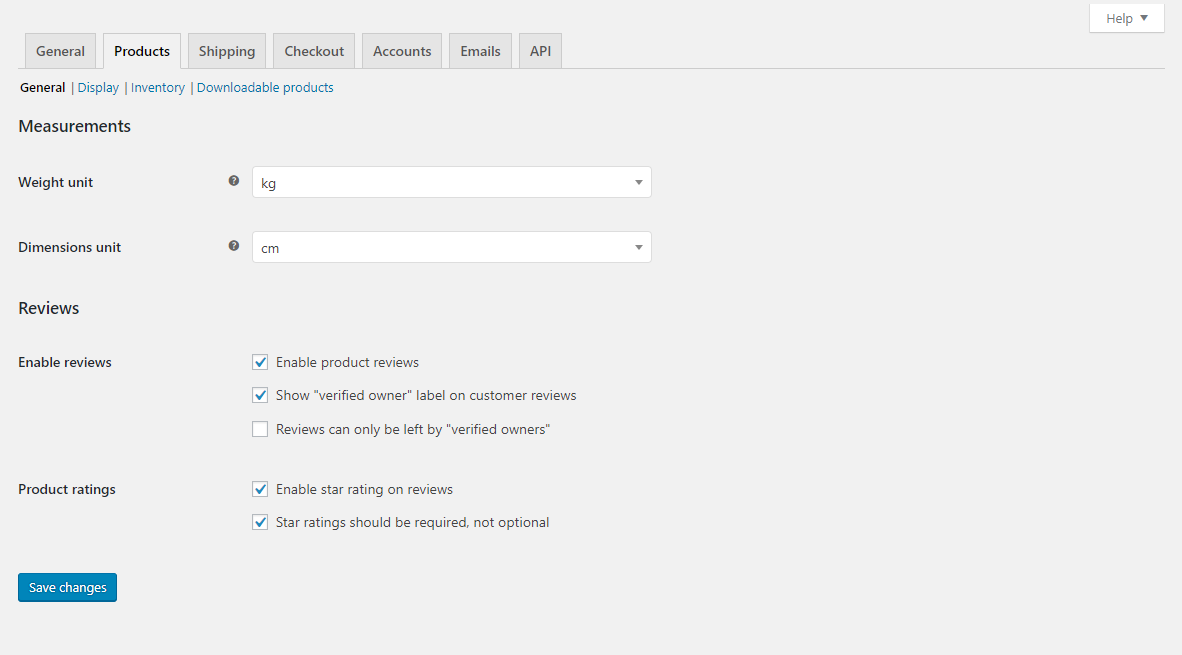
In this tab, you add the physical details of the product and choose whether you want to allow ratings and reviews of the products. Also, change the settings for Display – for the shop and the product, Inventory – for managing the stock, and finally for the Downloadable products.
Tax
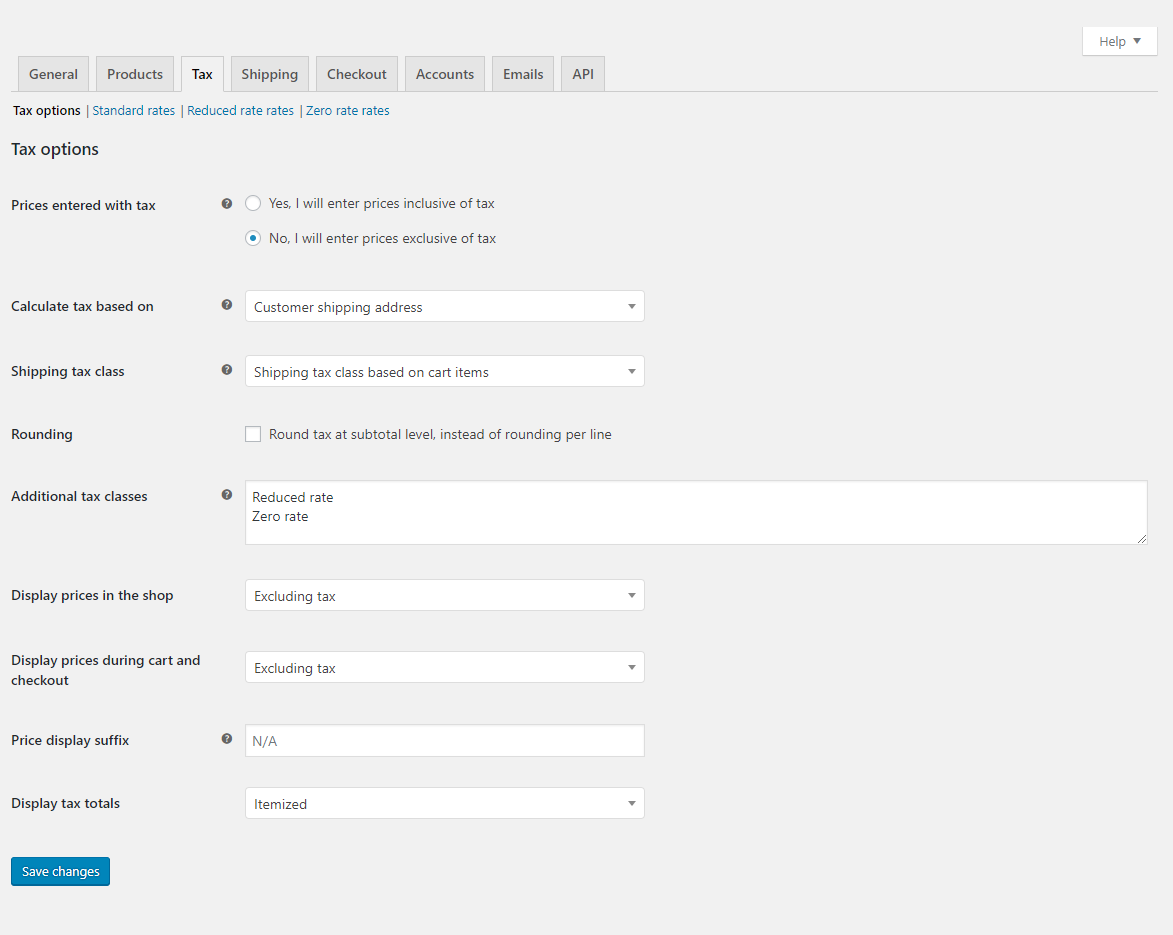
This tab will only be visible to you if you have checked the Enable taxes checkbox in the general settings. Here, you can change and set the Tax options, Standard rates, Reduced rate rates, and Zero rate. You can read more about how to set up tax and tax rates in WooCommerce in this article.
Shipping
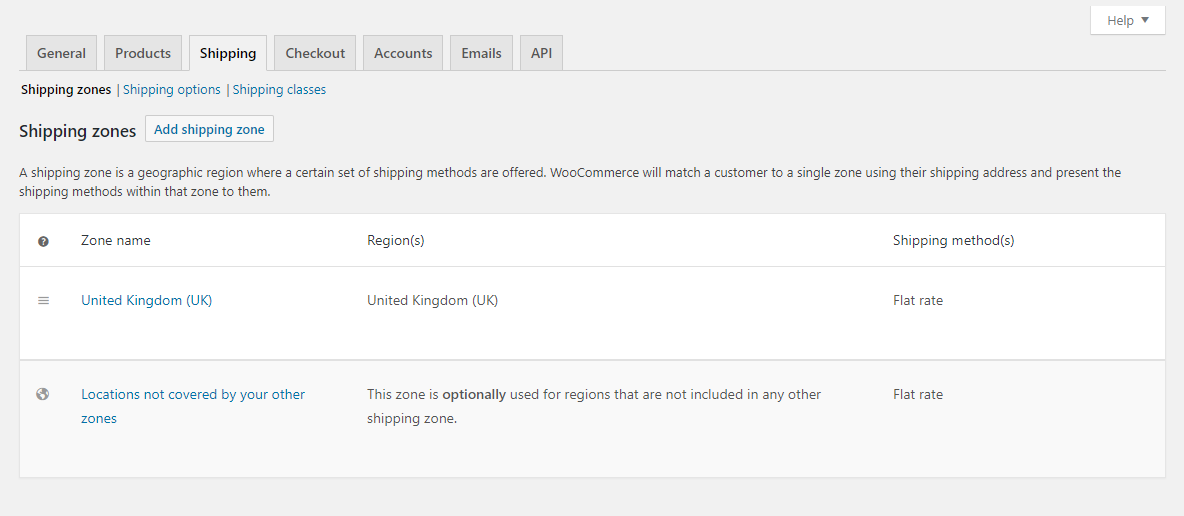
In the Shipping settings, you can change or add the Shipping zones, select the Shipping options, and create Shipping classes. Setting up shipping in your WooCommerce store is really important when you are selling physical goods in your store.
Checkout
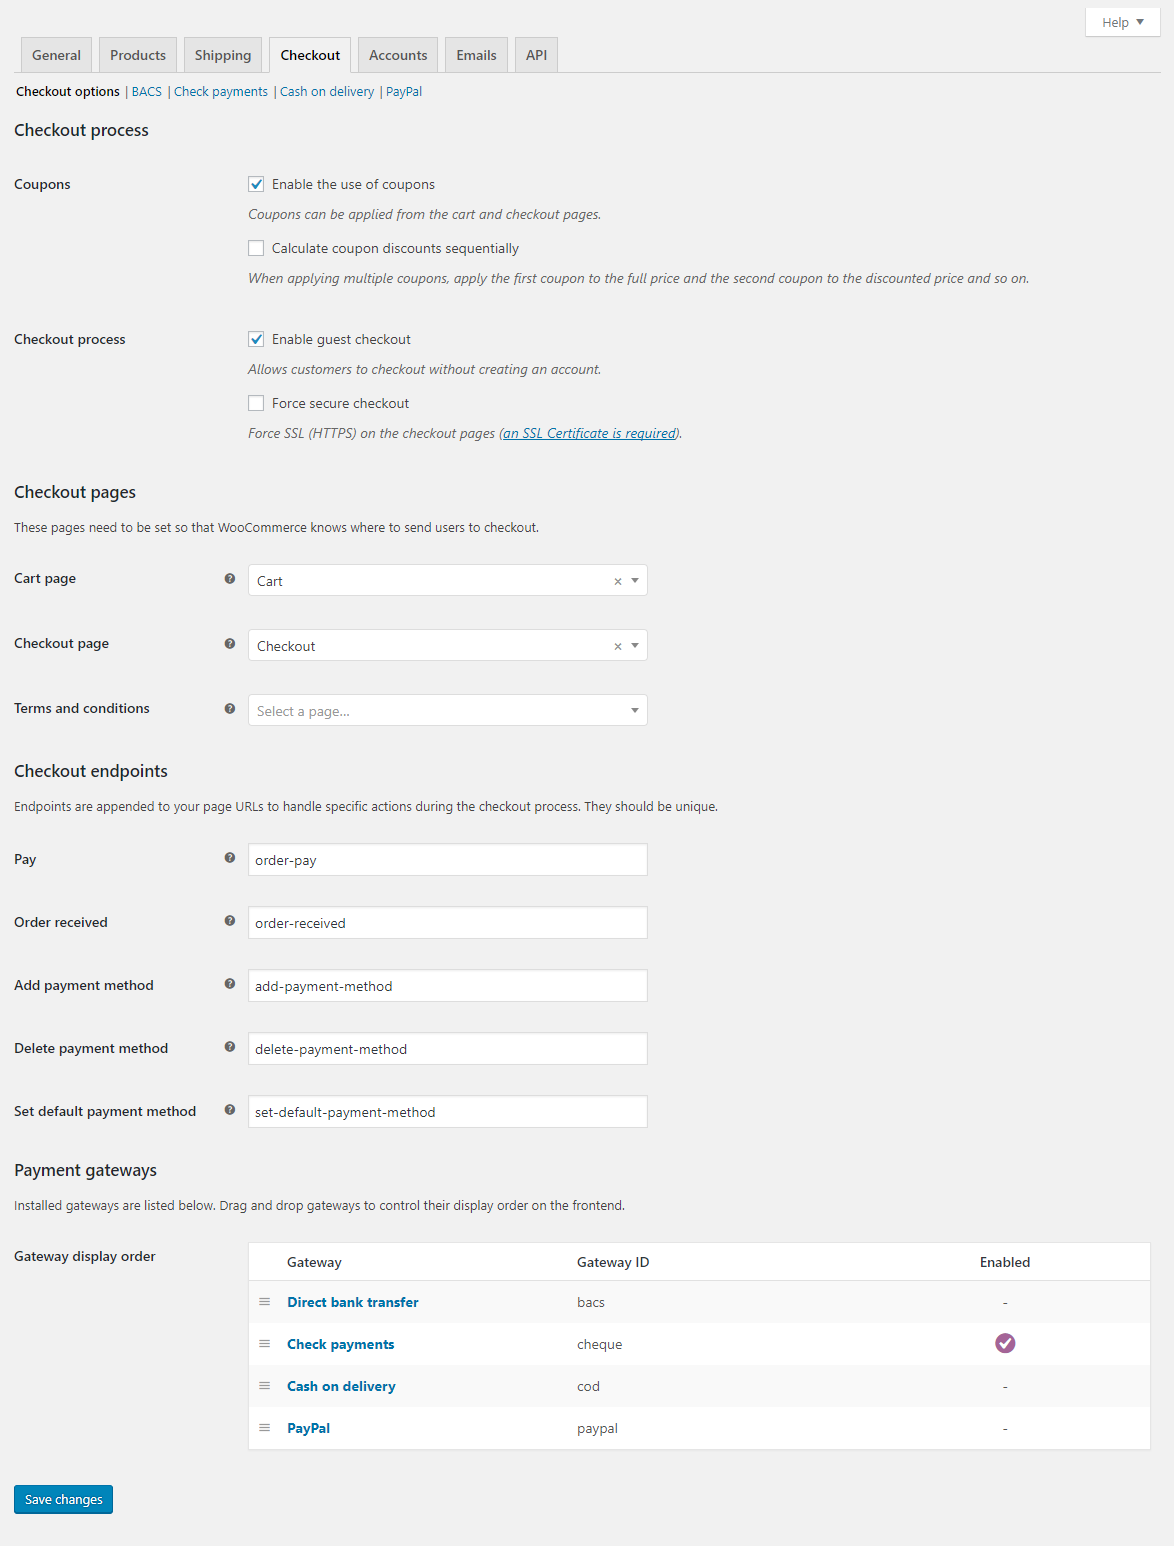
In the Checkout options, change the settings for the checkout pages and the payments options that you selected.
Accounts
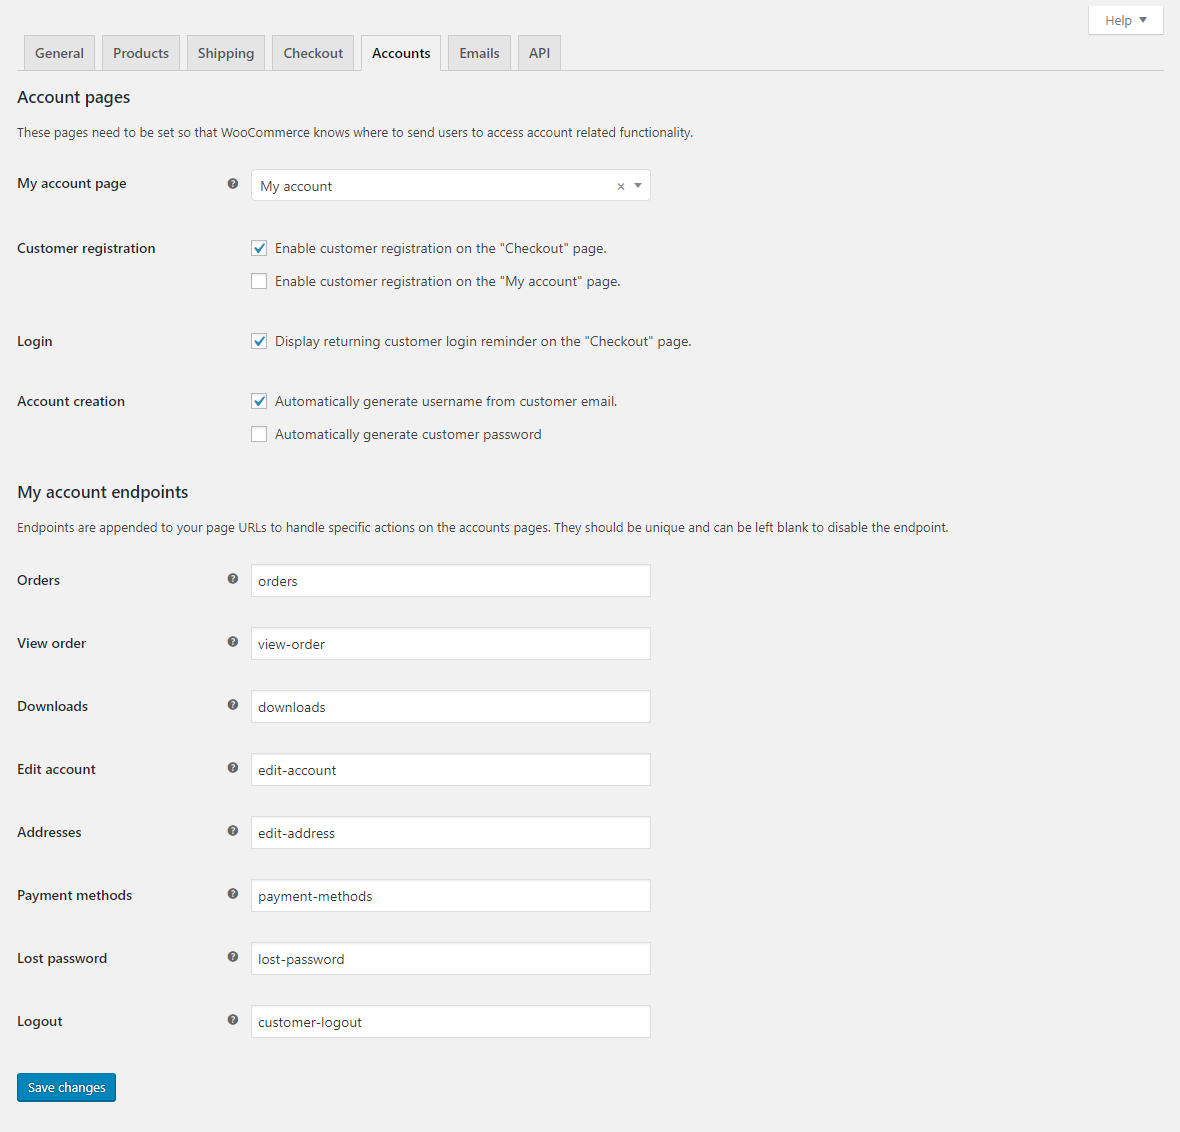
On this page, you can manage the settings for you and your users’ accounts.
Emails
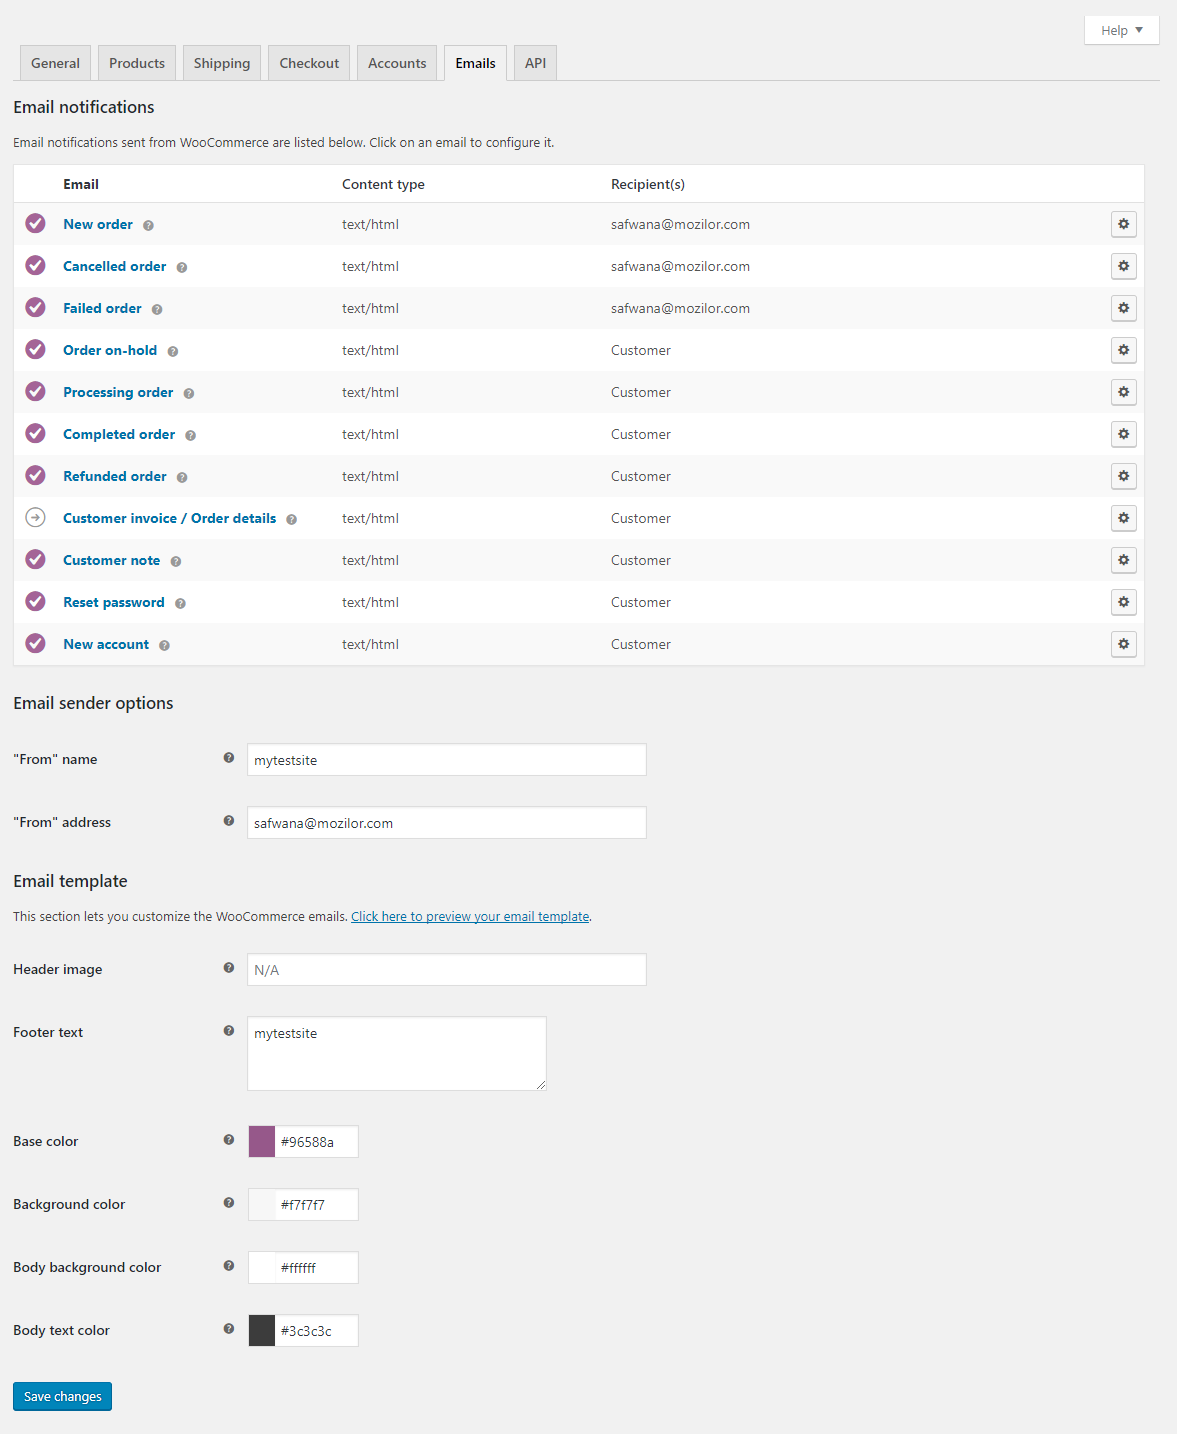
On this page, you can configure the settings for the emails sent from WooCommerce.
API

In this tab, you can enable the REST API, create keys and Webhooks.
Step 4: Get a WooCommerce Compatible theme
Theme decide what your store looks like to your customers. So, it is important that you have a nice looking theme. Also, the theme should be WooCommerce compatible. WooCommerce plugin adds a lot of functionalities to WordPress for making it an e-commerce website. It adds pages that differentiate an e-commerce website from a regular website like Shop, Cart, and Checkout page. So, the theme you select should be compatible with WooCommerce.
During the setup of the WooCommerce plugin, you are asked whether you want to use the Storefront theme. Storefront is a free WordPress theme available to any WooCommerce store. If you do not have any other WooCommerce compatible theme, you can go for the storefront theme or choose one of the many Storefront child themes.
After you install and set up the WooCommerce plugin, WooCommerce asks you to design your store.
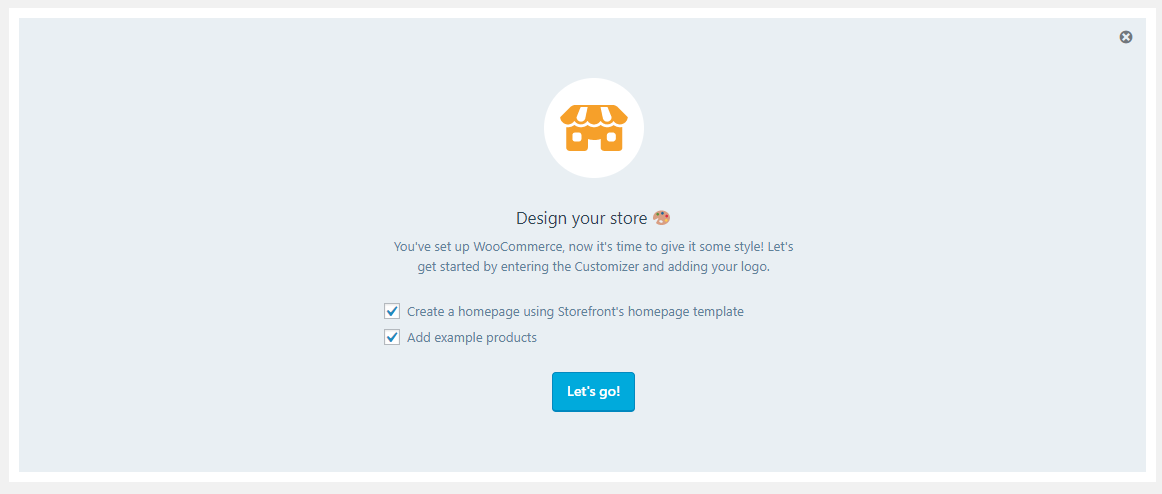
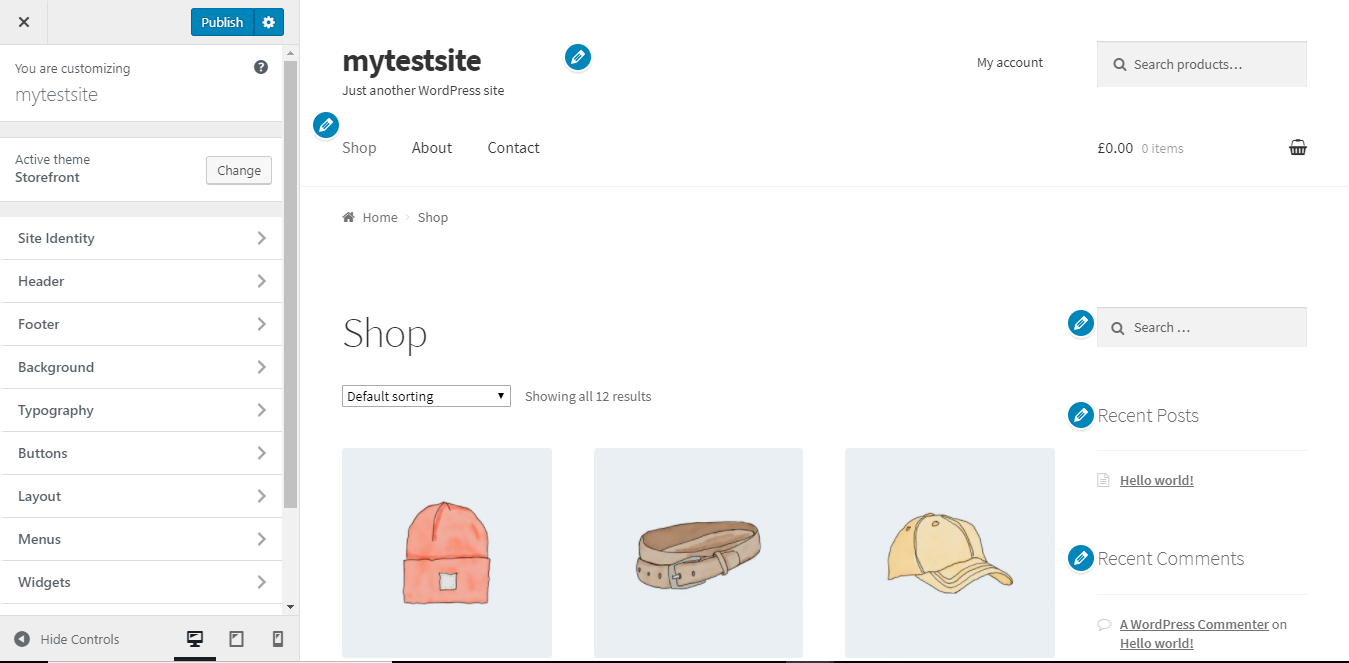
This will take you to the theme customization page for Storefront.
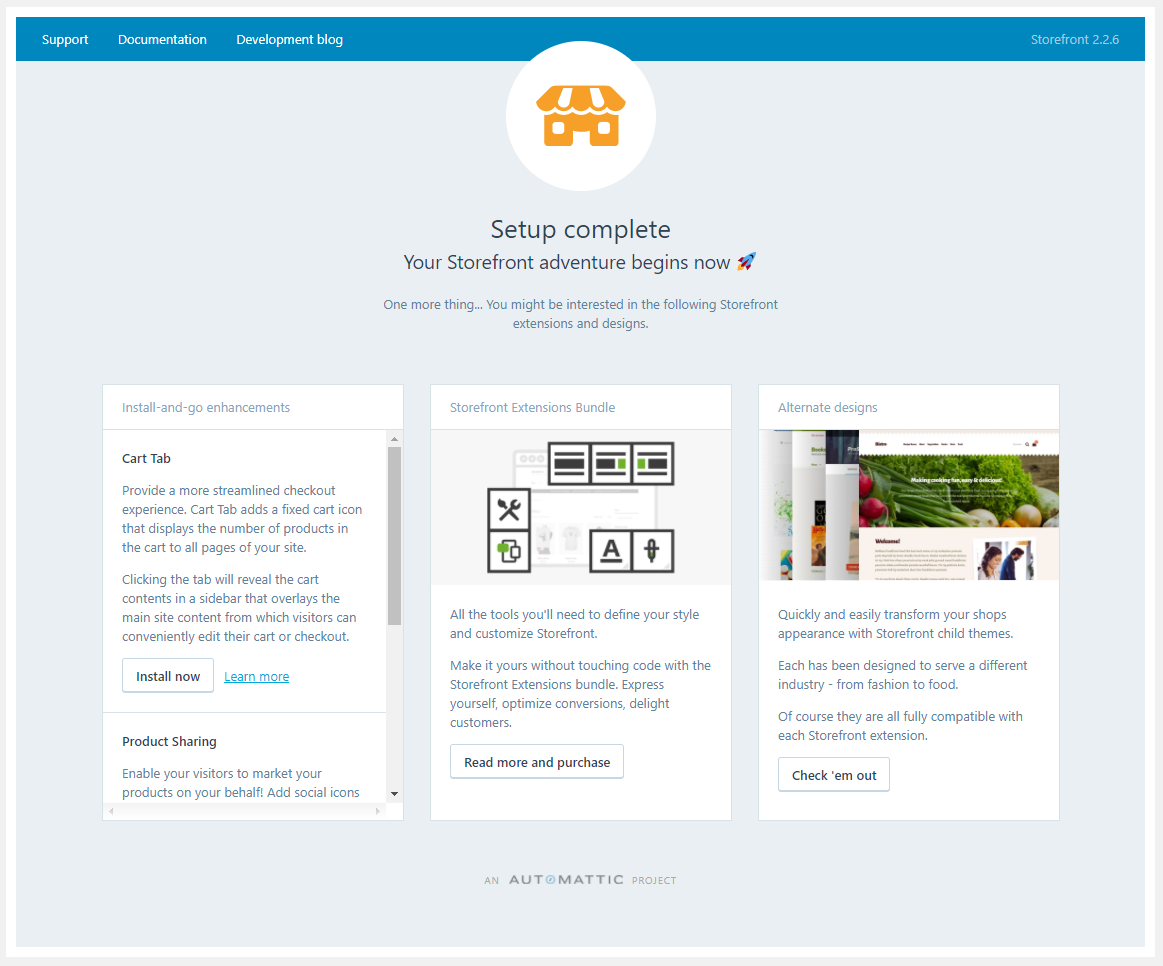
After you have done your customization, you will get a success message.
Even if you are using some other themes, you will still need some customization to create your store’s own identity. For this, from the dashboard, go to Appearance > Customize.
Step 5: Add products to Your Online Store
After all the above steps, your store is set up for you and now you can start adding your products. For this go to the dashboard, go to Products. This will take you to the Add Products page
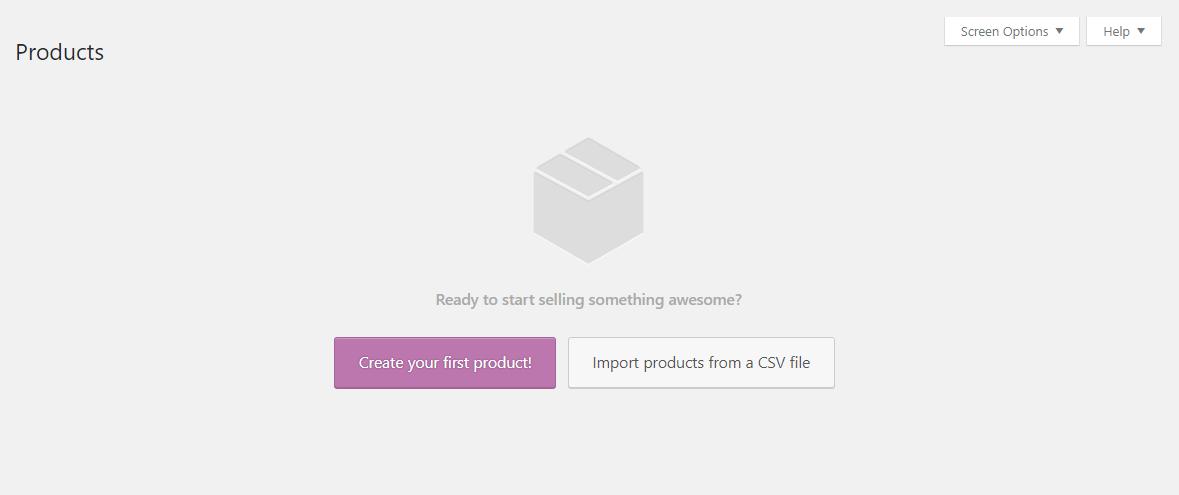
When you click on the products page for the first time, you can either create your first product manually, or you can import products from a CSV file. If you have CSV (Comma Separated Values) file of your products you can directly upload the CSV file and import. This will populate your store with all the products in the CSV file in just a few steps.
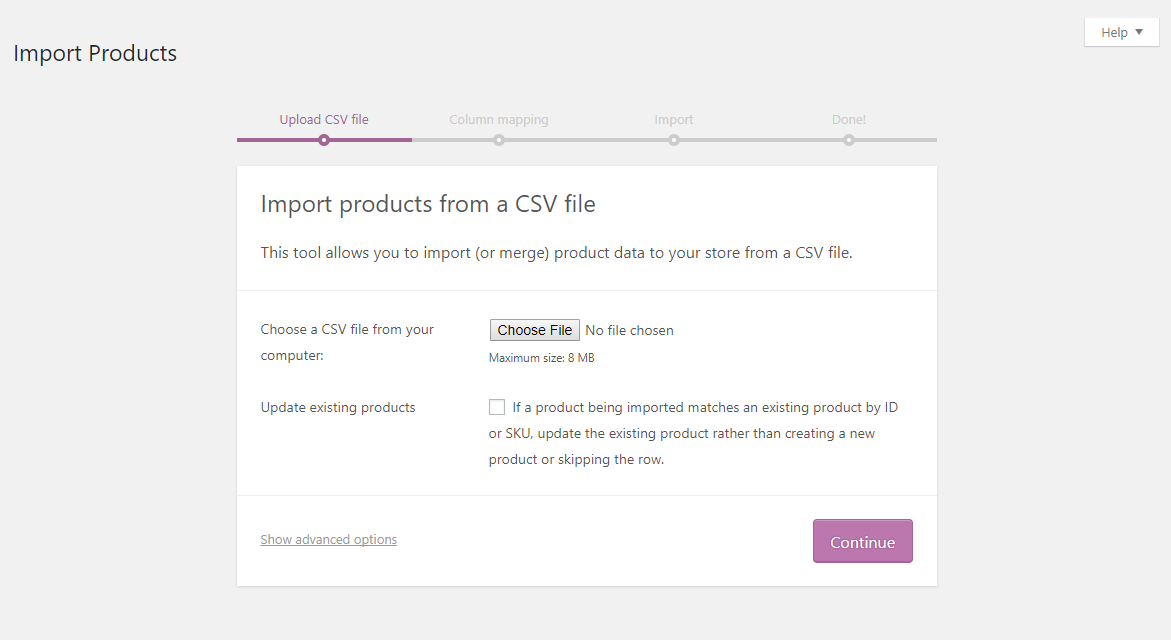
If you don’t have a CSV file, you can manually add the products one by one. Go to Products and Add New. Then create your first product.
This will take you Add New Product page. This is where you can add the product and all the details of the products to the store. Let’s see each section of the page.
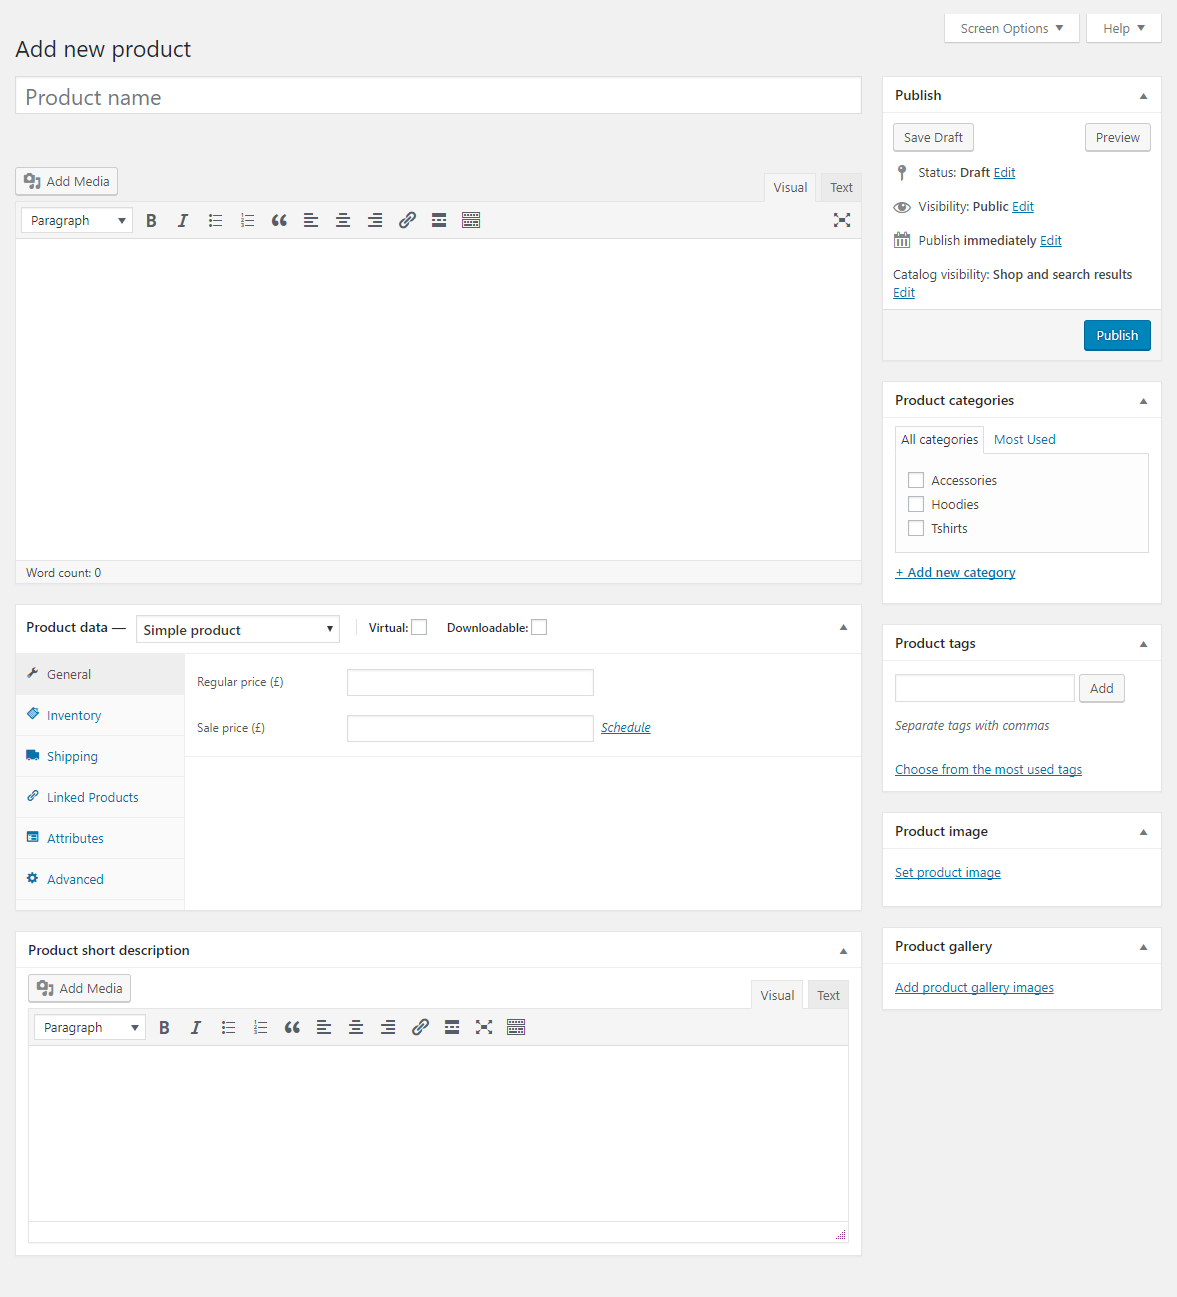
Product name – This is where you give your products name. This is a required field.
Product Description – This is where you give the product’s main body of content. Give the users a description of the product here.
Below the Product Description section, we have the Product Data section. Here first, choose the product type. There are four different types of WooCommerce products.
- Simple – A simple product is a standalone product.
- Variable – This type of product has different variations of the same product. For example, different sizes of a T-shirt, or different fragrance of a perfume.
- Grouped – This type is the bundle of the multiple single products that form a single entity.
- External/Affiliate – In this type, you are only listing the product in your store, but you are not the actual seller.
Next check whether the product you are adding is a non-physical item, for example, a service, check the Virtual check box. Check the Downloadable checkbox if the product is a downloadable product, like a software.
Next, in the Product data section are some tabs where you can add some more details related to your product. These tabs vary for different types of products. For simple products, below are tabs.
General
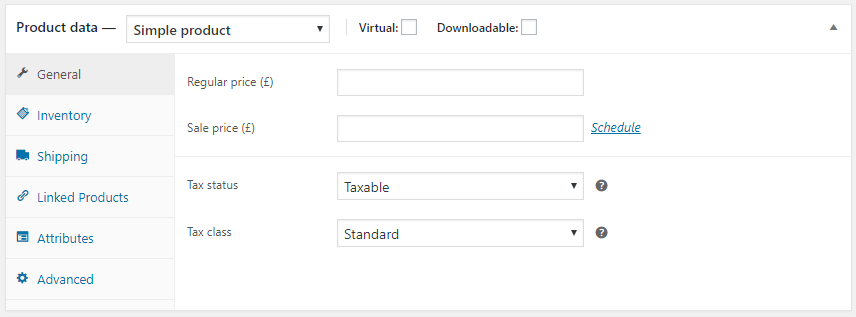
Here you set the price and tax details for the product.
Inventory
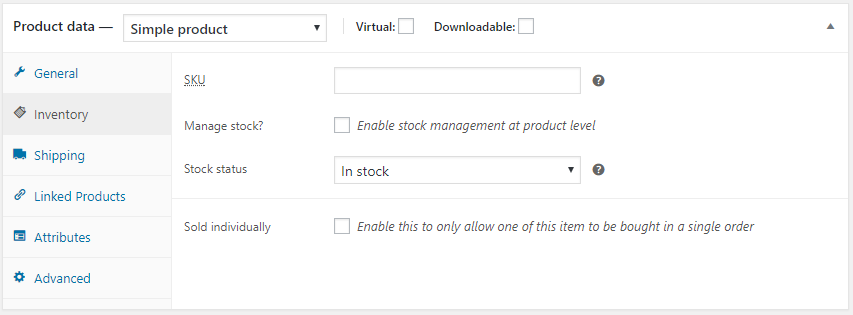
Here you can give the SKU (Stockkeeping Unit) – unique alphanumeric identifier for the product. Also, manage the stock.
Shipping
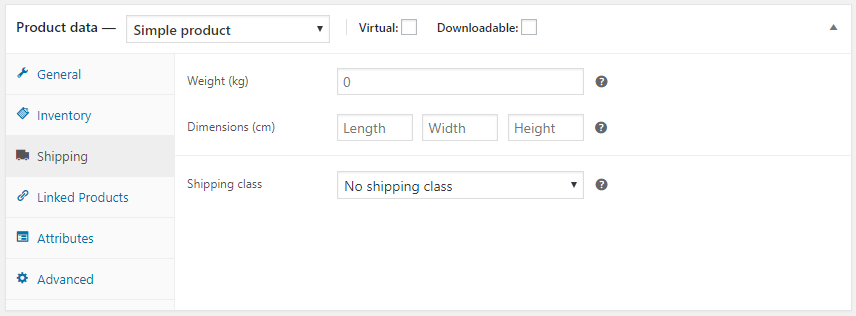
Here you will add the details needed for the shipping of the product.
Linked products
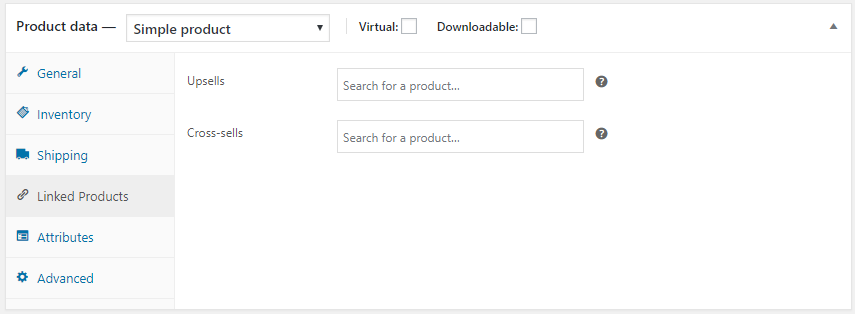
If you have any other products linked to the products as upsells or cross-sells, add the product here.
Attributes
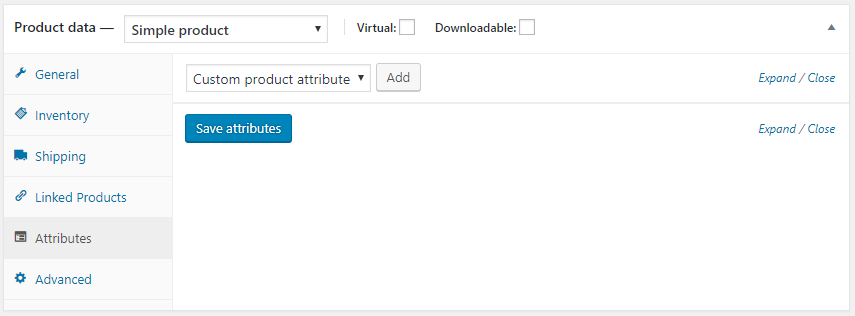
Add attributes to the product here.
Advanced
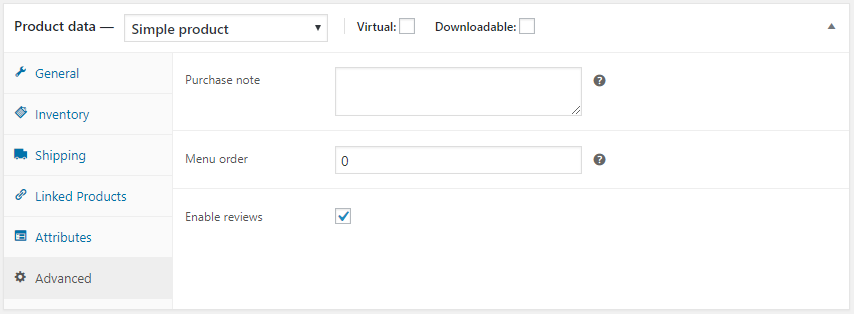
In the Product Short Description section, add a brief description of the product which will appear on the product page under the product name.
On the right side of the page, you have:
Product categories – to better organize your products into categories and make it easier for the users to search and find a product
Product tags – to add tags to the product making it easier for the users to find a product.
Product image – Upload the image of the product here. This image will be shown in the store’s catalog
product gallery – Add multiple images to the same product in the product gallery.
Publish your product – After you have done with the editing of your product, publish the product for it to be visible in the store.
Step 7: Extend WooCommerce
Extend the plugin with more WooCommerce compatible plugins. As your business grows you will need to grow your online store. The WooCommerce plugin will help set up everything that an online store would require, but that will not be sufficient when your business grows. WooCommerce plugin has extensions for almost anything that can extend the functionalities of your store and handle your growing business more efficiently.
Extending the functionalities using WooCommerce compatible plugins are very easy. All you need to do is find the right plugin, install and activate it. You can look for WooCommerce extension without even leaving the browser window. From the left sidebar of your WooCommerce dashboard, go to WooCommerce > Extensions.
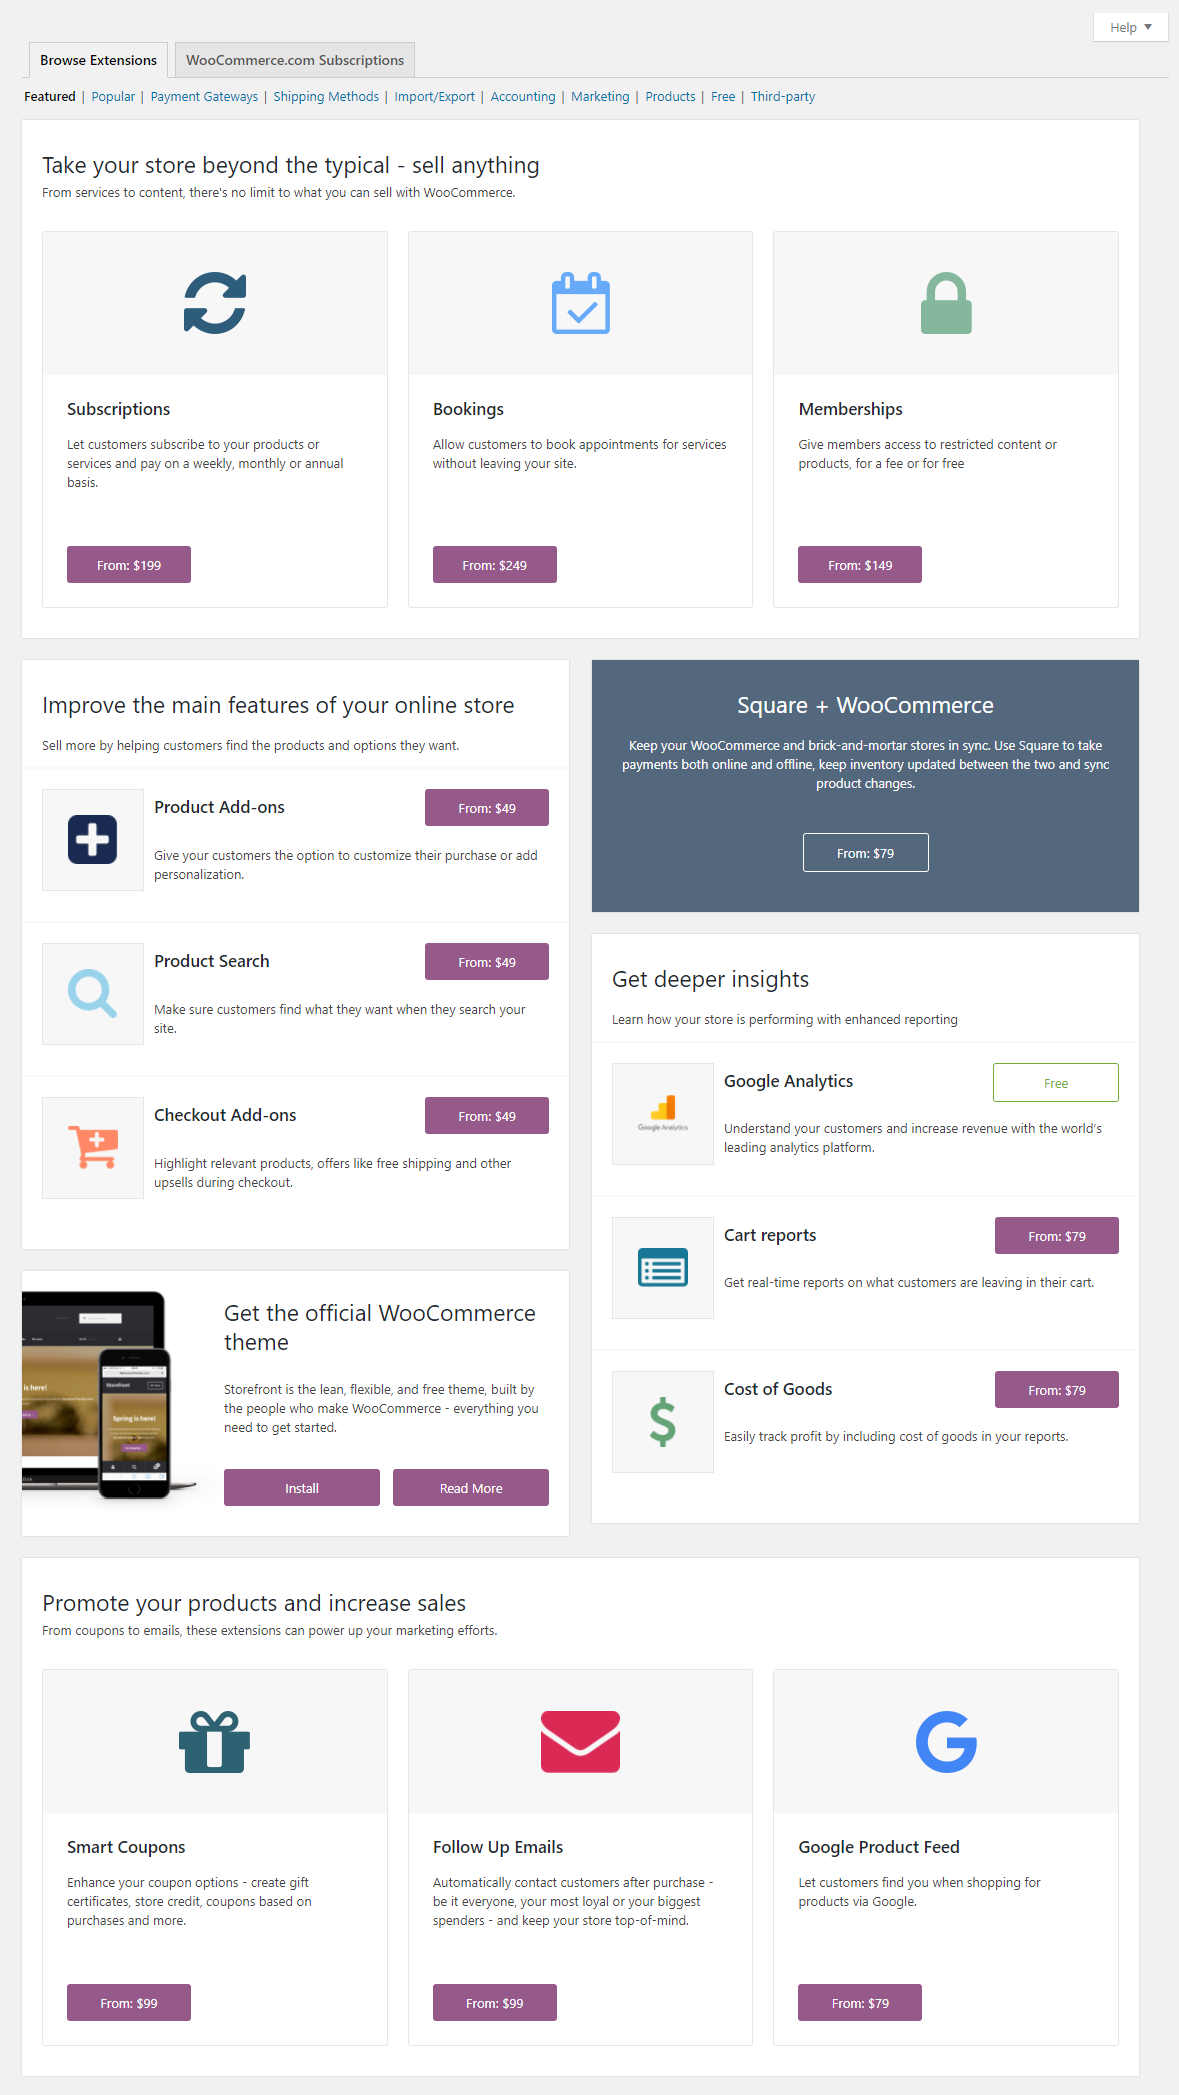
From this page, you can browse different extensions for WooCommerce from Featured, Popular, Payment Gateways, Shipping methods, Import/Export, Accounting, Marketing, Products, Free, and Third-party.
And then, you are done setting up your WooCommerce store. After you have set up the store, all you need to do is to take your store to the public, promote it and drive good traffic and subsequently great sales to your store. You can also add subscription services to your store to ensure a reliable recurring revenue. When you start getting decent traffic and sales it is important to regularly maintain and update the store to make it relevant and to grow the store.
Wrapping Up
Setting up an e-commerce store is not as much hard work as it sounds. With WordPress and WooCommerce setting up your store takes not even a day. You don’t need much technical expertise to get the job done. And you can get the site up all by yourself without hiring an expert and start selling online.