Table of Contents
It’s pretty obvious that you can’t run an eCommerce website without a product page. Therefore the addition of products should be given priority while building an eCommerce website and WooCommerce makes it easier than ever.
Adding Products to the Store
To add a new product all you need to do is click on the add new button to provide a title, a short description, and a long description of your product in the spaces provided.
Now from your dashboard go to WooCommerce > products > add new
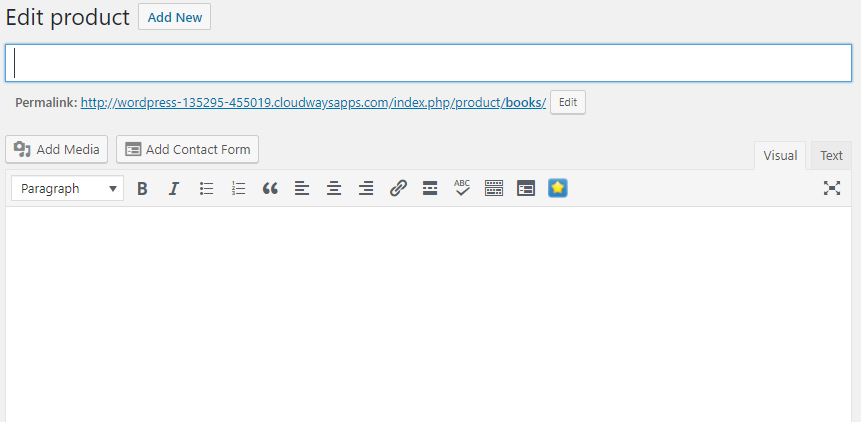
The next step is to give “product data/product type” from the drop-down menu.
There are four types of product,
- Simple product
- Variable product
- Grouped product
- External/Affiliate product
Now let’s see how to add each of these products,
1.Adding a simple product

A simple product is a unique product with a single price, SKU, and it is always shipped. Adding a simple product is the easiest of all. An example of a simple product would be a book.
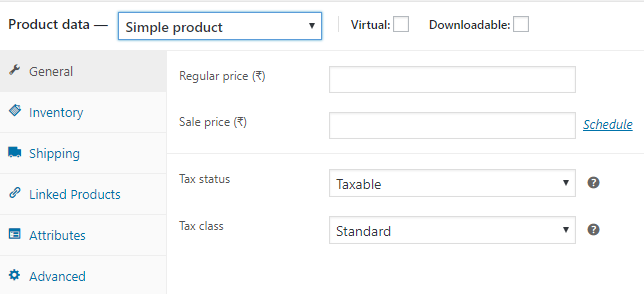
To add a simple product set “simple product” as the product type. Then tick on the appropriate checkboxes according to your product’s nature ie, whether it’s virtual, downloadable or both.
The next step is to click on each tab on the left side column. By opening General you give basic details about price and tax.
In the screenshot below, there are two fields for adding price.
1. Regular price- The ordinary price of the product, which is mandatory to fill.
2. Sale price – The discounted price, if you wish to give any discount for your product if not you can leave it empty.
You can set the currency to your preference. For that, go to your dashboard,
WooCommerce > Settings > General > Currency
Now from the drop-down choose your currency and click save changes.
The next field is for entering Tax status ie; if the tax affects the “whole product / just the shipping cost / no tax at all”. Tax class is for choosing a specific tax rate. You can choose one from the drop-down menu. If the default options aren’t applicable to your product, you can add the one by going to
WooCommerce > settings > Tax > Tax options > Additional tax classes(enter the desired tax rate) > Save changes
Now you can choose the new tax class from the drop-down.

Then onto the next tab Inventory, where you give SKU(stock keeping unit), which is a unique ID for your product. Then you can tick on the checkbox if you wish to “enable stock management at product level” ie, you will not have to manage stock manually. Ticking the checkbox will result in two more fields.
1. Stock quantity- Enter the number of stocks
2. Allow backorders- Asks your permission to allow/not allow/allow but inform the customers.
Allowing backorders will keep the product status “in stock” even when it is out of stock.

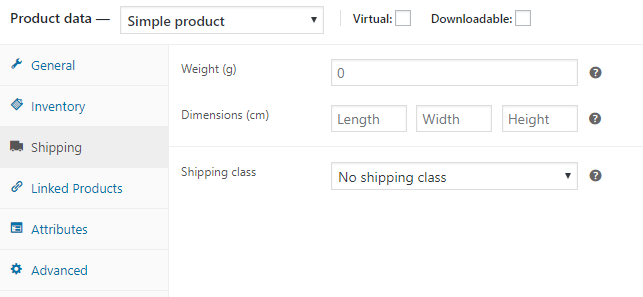
By opening the Shipping tab, you provide all shipping related details like weight, dimensions, shipping class which are necessary for shipping.
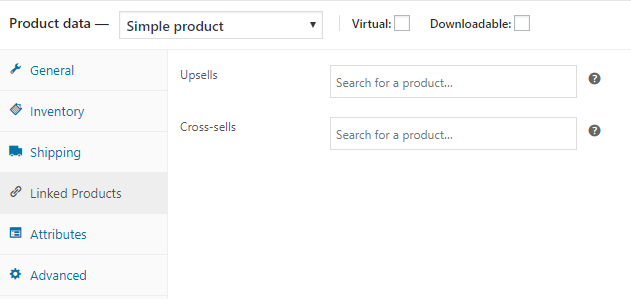
Linked Products settings are for adding upselling and cross-selling related data.
Upselling: Persuading customers to buy similar but more expensive products by advertising it on the product page.
Cross-selling: Persuading customers to buy products related to the one in their cart.
Attributes tab will be explained along with variable products.
The final one is an Advanced tab, where you enable or disable reviews, add purchase note and menu order.

2.Adding variable product
Variable products vary in different measures like size, color, etc. They will have different SKU, price, etc. For a clothing website, one of the variable products would be T-shirts.
To add a variable product set product data as “variable product”, the rest of the data are to be filled the same way as the simple product, except the Attribute tab. And a Variable tab is introduced when adding a variable product. These are the two tabs you need to manage while adding a variable product.
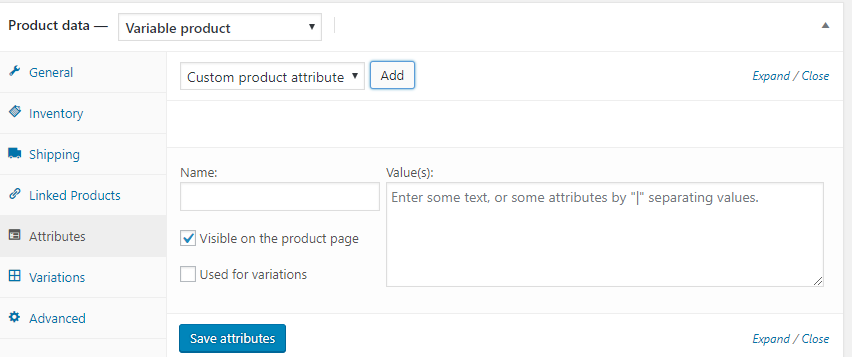
In the attribute tab, you can add the name of the attribute and values separated by the pipe(|). Eg: if color is an attribute, Red|green|blue can be the values you would be entering in the adjacent field for value(s).
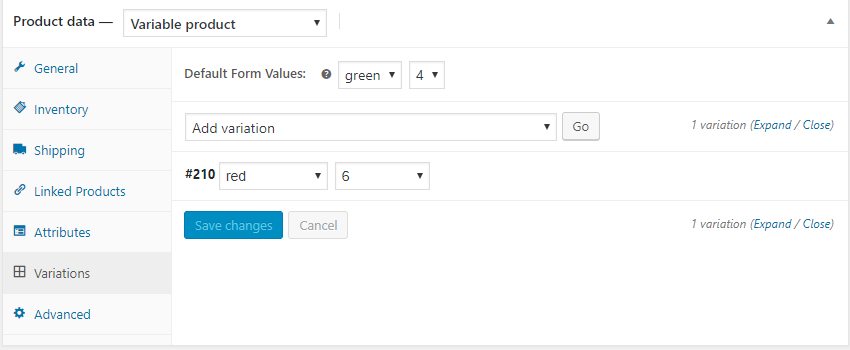
Then you have to tick the checkbox which says “used for variations” in order to add variations. Up next using the variation tab you can set a default set of attributes to show on the product page.
Then click “Add variation” to set your product variant. Now you have to create a variation using the attribute values and give each variant its stock quantity, price, etc.
3.Adding grouped product
Grouped products are created by setting product data to the same. Now you will have only four tabs on the right. In the linked products tab search for products, you wish to add to the group. It is mainly used to show all products under a group on the same page.

4.Adding affiliate/external product
Affiliate/External products are products you are promoting on your website but are sold on a different website. And you receive a certain amount as a commission for promoting these products. In affiliate products, you add products directly into your store, whereas in external products you promote via adding links and images from another website. Adding products to this category takes only two easy steps.
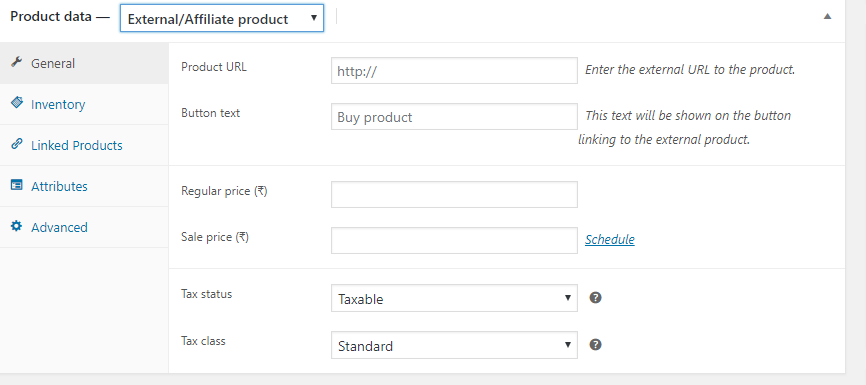
The first step, as always, is to set product data to the same. Now on the General tab, add the product URL you wish to promote. Then add a button text, to highlight the link, so that people would know that they are being redirected to another website.
Now you may assign each product to a category if not, it will be categorized as “Uncategorized” by default. If you haven’t created a category for your product, you can create one by clicking on the “+Add new category” button.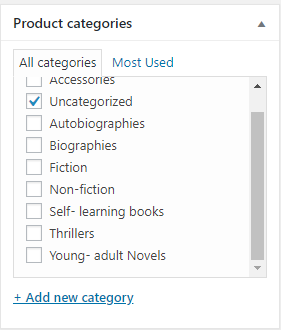
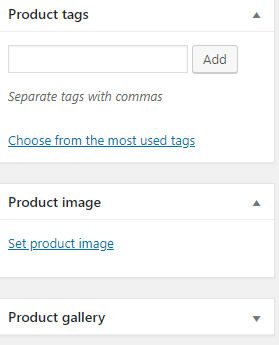
The final step is to incorporate Tags and Images. Product tags will be appearing on the product page below the short description of the product. It can be any one-word attractive description of the product. Try to choose a better quality image for your product since most of the times image sells your product. Fill in your product gallery with other images of your product.
Conclusion
WooCommerce provides a very efficient way to add products to your store with all of its data. If you just go through the article and learned how it is done, you would be able to add products quickly and easily to your WooCommerce store. However, if you wish to have a deeper understanding of WooCommerce, you can check out this ultimate guide for WooCommerce.
Comments
lana.21.pink@gmail.com
Great blog thank you! Feel free to check mine out.
March 26, 2020