Table of Contents
Product images are integral for any eCommerce store if they want their products to be sold. During online shopping, people make purchases solely based on the images and descriptions given on the website. Thus, you need to make sure that your online store displays a genuine and clear image of the products in it to ensure its sales.
If you are running a WooCommerce store and looking for an easier way to import products into it along with product images, you are not in much luck with the default WooCommerce system. The built-in WooCommerce system only allows you to import limited product data excluding images. Thus, your only hope is in using a plugin.
Product Import Export Plugin for WooCommerce is a great option when it comes to importing images with products. This article will guide you through it by concentrating solely on the entire process of importing images to your WooCommerce store.
Along with the import of images, it also supports generating thumbnails for the product images, import of multiple product images, downloading the image from the provided URL in the CSV file to the server of your store, and re-using product images from the media library, etc.
Steps for Importing WooCommerce Products with Images
In order for the images to be imported, there are a few pre-requisites.
- A CSV file of the products and the related data you need to import. This can be obtained by exporting the products with images using the Product Import Export Plugin for WooCommerce or preparing your own as in the sample CSV.
- The URL of each product image must be entered in the image column of the CSV file which is to be uploaded.
- For importing multiple images of a product, the URLs must be separated by the vertical line character ‘|’. (During import, the first image is taken as the Product image, and the rest of the images are added to the Product gallery.)
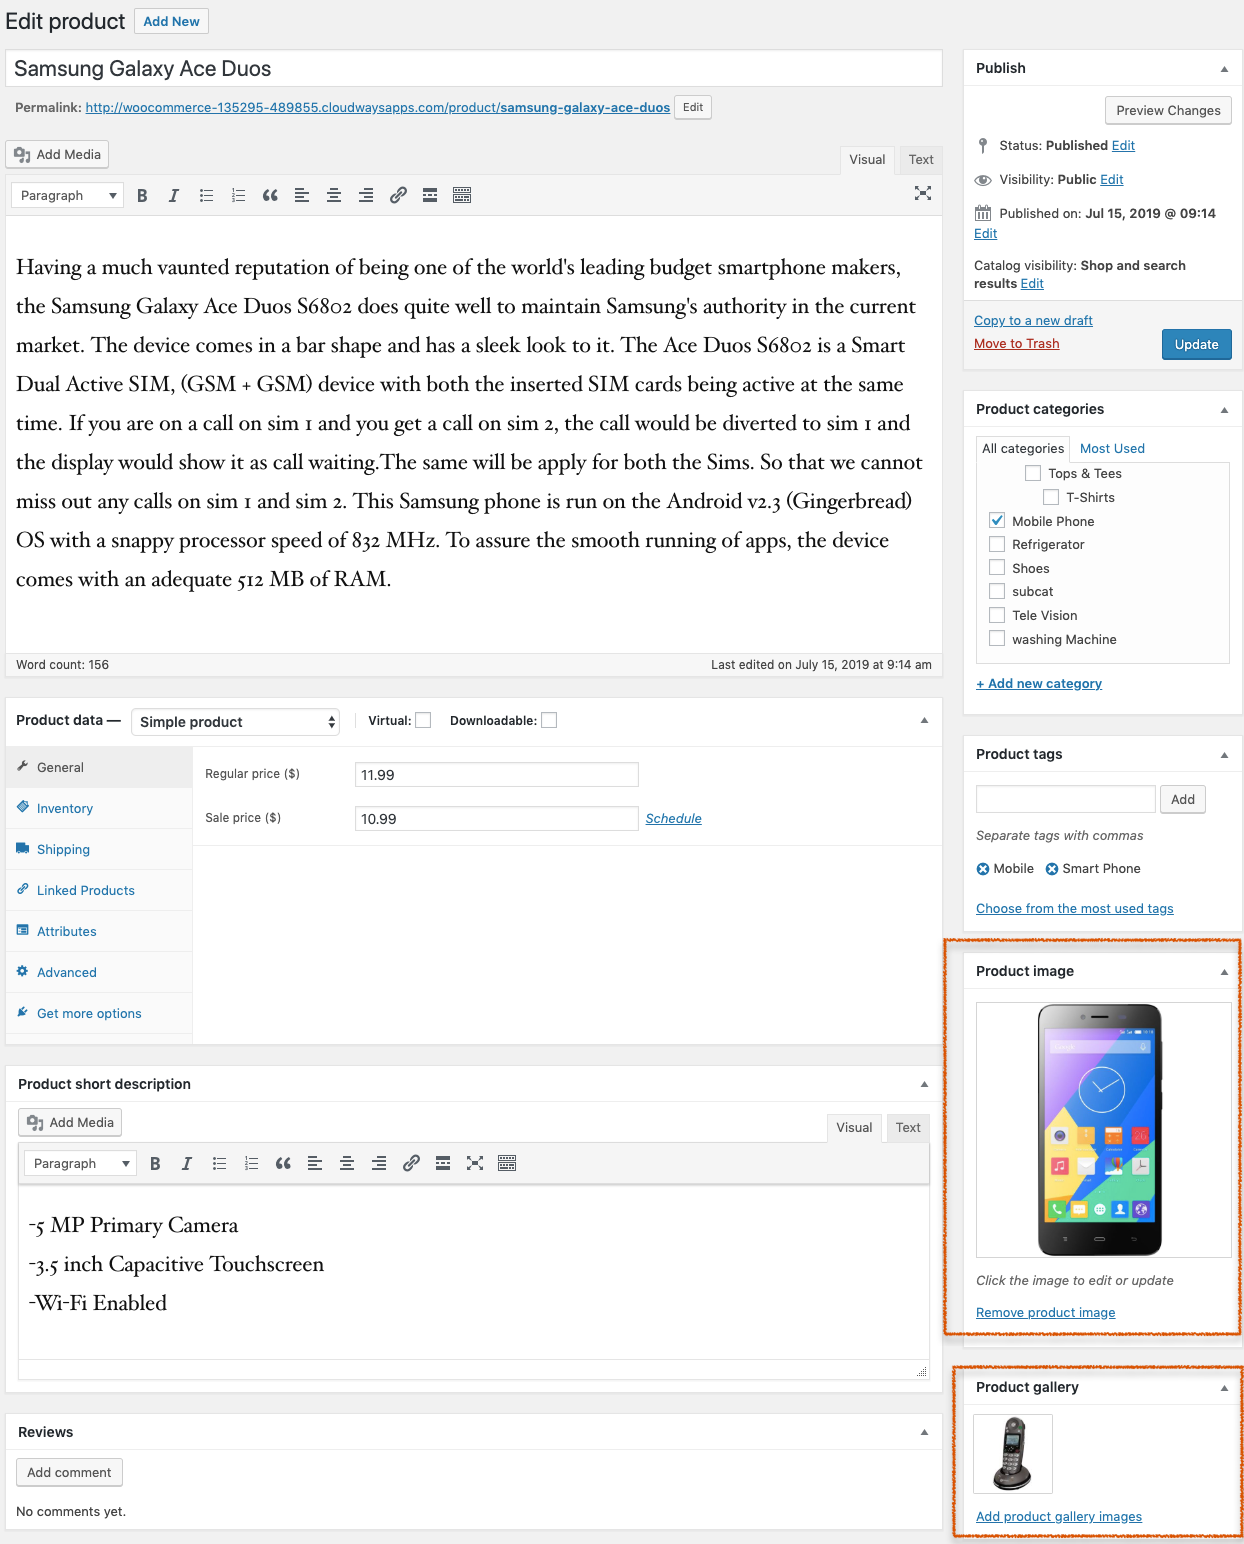
As shown in this screenshot of the product image column of the CSV.

The marked Product image and gallery image is that of a simple product (Samsung Galaxy Ace Duos).
Now let’s take a look at how these images are imported to a WooCommerce store.
Step 1- Installation of the Plugin
First, you need to install and activate the Product Import-Export Plugin for WooCommerce.
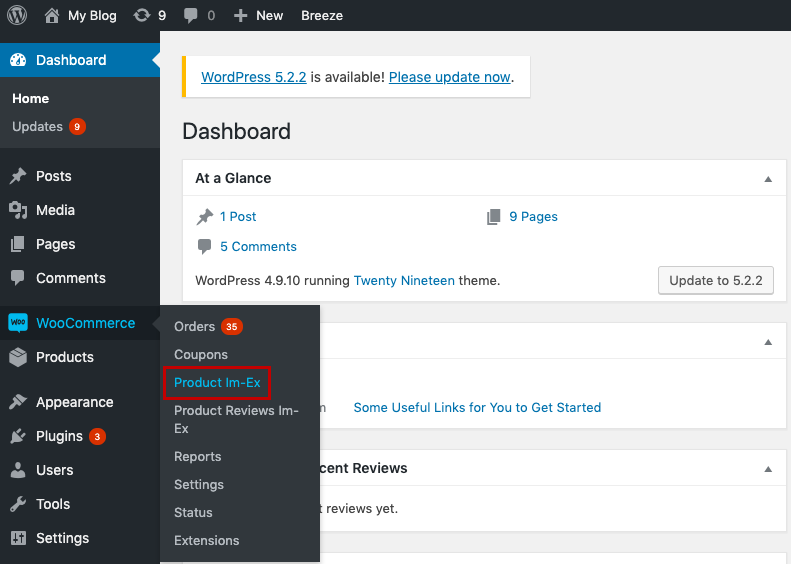
Step 2- Open the Import Settings Page (of the plugin)
Once you are done with its installation and set up go to your WordPress dashboard and navigate to WooCommerce > Product Im-Ex.
The import screen looks as given below.
Step 3- Configuring the import settings
You can configure these fields as per your requirements or you can visit this article for guidance on completing the setup.
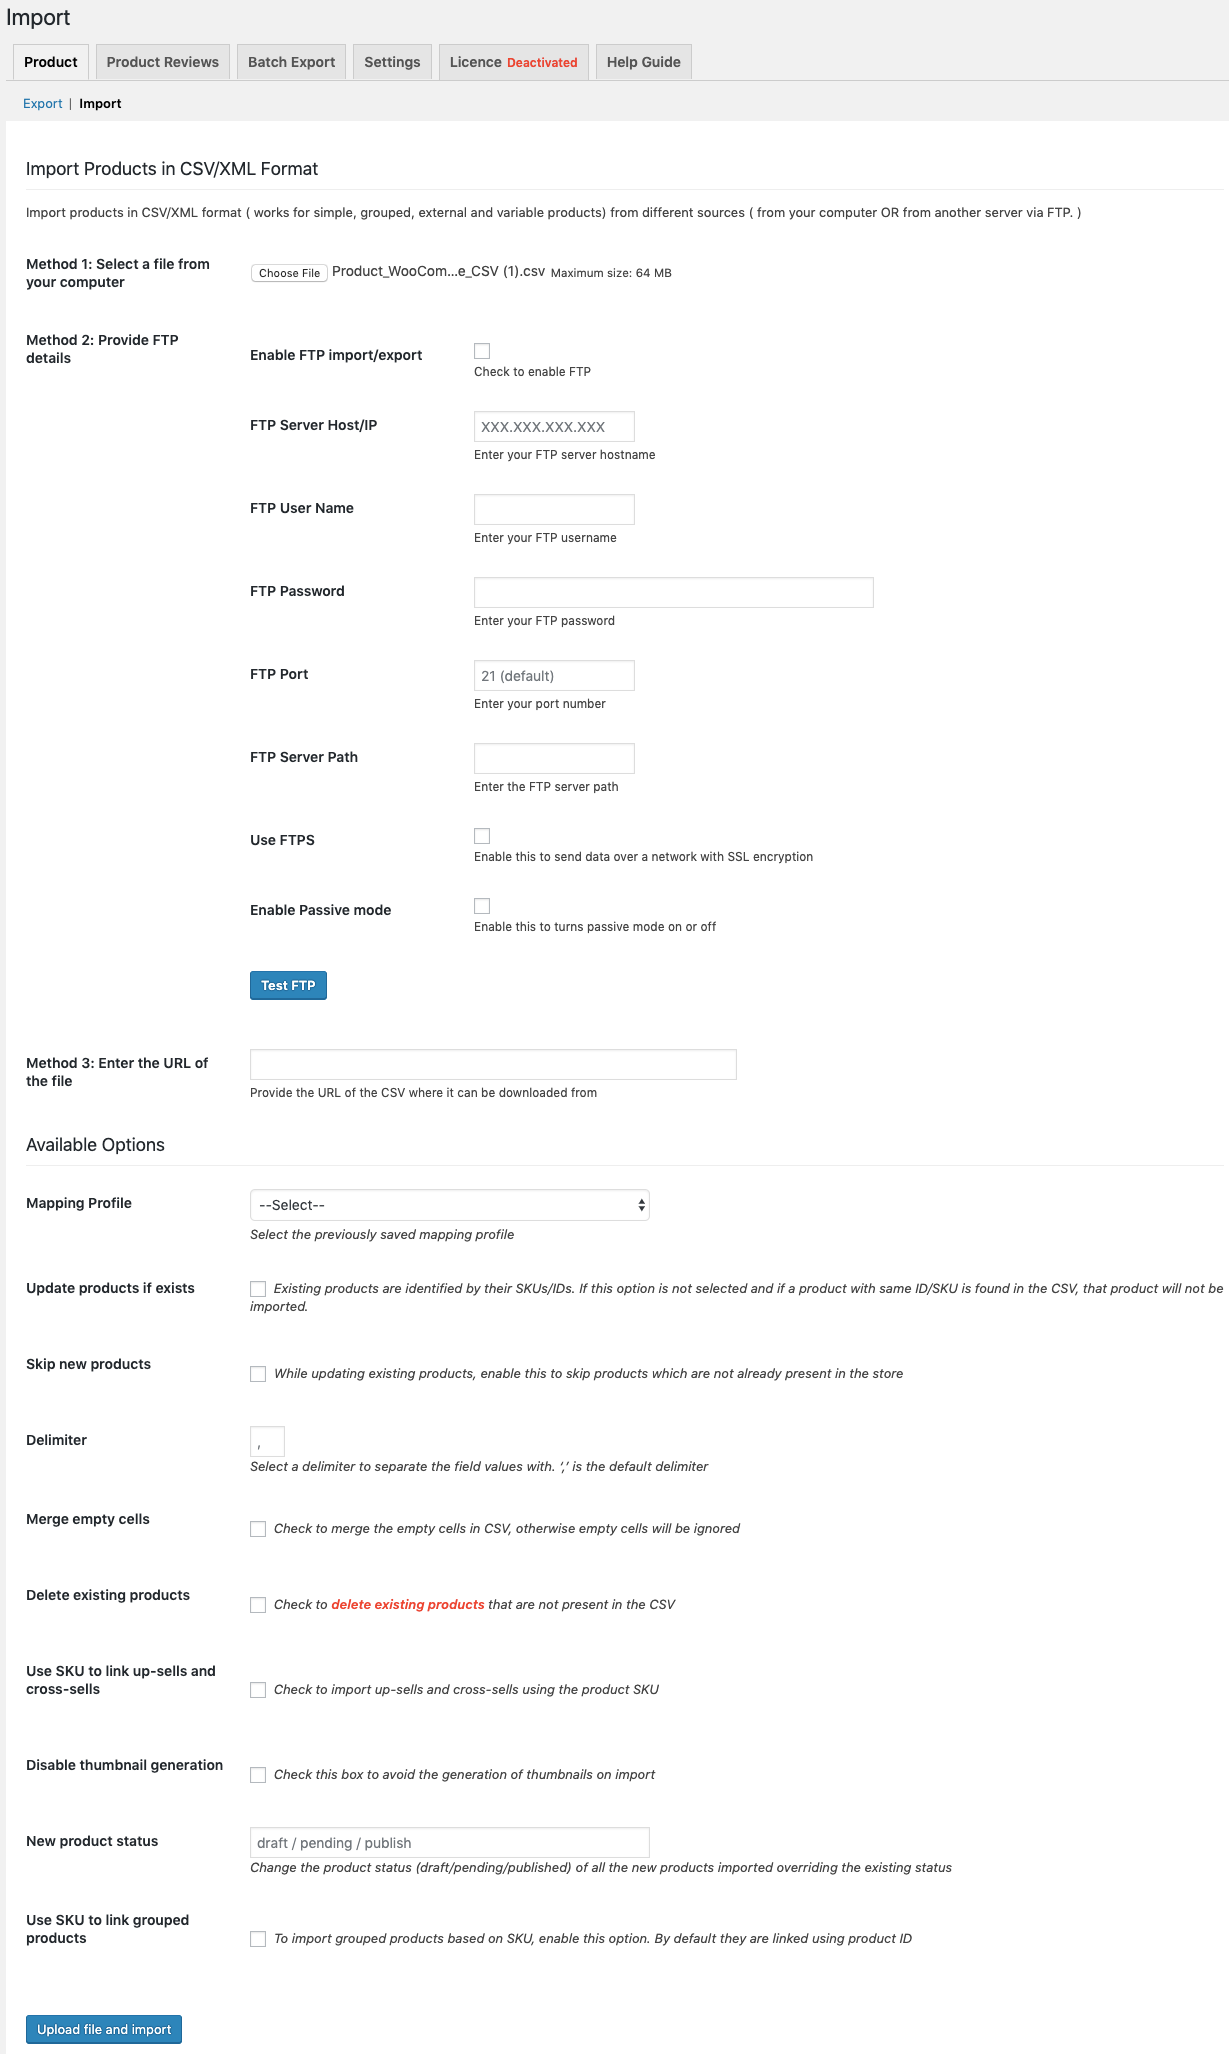
Now you can choose the CSV file which includes the images to be imported. The plugin provides you with multiple options for it such as choosing a file from your computer, via FTP, and entering the file URL. Once you chose the file, select either a previously stored mapping file from the drop-down or proceed with Upload file and Import to create a new one.
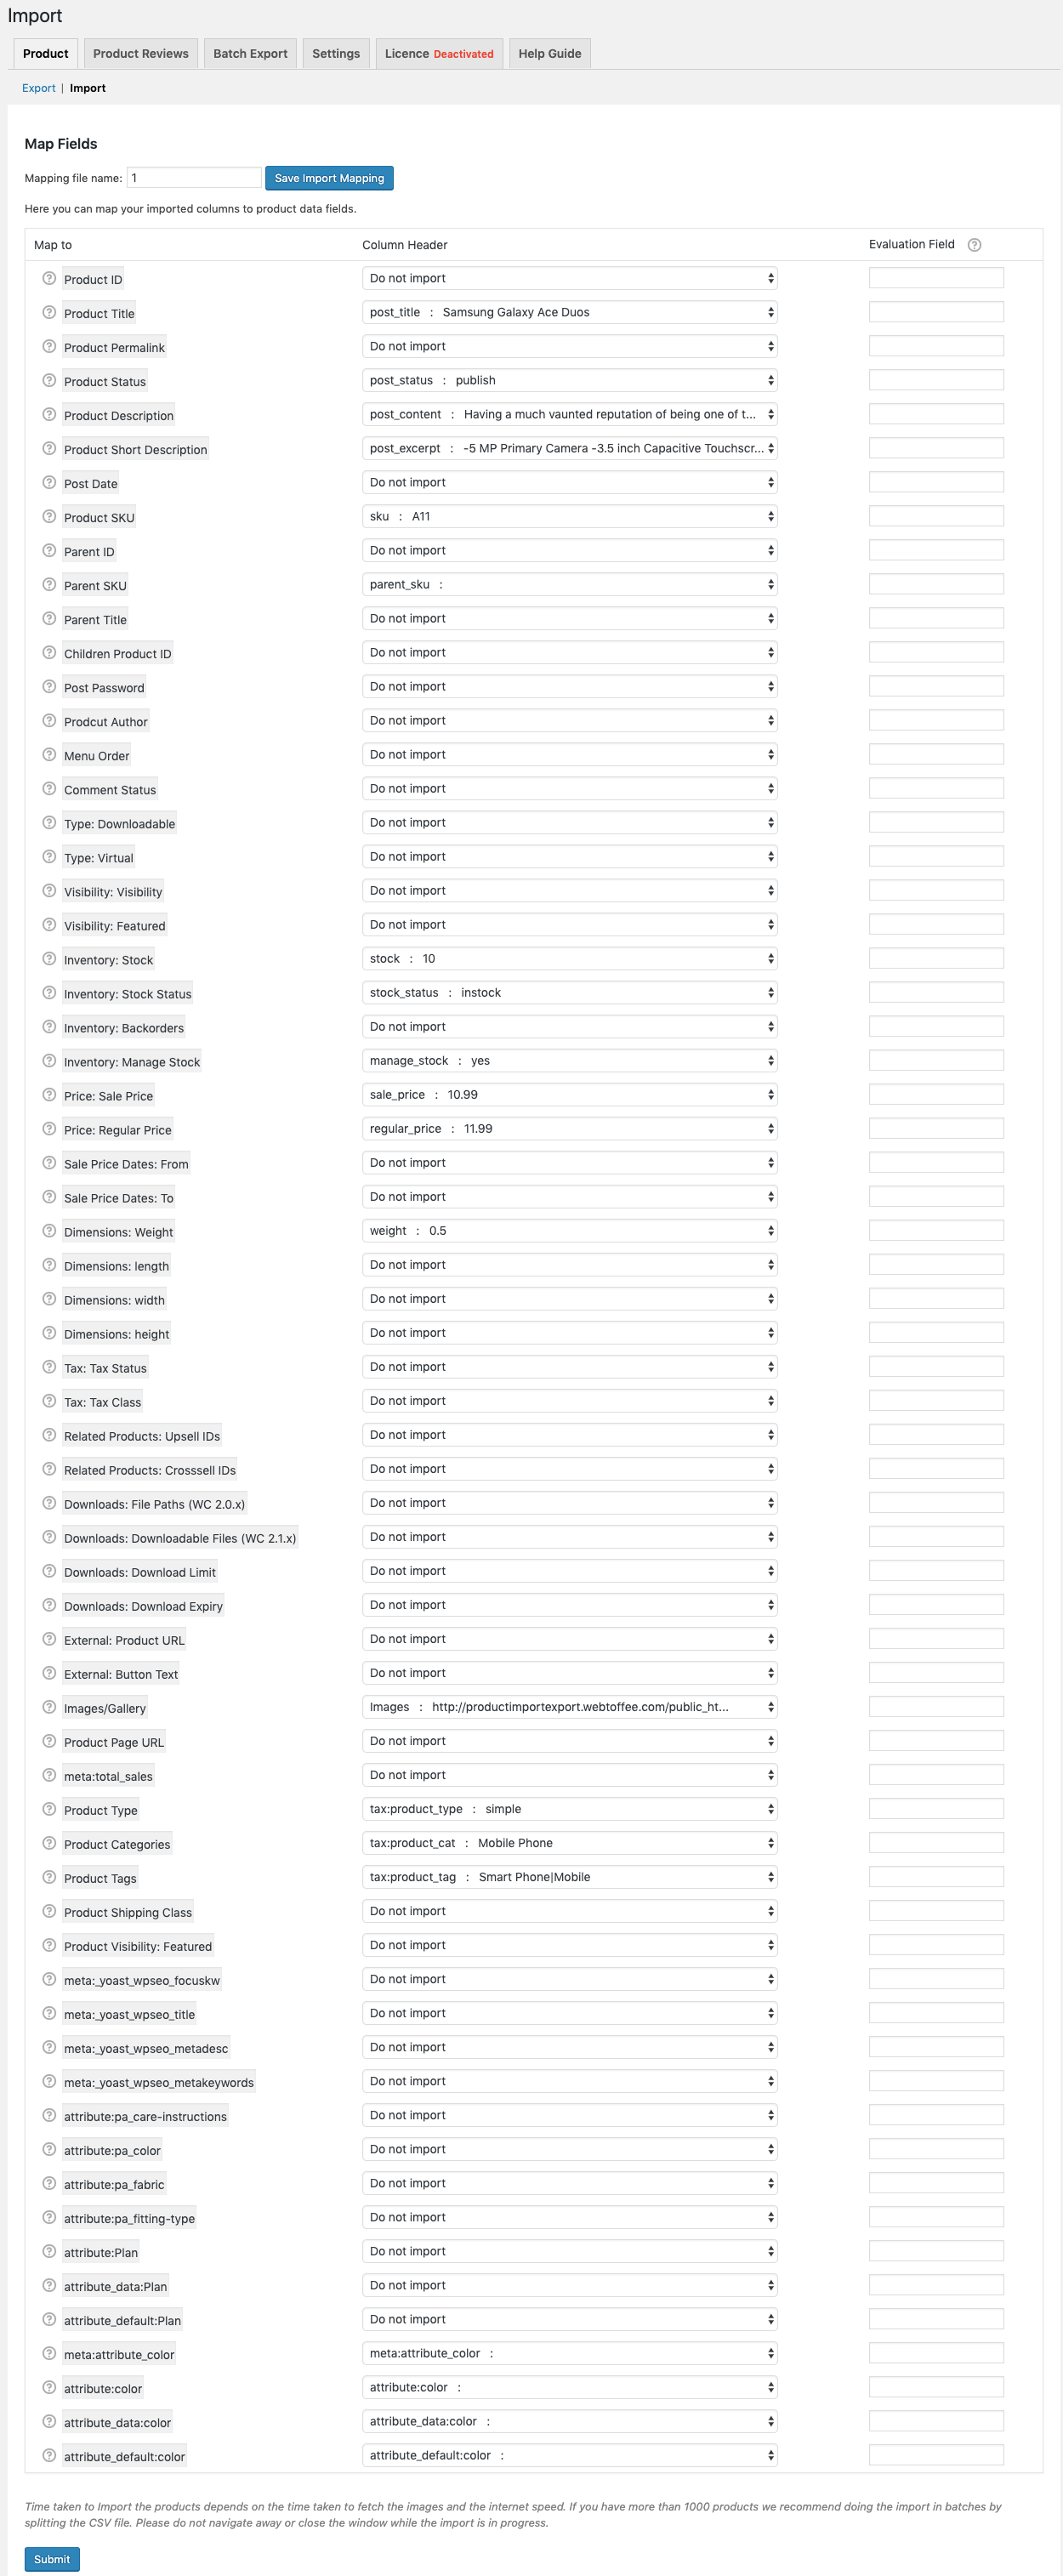
Step 4- Mapping the import file.
The mapping window looks as shown in the below figure.
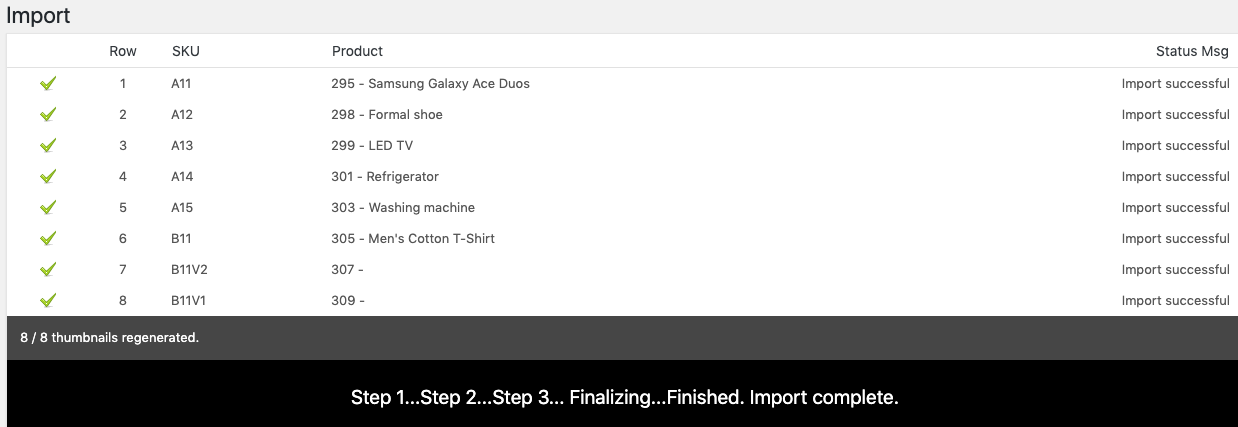
Now, click the Submit button which will start the import of products along with its images.
Here is the Successful Import screen.
The created thumbnail of the product.

Now, go to the product page of one of the imported products and you will be able to see the imported product image and gallery images within it.
Conclusion
You should never take the import of WooCommerce products along with their images lightly. Depending on your store’s size there would be tons of them including gallery and variation images. So you will never regret your decision to use an extension as there is no other way to address this need.
