Table of Contents
Are you a WordPress user or a website owner looking for an effective way to connect with your visitors and make it easy for them to get in touch with you? Well, look no further than diving into the amazing world of contact forms in WordPress!
Whether you’re a seasoned pro or just starting out, this article will walk you through the process of creating contact forms on your website. So, get ready to explore the power of contact forms and take your WordPress website to the next level of engagement!
Now, do you wonder why contact forms are necessary for WordPress when you could just share your email address for people to contact you?
Why Should You Have a Contact Form?
Here are the four main reasons:
- A promising sign of professionalism: A contact form page on your website is a green flag since it is a clear indication of professionalism, as it showcases your dedication to providing a convenient and structured means of communication for your audience.
- Helps visitors stay on your site: When posting an email address instead of a contact form, people visiting the site must open the mail to communicate, which is probably a distraction.
- Protection from spam: A contact form provides privacy and spam protection compared to displaying the email address directly.
- User-friendly: People may find the contact forms more convenient than opening an email and sending a message.
However, by default, WordPress lacks an in-built contact form, but adding one to the site is not a tough job either. Let’s look at how easily you can create WordPress contact forms.
Steps to Create a Contact Form Page in WordPress
Follow the below steps to add a contact form to your WordPress website
- Choose The Best Contact Form Plugin
Firstly, you must choose the contact form plugin you wish to install. For now, let’s consider WPForms, one of the best contact form plugins on WordPress.
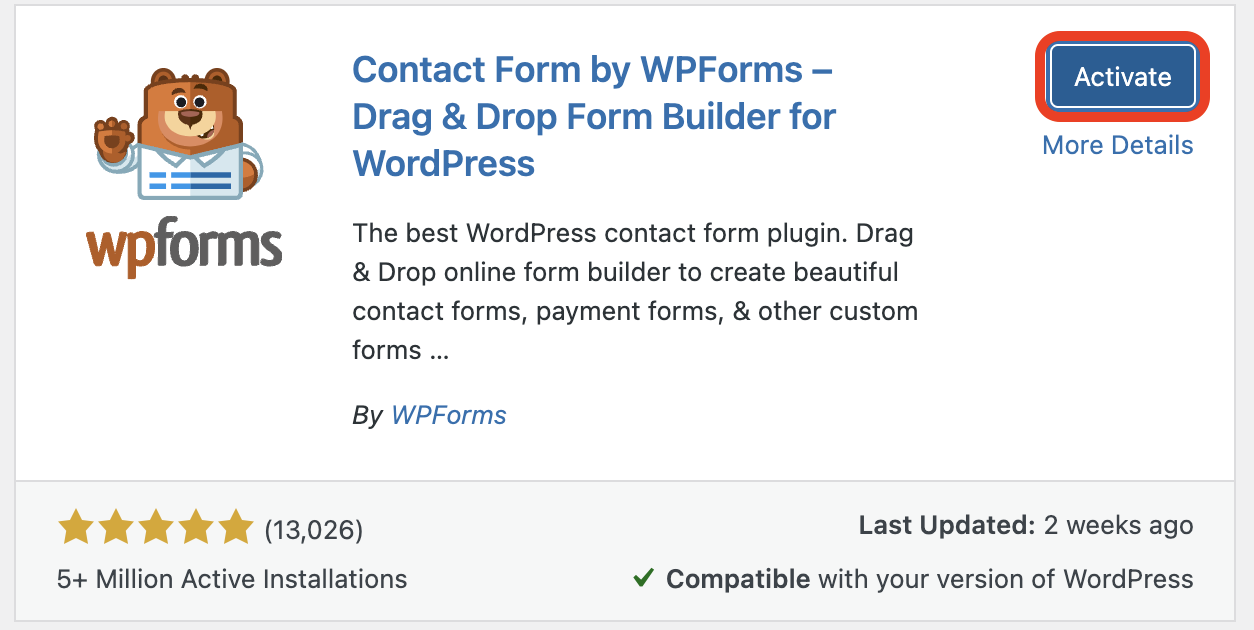
- Install The Plugin To Your WordPress
For this, you will have to log in to your WordPress dashboard. From there, go to Plugins > Add New and search for WPForms.
Click the Install Now button and then the Activate button to install and activate the plugin.
Now, you’ll get WPForms Lite, which allows you to create simple contact forms. You can upgrade to WPForms Pro, the paid version with enhanced features if needed.
Now you are all set to create a contact form in WordPress.
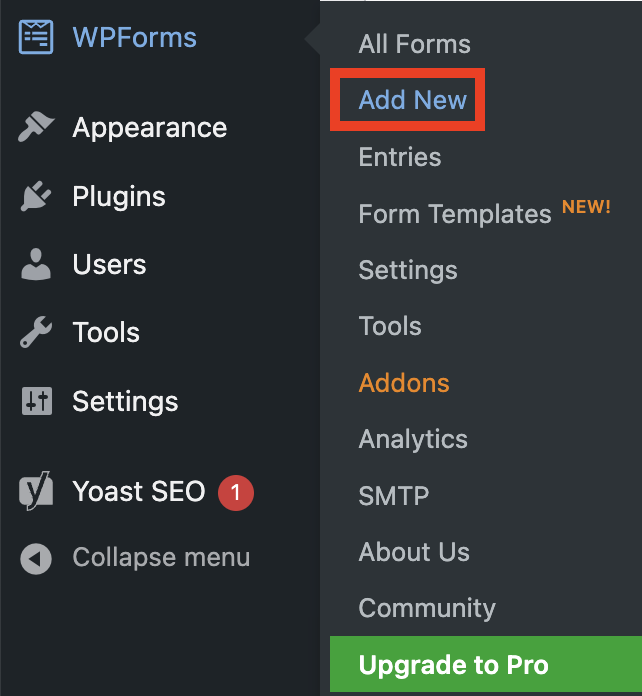
- Create a Contact Form using WPForms
You can now find the WPForms menu in the dashboard. Navigate to WPForms and click on Add New.
You will now be brought to the WPForms drag-and-drop form builder template library.
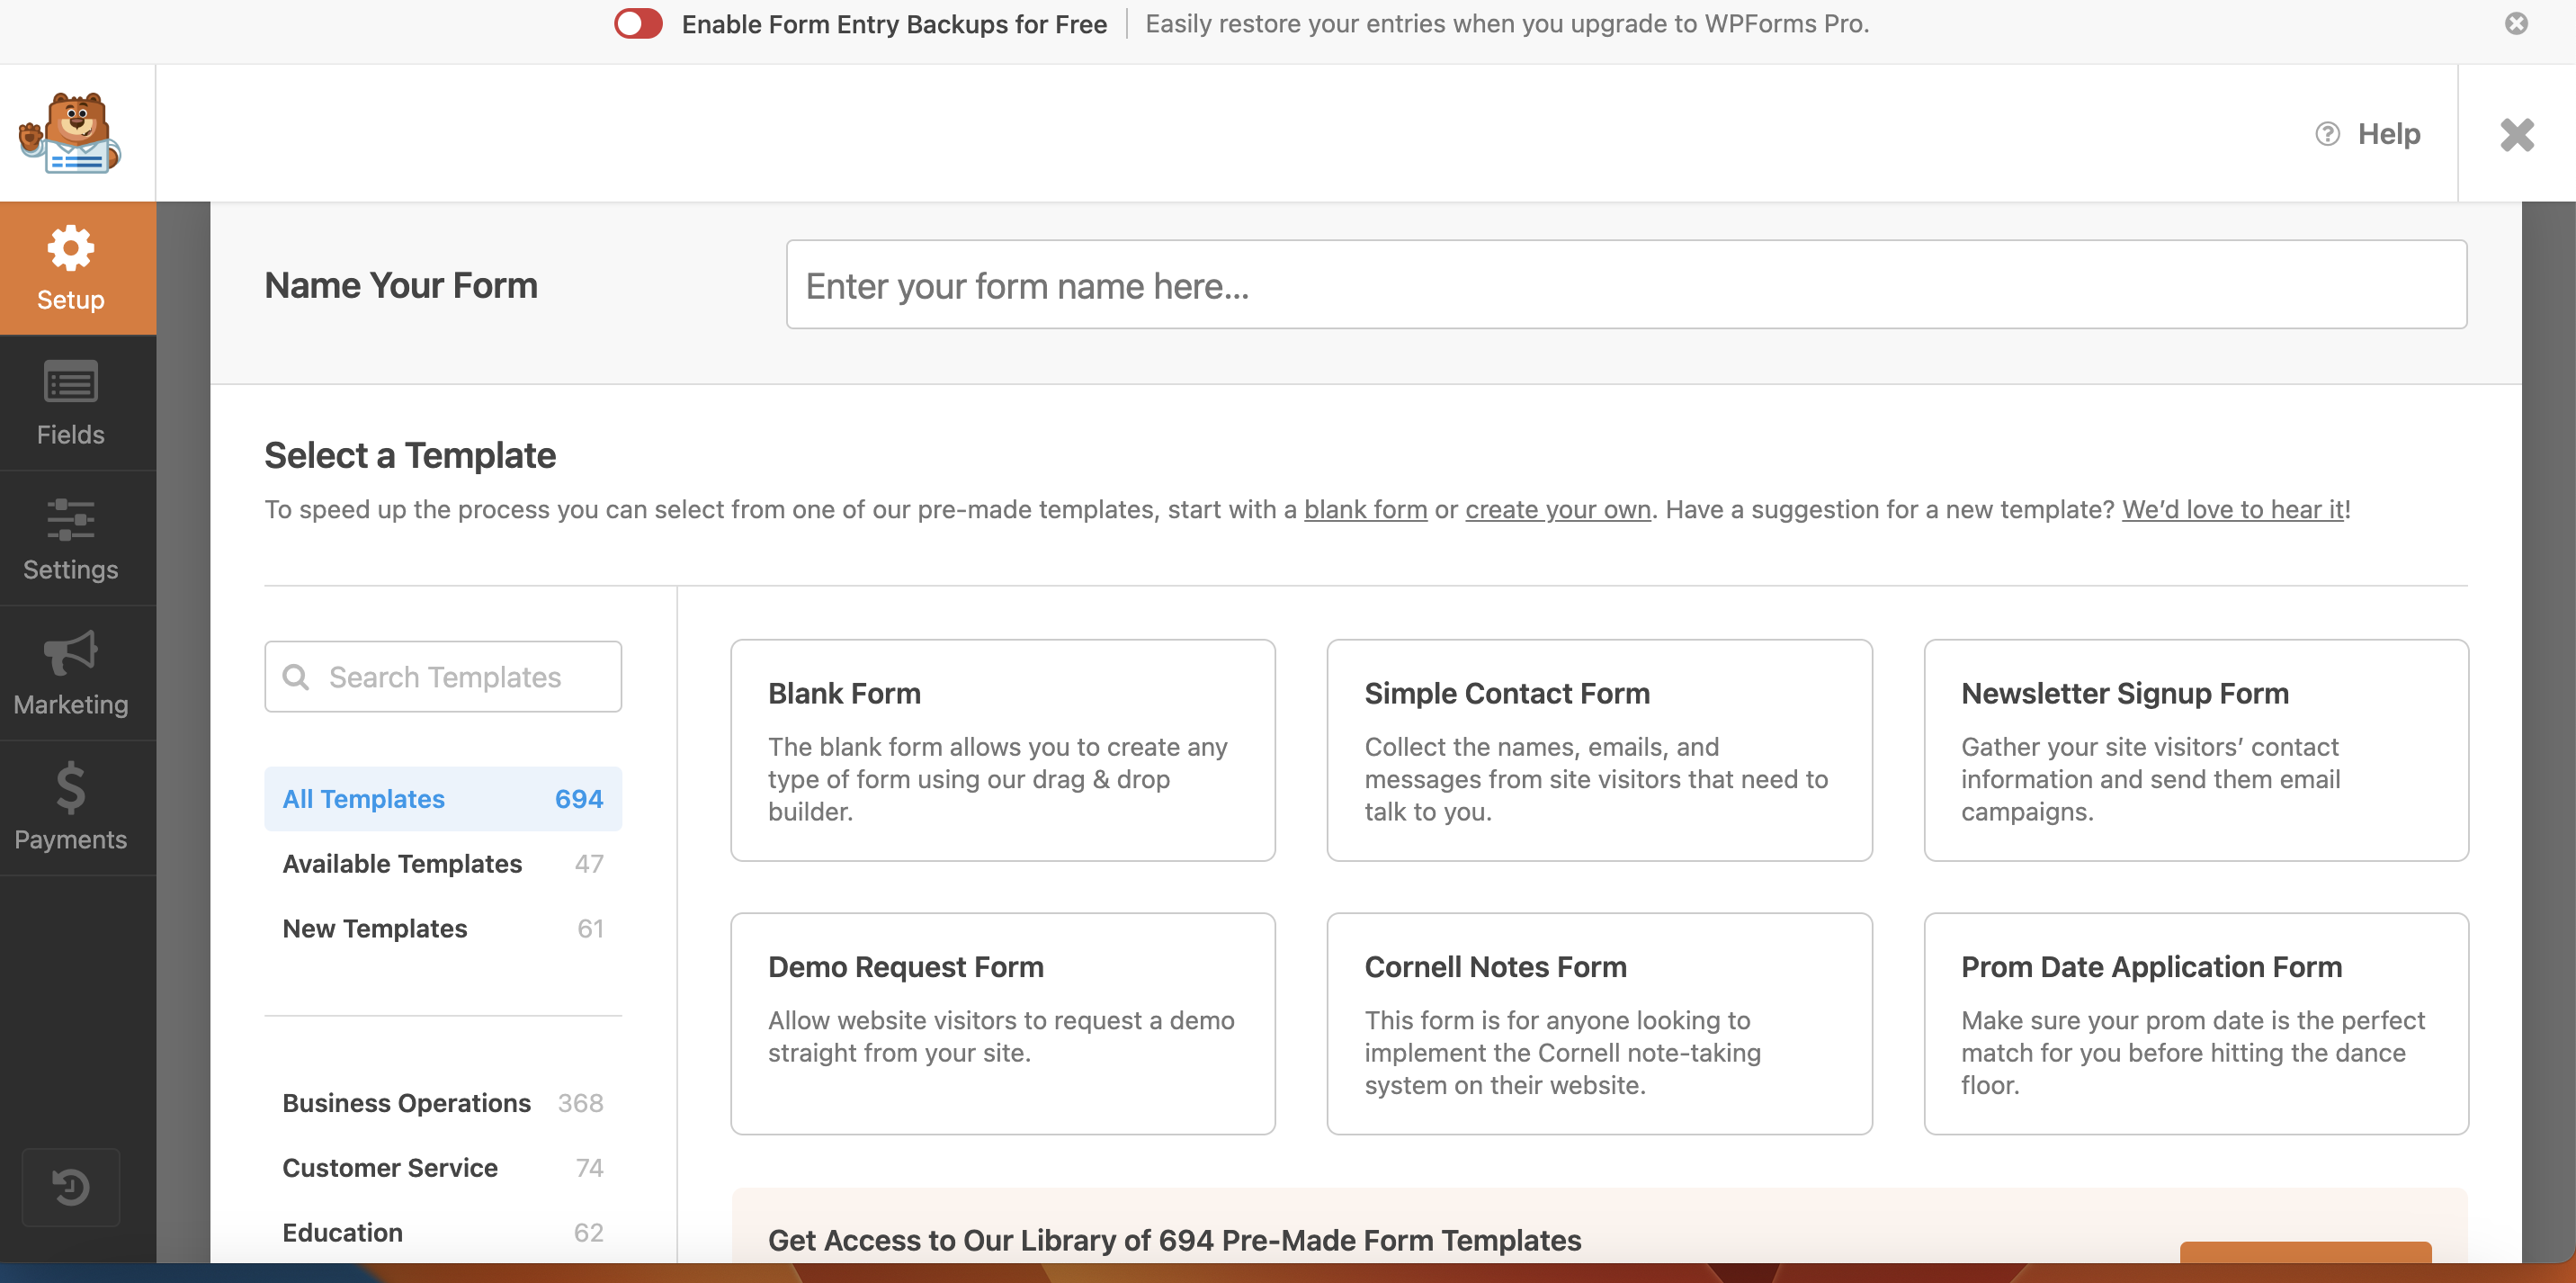
Proceed by naming your contact form and selecting the desired template. You can either start with a pre-built template or a blank form. Simply click on the Use Template button to start creating your contact form.
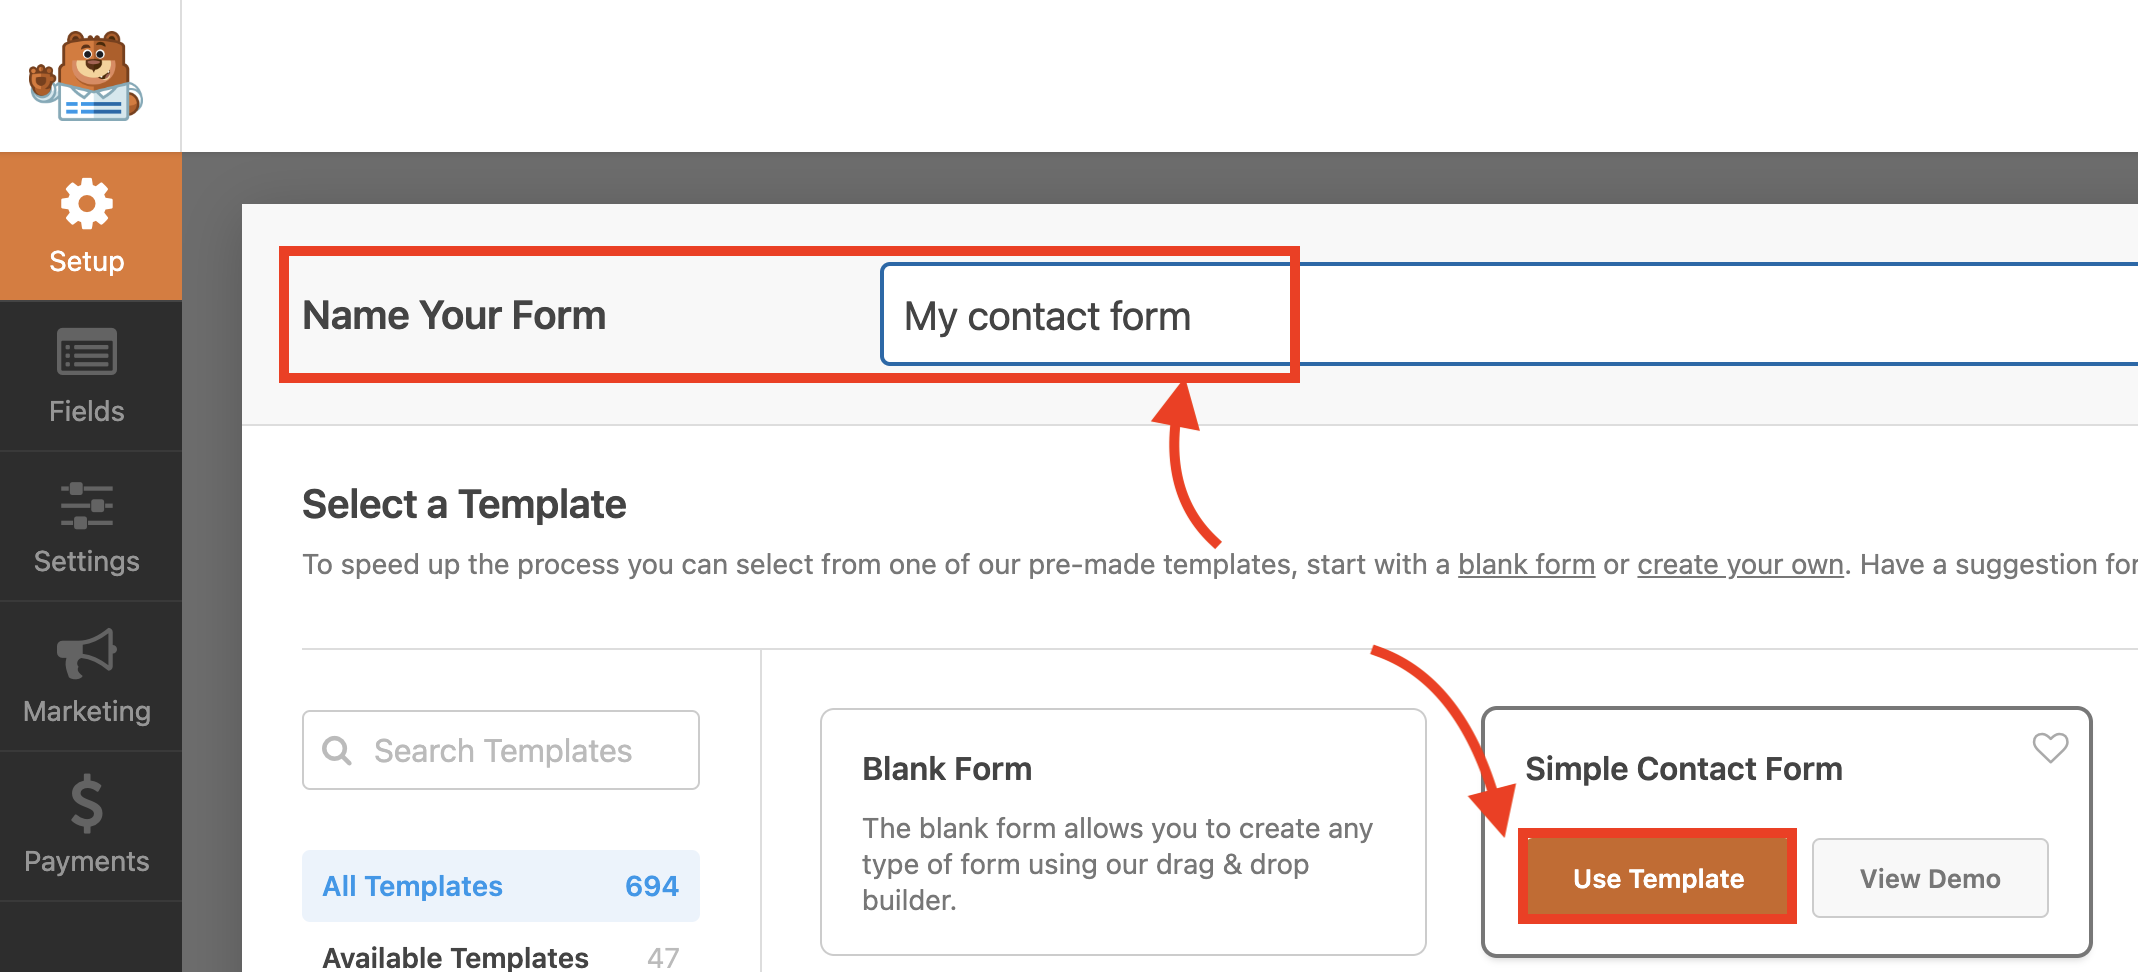
Clicking on the Use Template button will lead you to the corresponding template, along with a Field Options panel on the left, which can be used to edit and make changes.

You can make changes to the form by either dragging and dropping or just clicking on the desired fields available in the Field Options. You can choose from various field types like dropdowns, checkboxes, radio buttons, etc. You can even use your mouse to drag and drop and change the order of the fields in the form.

Add the necessary fields and customize each by clicking on them and modifying the settings on the left side. Once done, click on the Save button to save your changes.
Now that your contact form is ready, it’s recommended to set up a confirmation message for website visitors who submit the form.
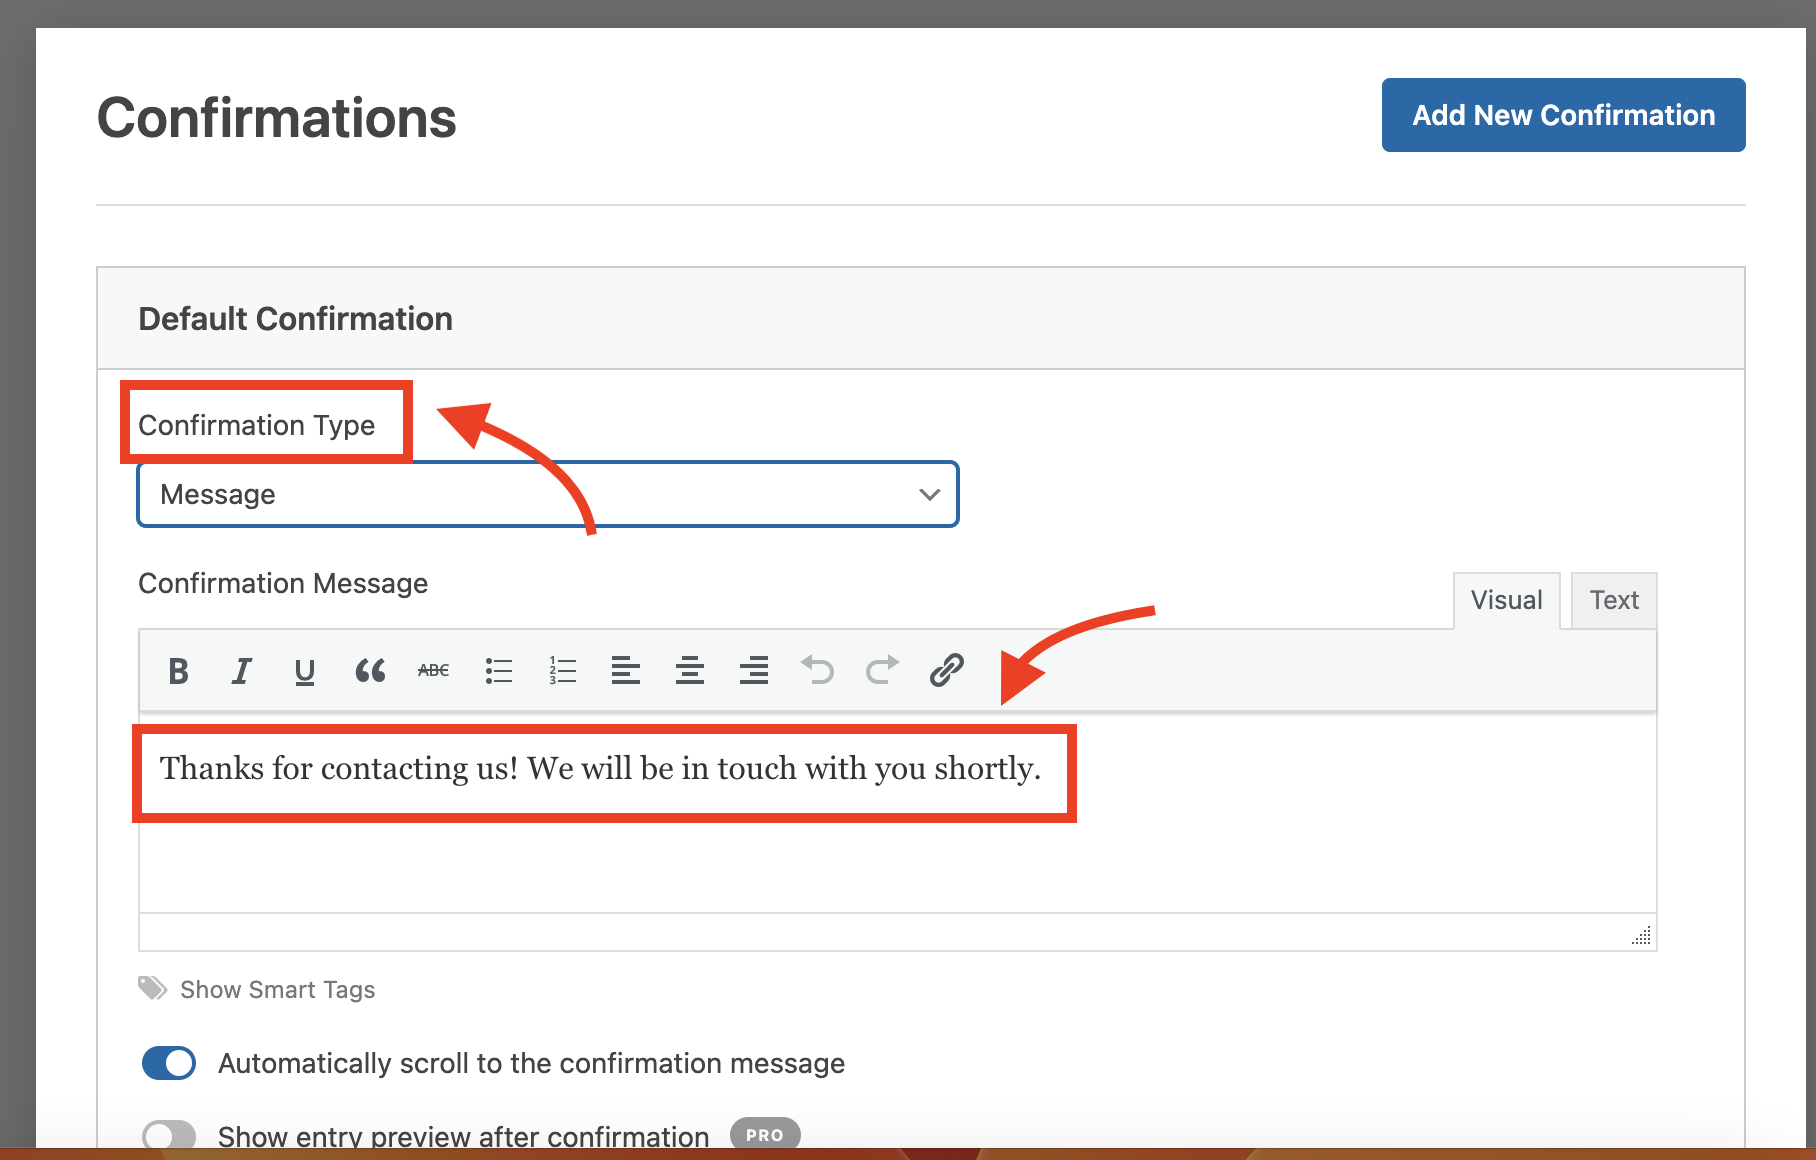
- Create A Confirmation Message
A confirmation message can be a thank-you message to acknowledge the form submission.
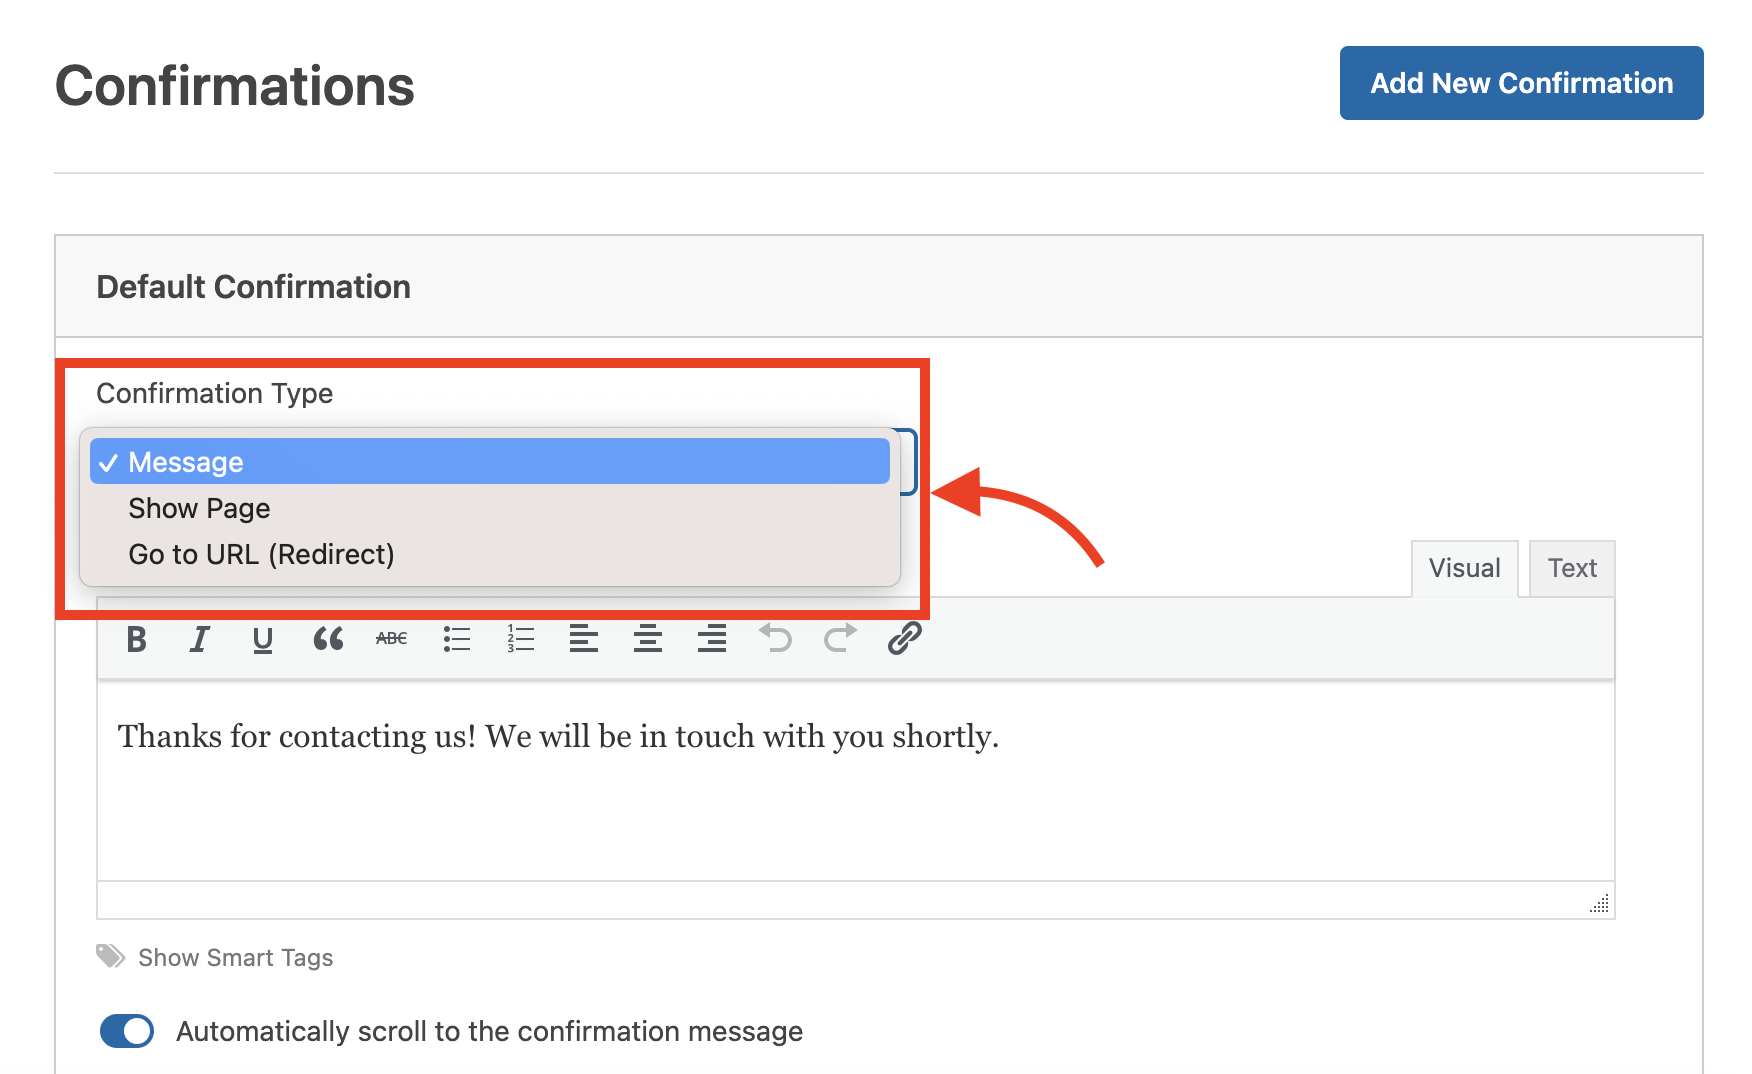
To create this, click on the Settings tab in the Form Builder and click on the Confirmation tab in the options shown.You will get three options in the Confirmation Type drop-down: “Message,” “Show Page,” and “Go to URL.”
The message box might already display a default message, but you can customize it as per your preferences. The “Show Page” option is exclusively available in WPForms Pro, and selecting this option will let you display a chosen page that includes an appropriate thank-you message or any additional information you wish to show.
Additionally, you can redirect visitors to a specific page without displaying any message by using the URL option in the drop-down menu.
Make sure that you save the changes after custom
- Set Up Form Notification
After a visitor submits the form, setting up notifications is crucial to staying alert and responding promptly to inquiries, leads, or important form submissions.
To create this, click on the Settings tab in the Form Builder and click on the Notification tab in the options shown.
By default, there will already be a notification set up for the admin email. Either click on it to edit it or click the “Add New Notification” button to create a new notification and do the necessary customization.
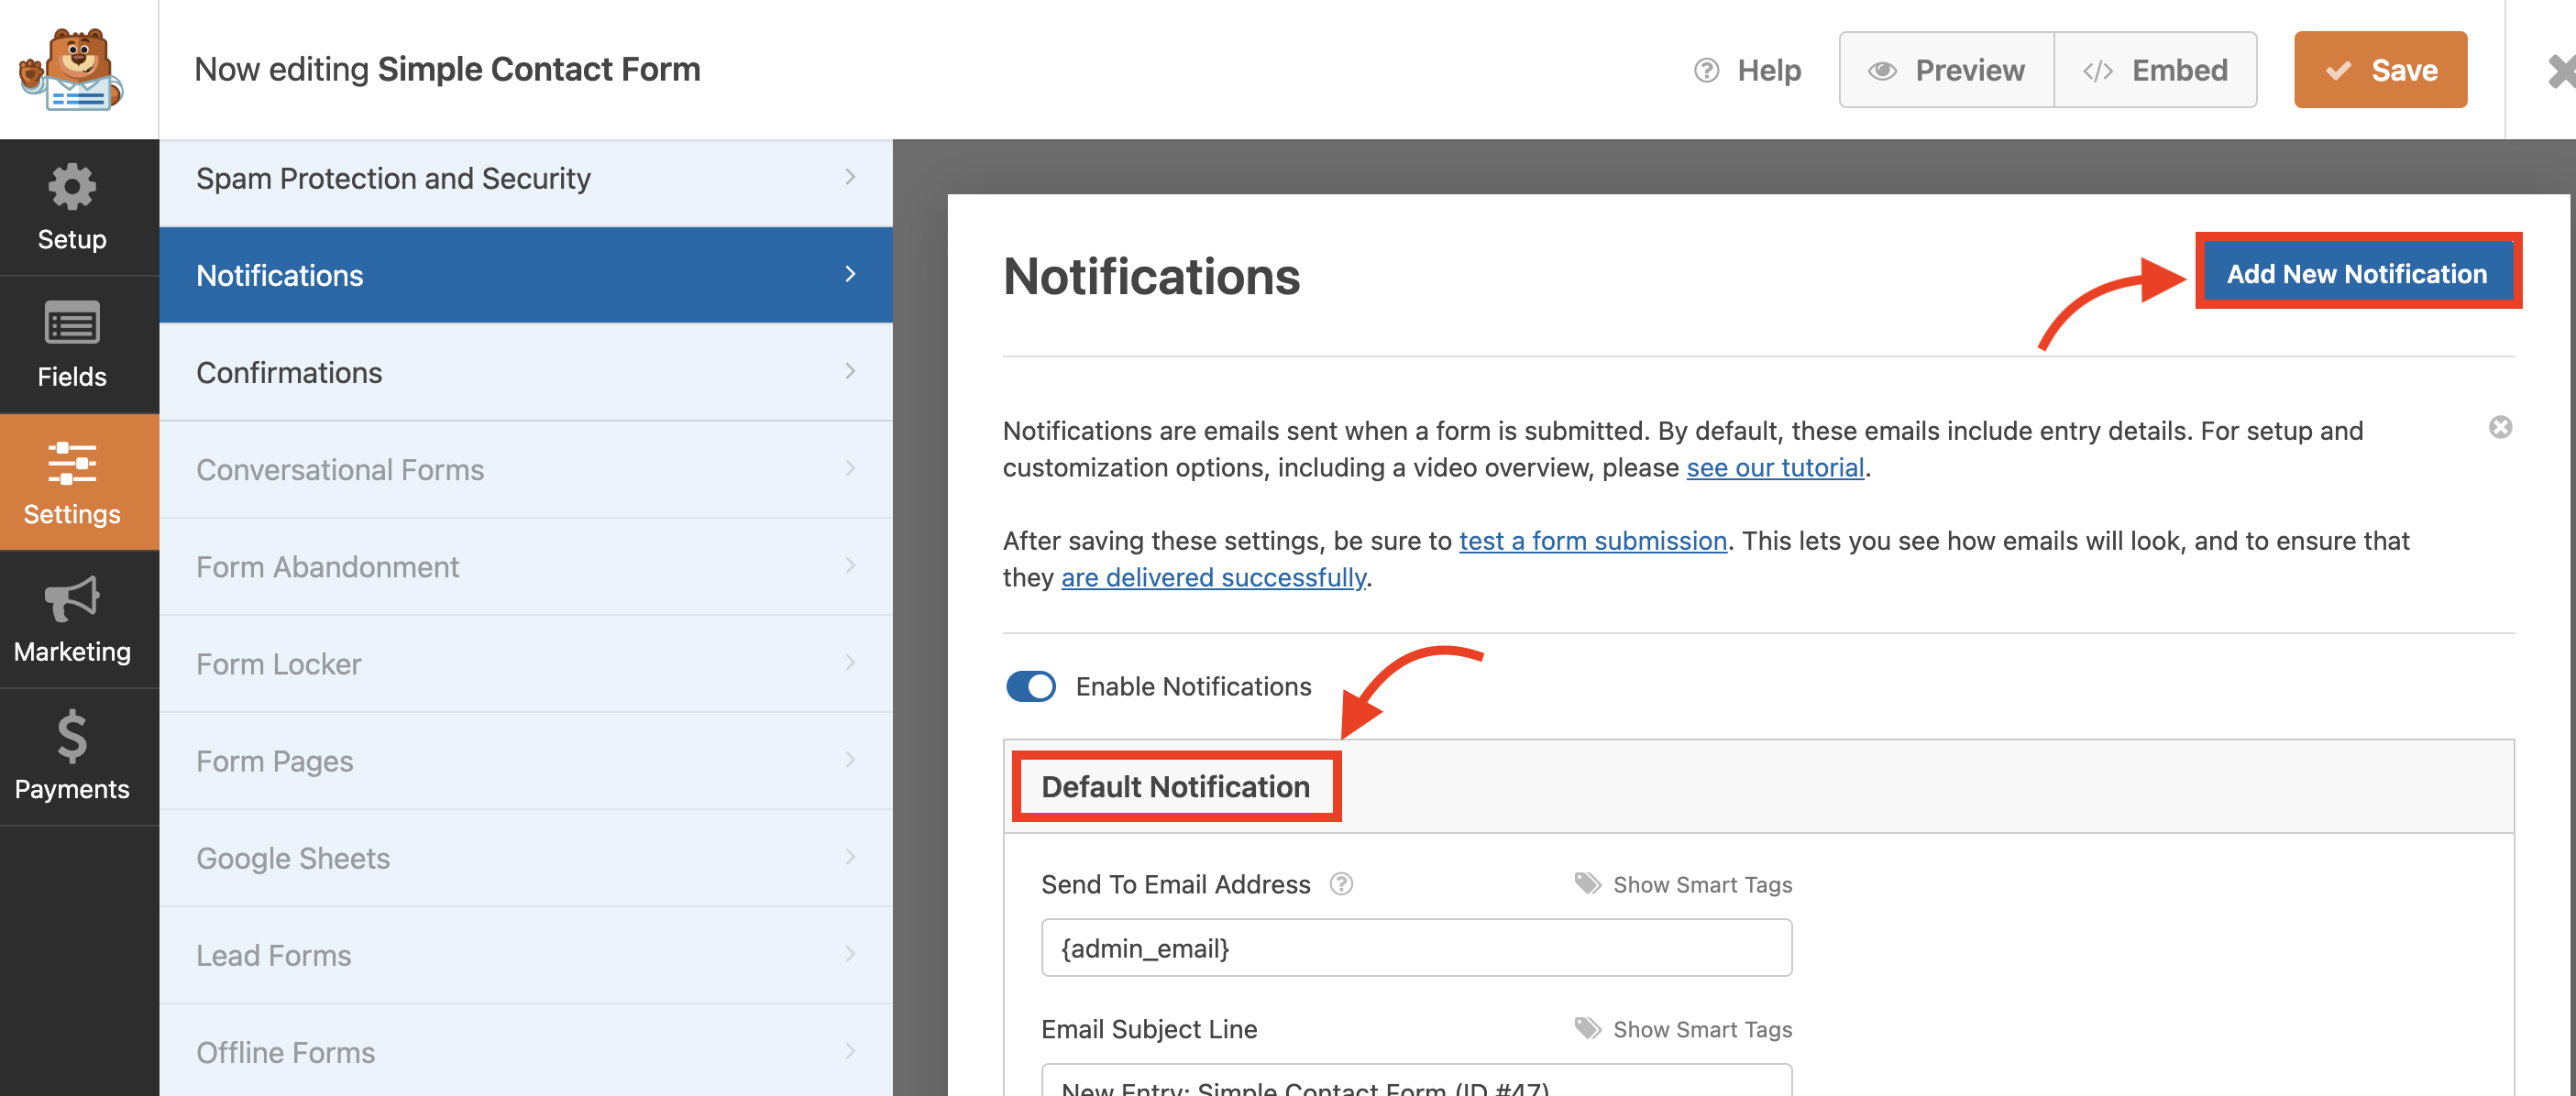
You can modify various aspects of the email notification, including the email subject, recipient(s), message content, and other options. You can even include or exclude form field values in the email notification by clicking on the “Show Smart Tags” button and choosing the desired form fields to be included in the email message.
You can also customize various other settings for the email notification, such as the “From Name” and “Reply-To” email addresses.

Once you have completed the email notification settings, click on the Save button to save the form. Now, WPForms will send an email notification to the specified recipient(s) whenever a user submits the contact form.
- Add The Contact Form To Your Website
You are almost there! Now, to embed the contact form on a page or post, create a new page or edit an existing one.
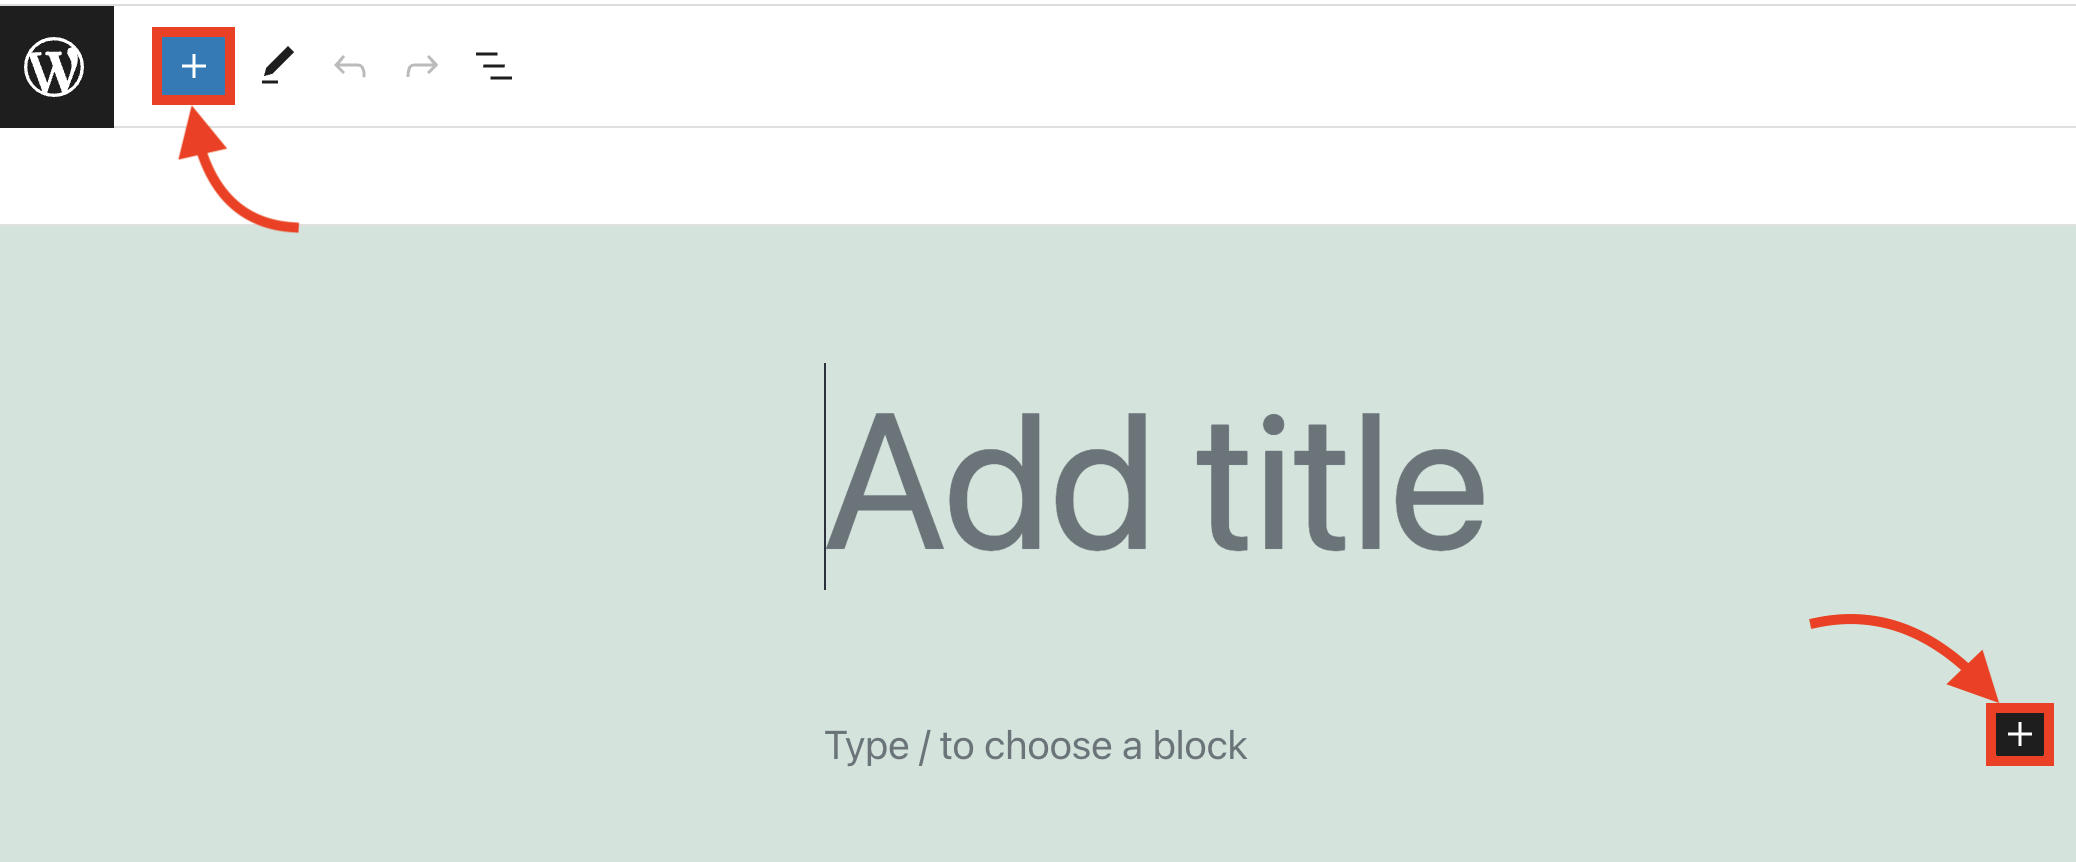
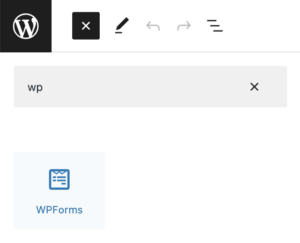
To create a separate contact form page, go to the Pages option in the dashboard and choose Add New. Then, click the plus icon on the new page and search for WPForms.
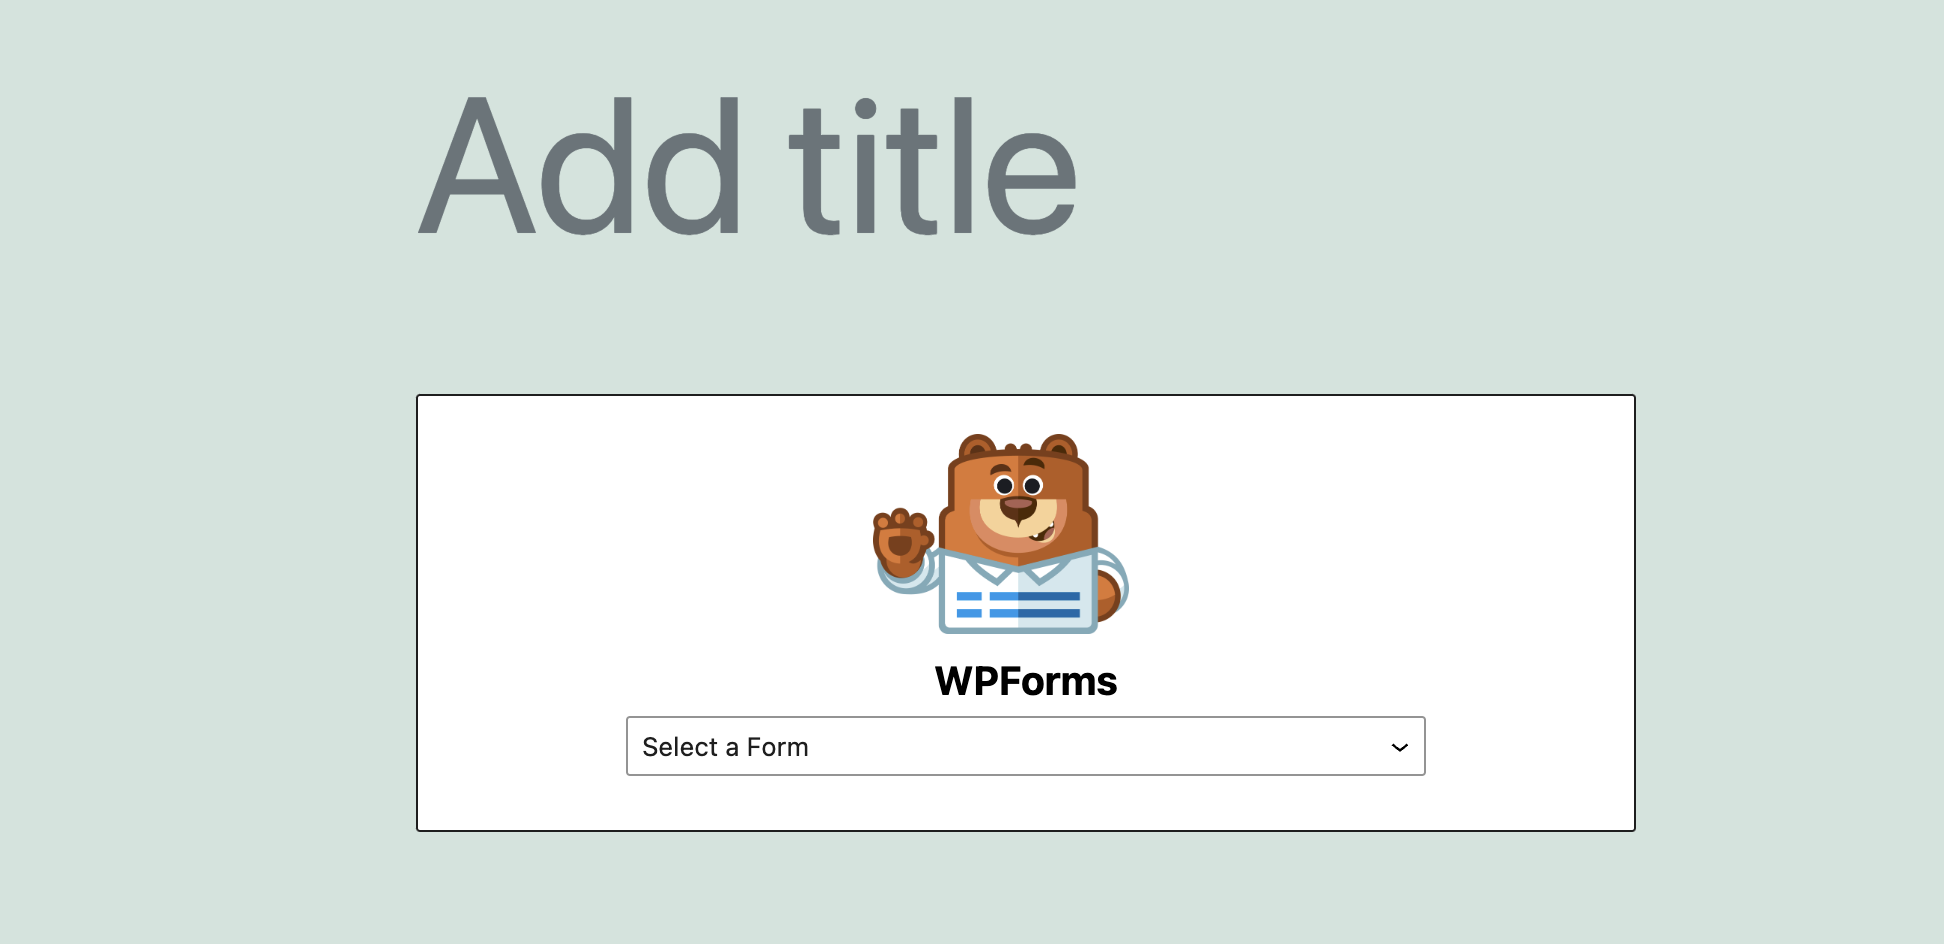
You will now see the WPForms block with a drop-down menu in the content area of your page. Choose the form you previously created from the available options, then update the page.
Preview your website or visit the page where you embedded the form to see it in action. It may look something like this:
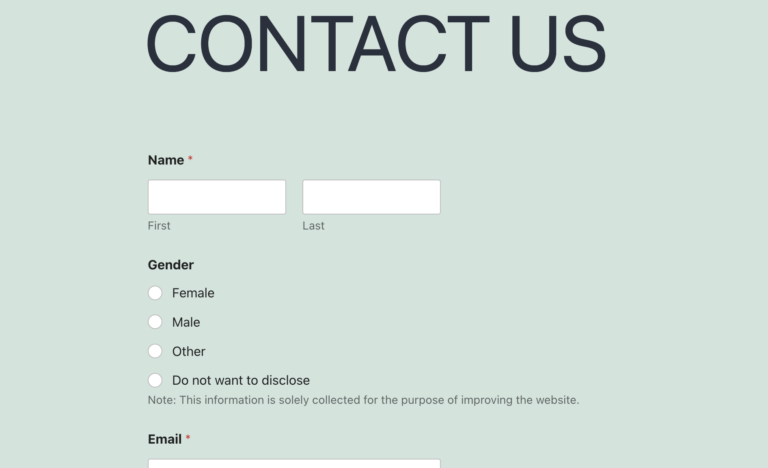
Wow! You’ve now created a contact form page!
You can also add a WPForms contact form widget by simply adding it to the desired post by clicking the Plus icon > Widgets > WPForms and selecting the preferred form from the drop-down menu.
Locating the Submitted Forms
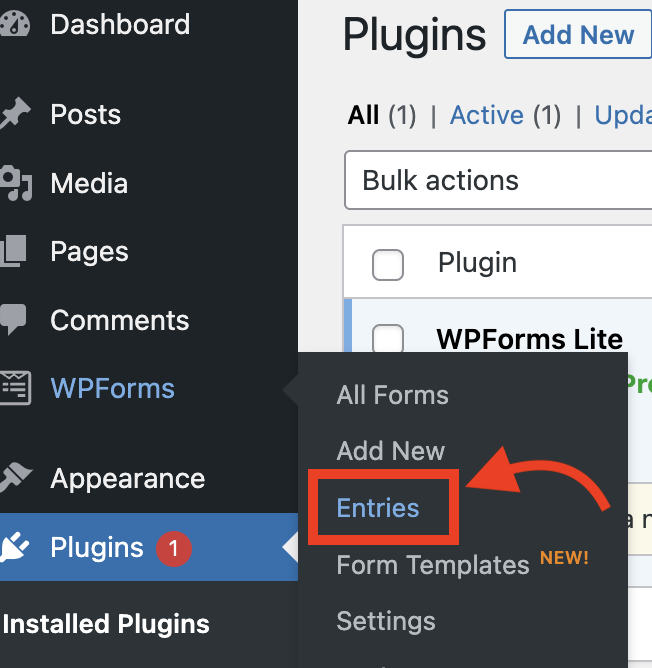
The unpaid version of WPForms does not have a built-in entry management system like the full version of WPForms. So, you will have to check the email address associated with your WordPress admin account or the designated email address. The messages sent through the contact form will be sent to these email addresses.
However, the paid version provides an entry view in the WordPress dashboard. To access this, log in to your WordPress admin area and navigate to WPForms > Entries. There you will find the list of form submissions, including the messages sent through the contact form.
Final Thought
Creating a contact form on WordPress is a simple process that can significantly enhance your website’s functionality and user experience. With the above steps, you can easily create and customize a contact form using WPForms. Remember, a contact form provides a convenient way for visitors to reach out to you while keeping them engaged on your site.
With the ability to capture valuable information and communicate effectively with your audience, a well-designed contact form is essential for any WordPress website. Start creating your contact form today and take your website to the next level of user interaction and convenience.
