Table of Contents
Mistakes can happen at online stores.
That’s quite natural. But what if a simple error that you could easily correct results in a significant loss of revenue?
It is said that about 25% of the total product returns are due to ‘wrong items received.’ Why does this happen? This happens due to the lack of proper warehouse maintenance. You can reduce this by implementing a simple addition to help your warehouse pickers easily identify and pick products from the warehouse.
We are talking about WooCommerce picklists. If you haven’t heard about it already, worry not we will discuss everything you need to know about WooCommerce picklists.
By the end of this article, you will be able to create and print picklists for WooCommerce.
So let’s begin with the big question.
What is a WooCommerce picklist?
WooCommerce picklist is a document that contains information on orders including product details and specifications. This really helps warehouse pickers to pack orders without making errors.
Picklists add to the efficiency of the store’s functionality and warehouse management. This significantly reduces the number of returns due to ‘wrong item received’.
The picklist is a simple document that can make a huge difference in your store’s shipping and warehouse management. But unfortunately, by default WooCommerce does not provide the option to create and print picklists.
So we will be using a third-party plugin to help you easily create and print WooCommerce picklists.
How to create WooCommerce picklists?
Now let’s see how to create picklists for WooCommerce. As we have already mentioned, there is no default option in WooCommerce to create picklists. So we will be using the WooCommerce Picklists Plugin by WebToffee.
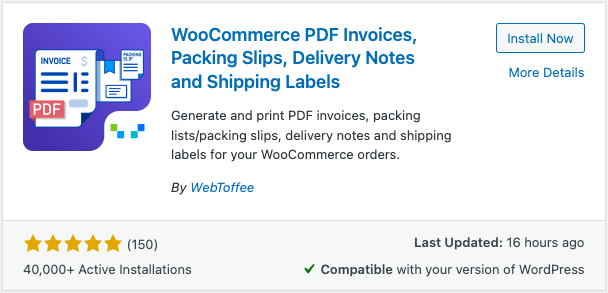
This plugin works as an add-on for WooCommerce PDF Invoices plugin by WebToffee. You can download the free plugin from the WordPress plugin library.
Follow the below steps to create WooCommerce picklists.
Step 1: Install the plugins
Firstly you need to install the WooCommerce PDF Invoice plugin from the WordPress plugin library.
From your WordPress dashboard, go to Plugins > Add New. Then search for WooCommerce PDF Invoices plugin by WebToffee.

Click on the Install Now button to install the plugin. Then activate the plugin.
Now you need to install the Picklists for WooCommerce plugin. After purchasing the plugin, you can download the plugin file from the My account section.
Then navigate to Plugins > Add New from your WordPress dashboard.
Upload the plugin file you downloaded from the My account page. Then install and activate the plugin.
Step 2: General configuration for WooCommerce picklists
From your WordPress dashboard, navigate to Invoice/Packing > Picklist.
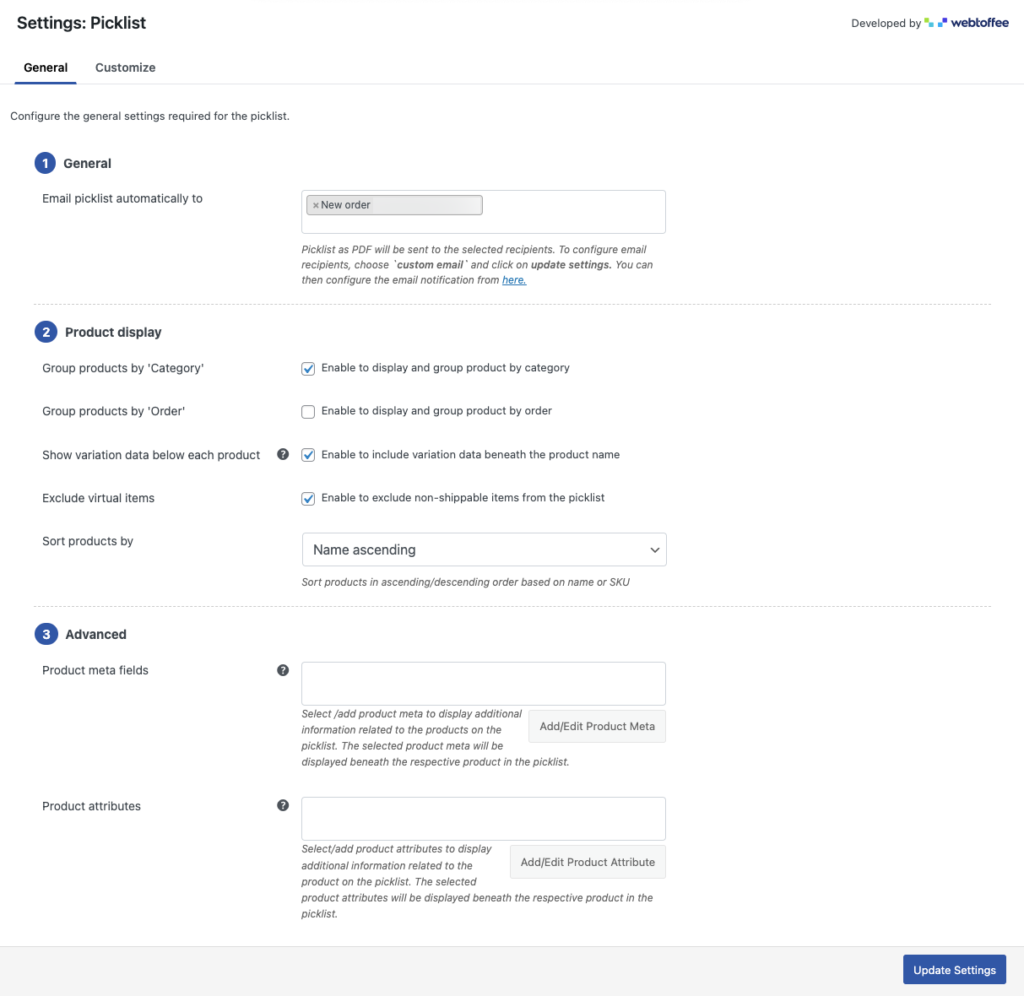
Now, from the General tab, you need to configure the general settings for the plugin.
1. Choose an order status to generate and email picklists automatically. Let’s choose ‘New order’ as the order status.
2. Then choose whether you want to display and group products by category or order. Enable or disable the corresponding checkboxes accordingly.
3. Enable the Show variation data below each product checkbox to include variation data beneath the product name. This will help warehouse pickers easily identify and pick the products and variations.
4. You may disable the Exclude virtual items to exclude virtual products like software or license keys from the picklists.
5. Then choose how you want to sort products. Let’s choose the Name ascending.
6. Now you can choose whether to include any product meta fields or attributes on the picklist file. Add necessary fields accordingly or you can leave it blank.

Now click Update Settings to save the settings.
Step 2: Customization options for WooCommerce picklists
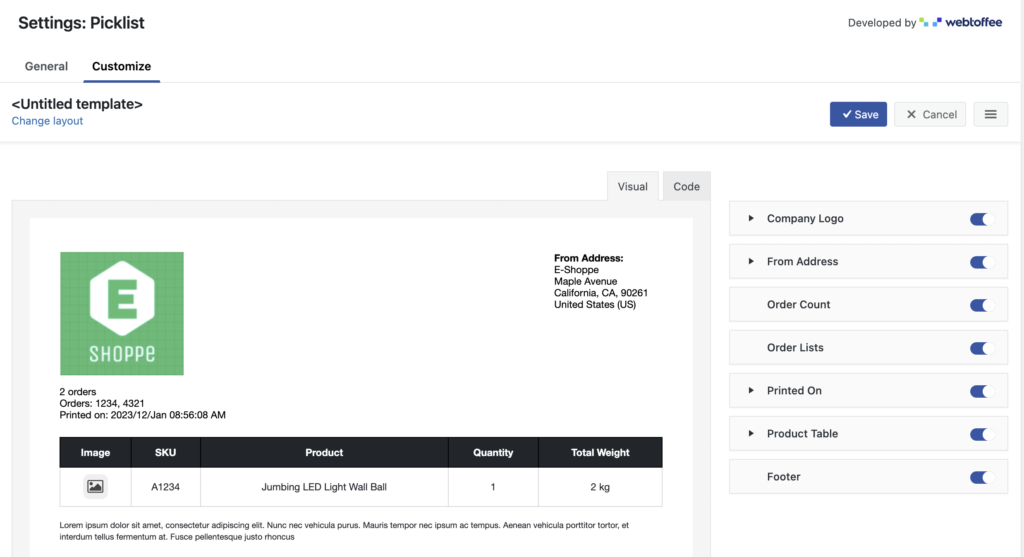
Go to the Customize tab from the WooCommerce picklist settings page.
From here you can customize the picklist for your store. You have both visual editors and code editors for customization. If you are a code wizard, go for the code editor. For now, we will go with the visual editor.
You can use the elements on the right sidebar to select and edit. Use the toggle switch to enable or disable the fields accordingly.
You can customize different elements like Company Logo, From Address, Printed On, and Product Table. Choose any element and configure the style, text, font, color, etc.

After making the necessary changes, click on the Save button to save the template. Add a template name, then save it for future use.
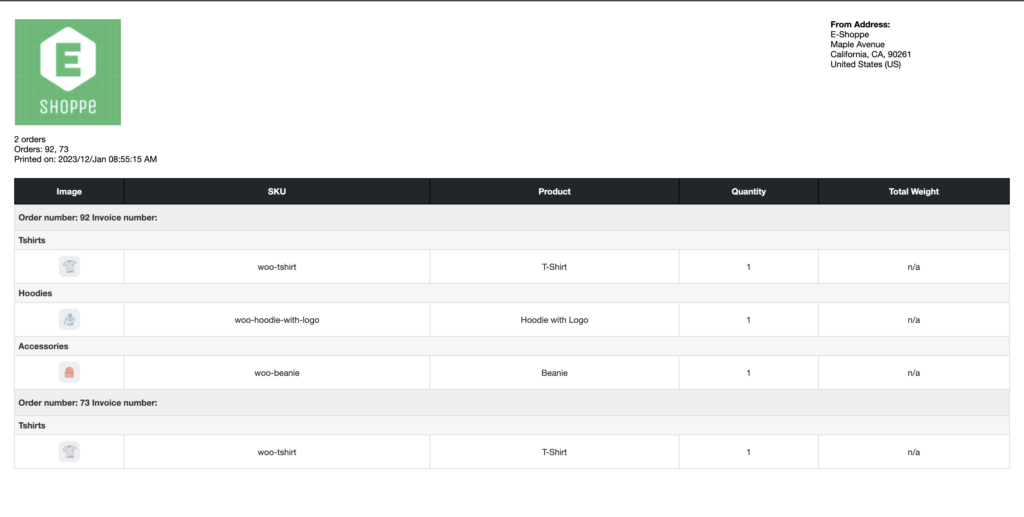
Here is an example of a sample picklist created using the WooCommerce picklists plugin.

How to print WooCommerce picklists?
The plugin automatically generates the picklists based on the order status. Now, let’s see how to access these picklists and print or email it to warehouse pickers.
From the WooCommerce tab on your WordPress dashboard, select Orders.
Now, select the orders on which you want to print the invoice. Then from the Bulk actions drop-down, choose Print picklist and click on Apply.

You can view, save, or print the picklist from here.
Wrapping up
WooCommerce picklist is a simple document that can benefit you in many ways. Your warehouse pickers will be able to easily identify the products in the order and pack it accordingly.
This will reduce the number of refunds for the ‘wrong item received.’ Sending wrong items to customers will definitely annoy them and you will lose their trust. Once lost it is not easy to get it back.
WooCommerce picklists can save you from all that trouble to an extent. The WooCommerce PDF Invoices plugin and the WooCommerce picklists plugin we mentioned in this article can be a good addition to your WooCommerce store site.
What did you think of this article? Drop us a comment below. If you want to learn more about WooCommerce invoices, see our detailed guide.
Thanks for reading.