Table of Contents
No doubt setting up an e-store will drastically increase your business. You will greatly benefit from an online shop, whether you have an existing business or are just getting started.
WooCommerce makes it easy for you to create an e-commerce website, but you may need to enable a couple of options to effectively manage and operate your WooCommerce website. In this article, we discuss variable products and how to add variable products in WooCommerce.
What are Variable Products?
Variable products in WooCommerce allow you to sell a single product in many different variations with each one having a different price, stock availability, images, shipping class, etc. You can manage each product differently.
Variable products will help you give a lot of options to your customers regarding size, color, and material at different prices.
Variable products can be used in various businesses. Below are some of the simplest examples.
- Different sizes of t-shirts, jeans, and pants for your textile website.
- Options for various toppings for your pizza.
- Offer different product material options for mobile cases, book cover material, etc.
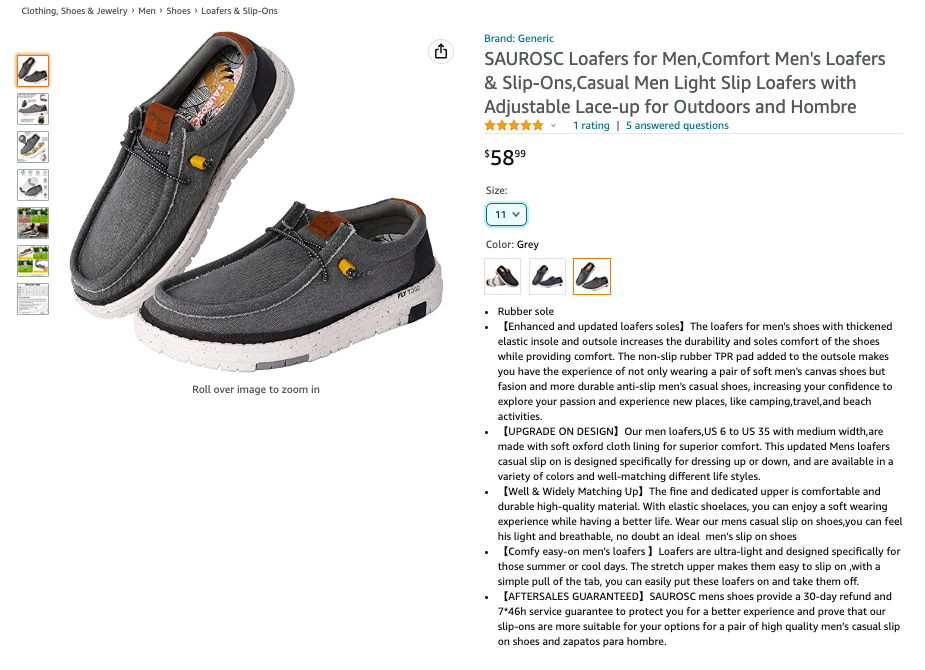
Below is an example of variable products on Amazon.
What are Attributes?
Attributes are additional product options that let your customers select from different options available. Size, Color, Material, and Type are different types of attributes.
Attributes are used to create variable products on your WooCommerce site.
There are 2 types of attributes available in WooCommerce.
Global Attributes and Custom Attributes
Global attributes are common attributes that you may use many times. You can add a global attribute so that you don’t need to manually add it all the time.
Custom attributes are specific attributes that may not be common for most products.
For example, Size options like Small, Medium, and Large can be used as a global attribute as they can be used for any products like T-shirts, Shirts, Bags, etc.
Whereas capacity is a specific attribute that can be used for bags (Capacity: 30L, 32L, 35L).
How to create Global Attributes in WooCommerce?
Let’s see how to create global attributes for your WooCommerce store. (You can skip this part if you don’t want to use global attributes)
- Open the Dashboard of your WordPress website.
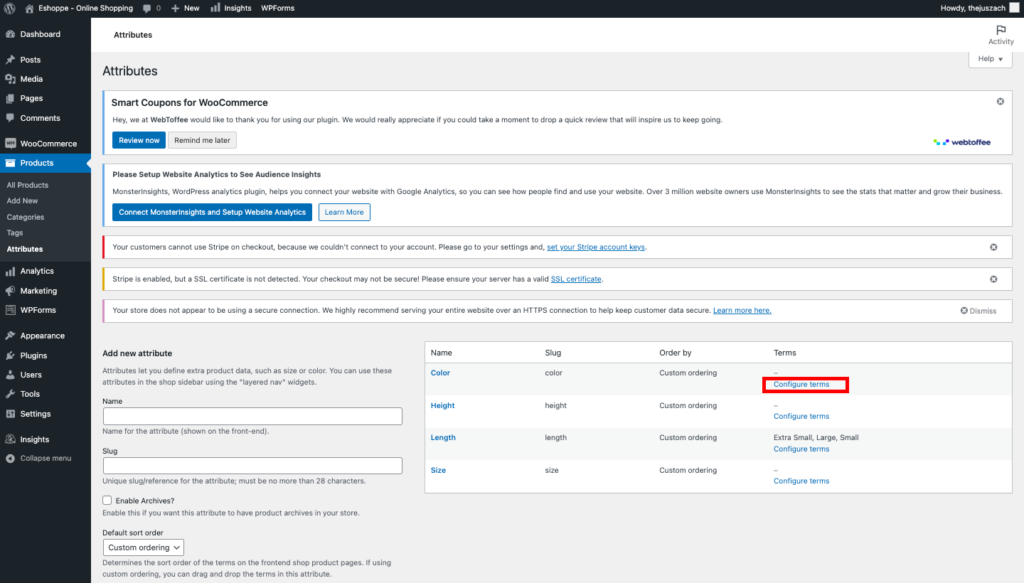
- Select Attributes from the Products menu.
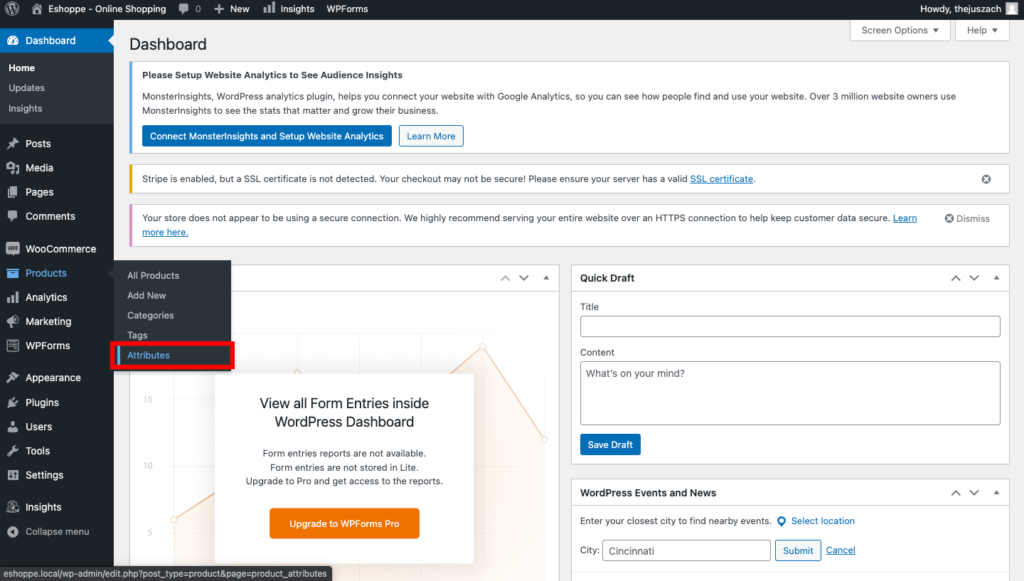
- This will take you to the Attributes page.
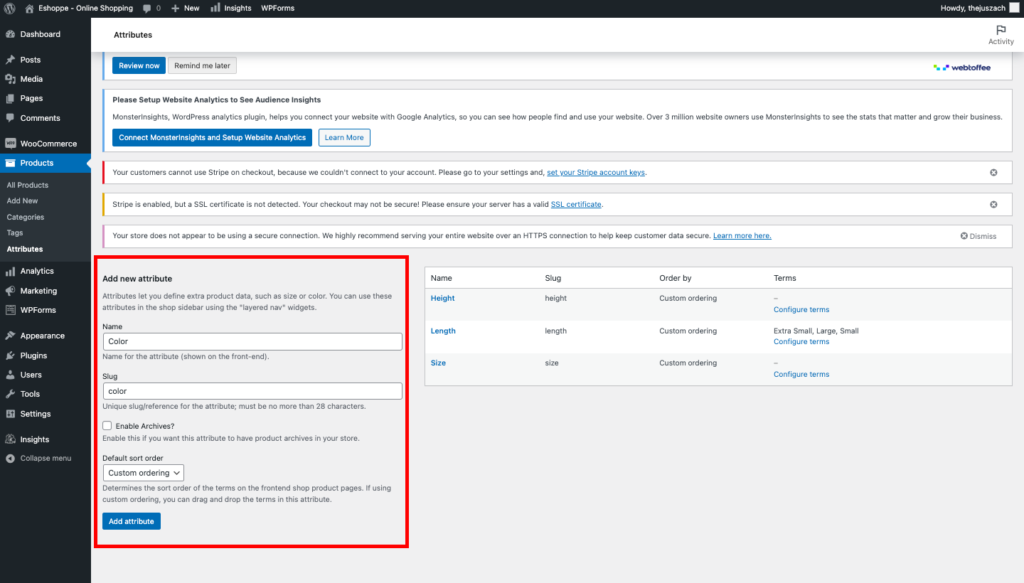
- Enter the Name for your attribute. (e.g. Color)
- Add a Slug (Optional). Slugs are URL-related versions of the Name.
- You can leave the Enable Archives checkbox unchecked. Enabling archives lets you view a page with all products having this attribute.
- Select a Default sort order. This will determine the sort order for your attribute. The sort order lets you arrange the attributes. For example small, medium and large.
You can also select Custom ordering so that you can sort the attributes manually.
- Click Add Attribute.
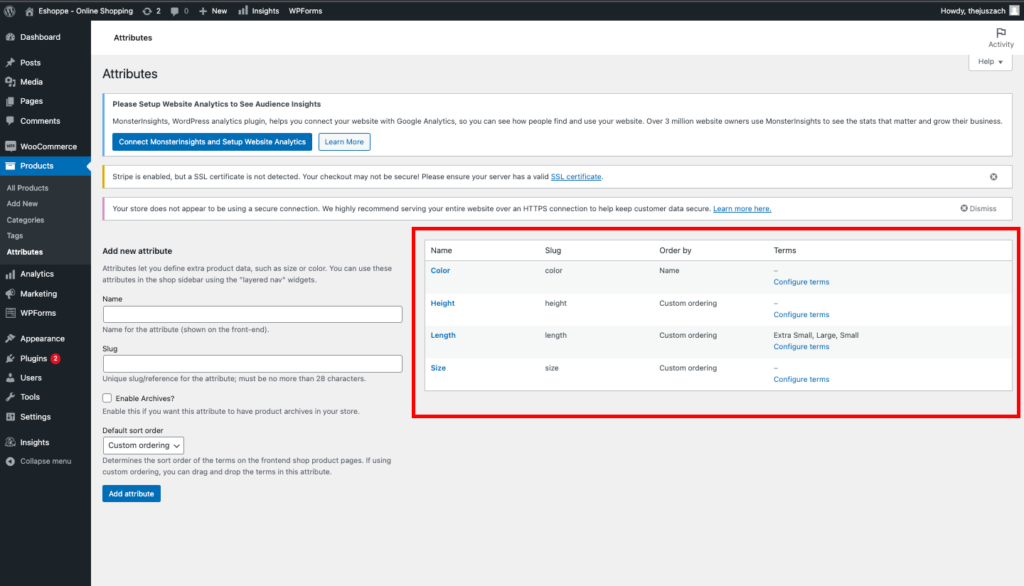
Now you can see your newly created attribute is added to the list.
Next, you need to add values to the newly created attributes.
- Click on Configure terms.
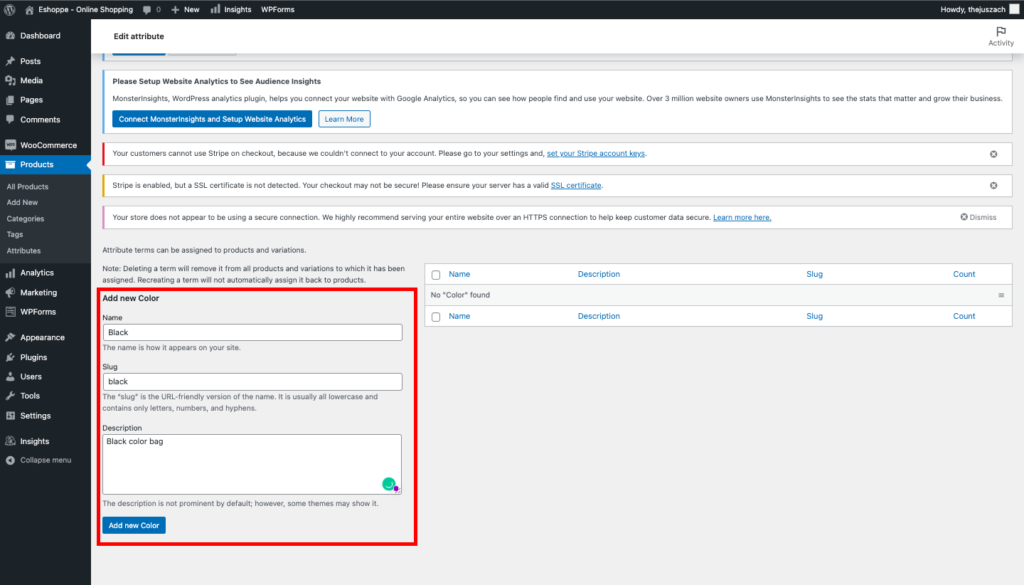
- Now you can add various values to your attribute.
- Enter Name, Slug, and a short description.
- Click Add New Color. (we chose color as the attribute)
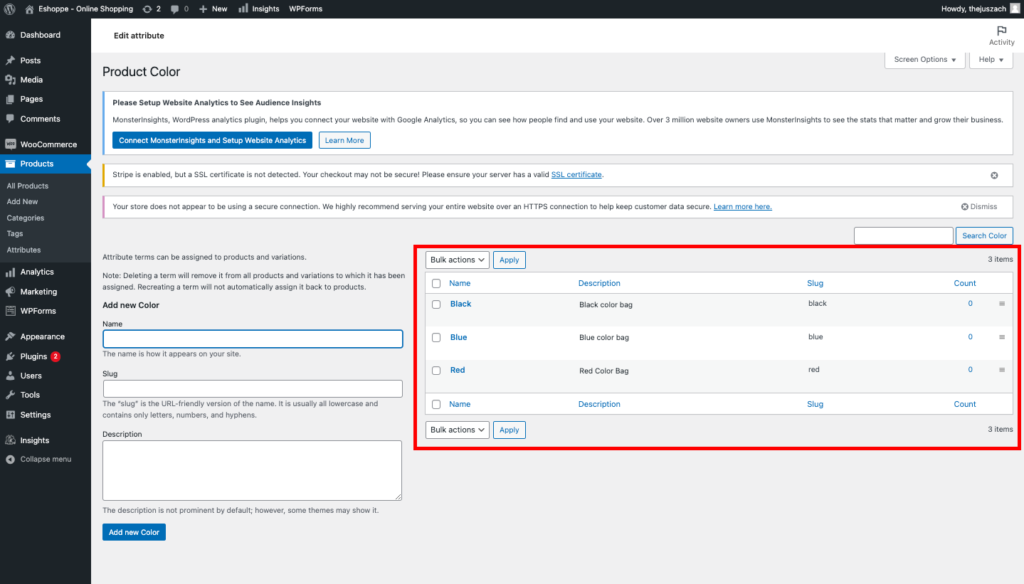
- Enter as many values as you wish.
Now you can see your values are added to the list.
Now with the attributes set, let’s kick start the step-by-step guide for adding Variable Products to your WooCommerce site.
How to add Variable Products to WooCommerce site?
The following steps will guide you to add variable products to your WooCommerce site. You can either create a new product or edit an existing one.
Step 1: Creating a new variable product
- Open the Dashboard of your website.
- Select Products > Add New.
- Enter the product details (title, description, images, etc.).
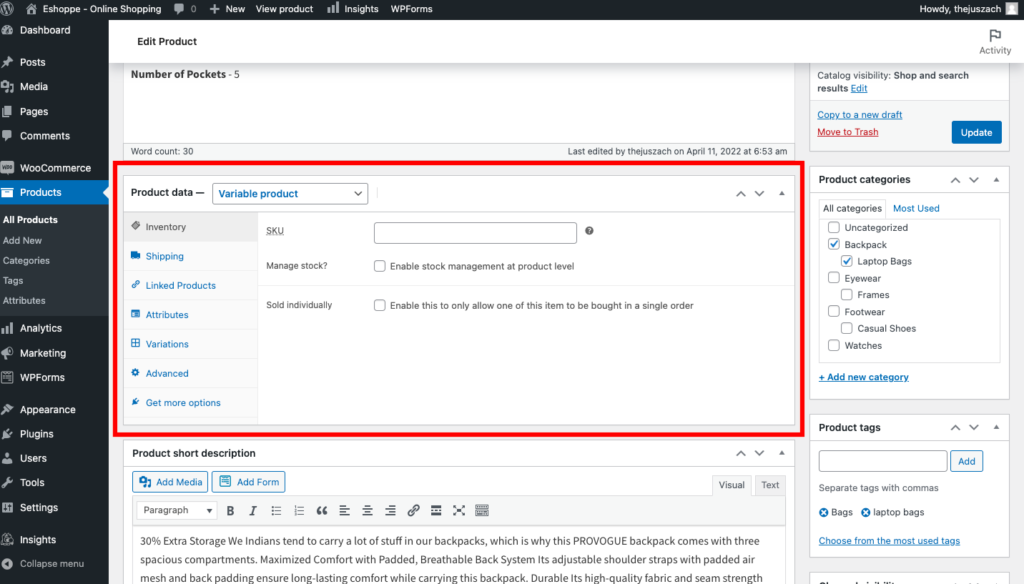
- Select Variable product from the Product data dropdown menu.
Step 2: Adding attributes
- Select Attributes from the Product Data meta box.
- Choose the global attribute you previously created. (mentioned above)
- Select Add.
- Choose Select All for the Values.
- Enable the Used for variations checkbox to add these attributes for variations.
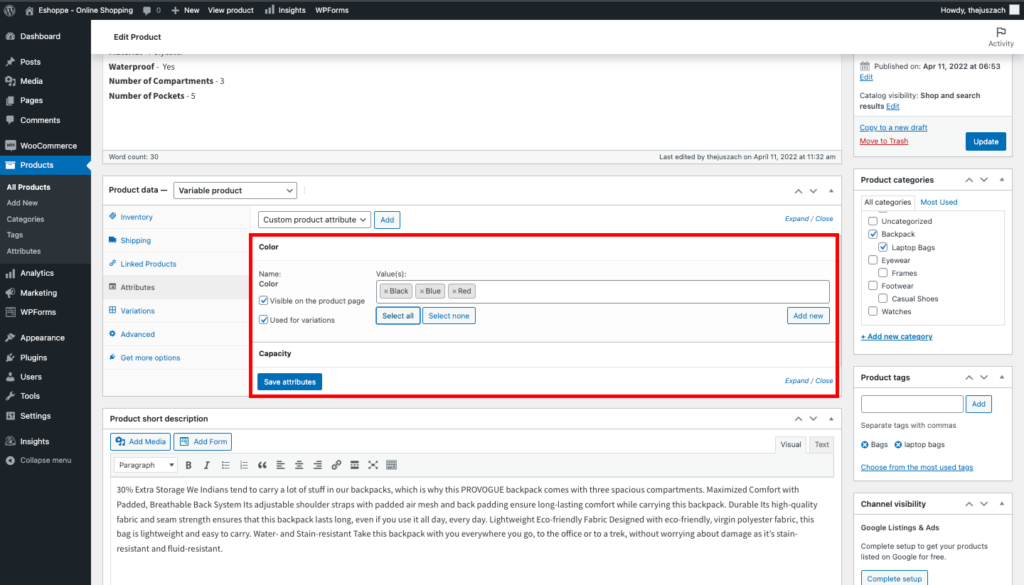
- Click on Save attributes.
You can see your attribute is added to the list. You can also add custom attributes specific to this product.
Let’s add capacity as a custom attribute.
Step 3: Create Custom Attributes
- Select Custom product attribute and click Add.
- Enter the Name.
- Enter the values and separate them using a vertical bar. (e.g., 30 L | 32 L | 35 L).
- Select the Used for variations checkbox.
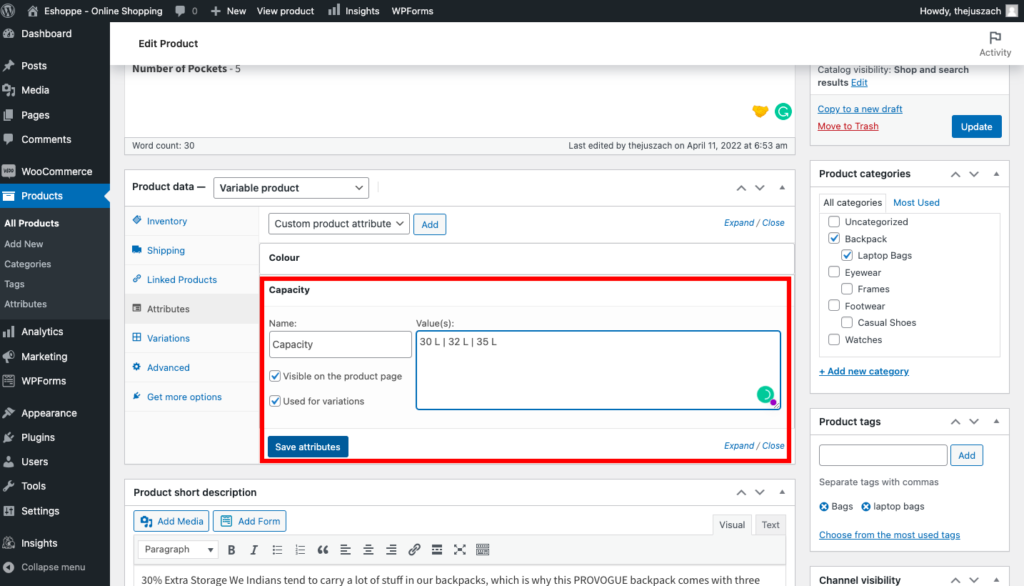
- Click on Save attributes.
Step 4: Adding Variations
- Choose Variations from the menu.
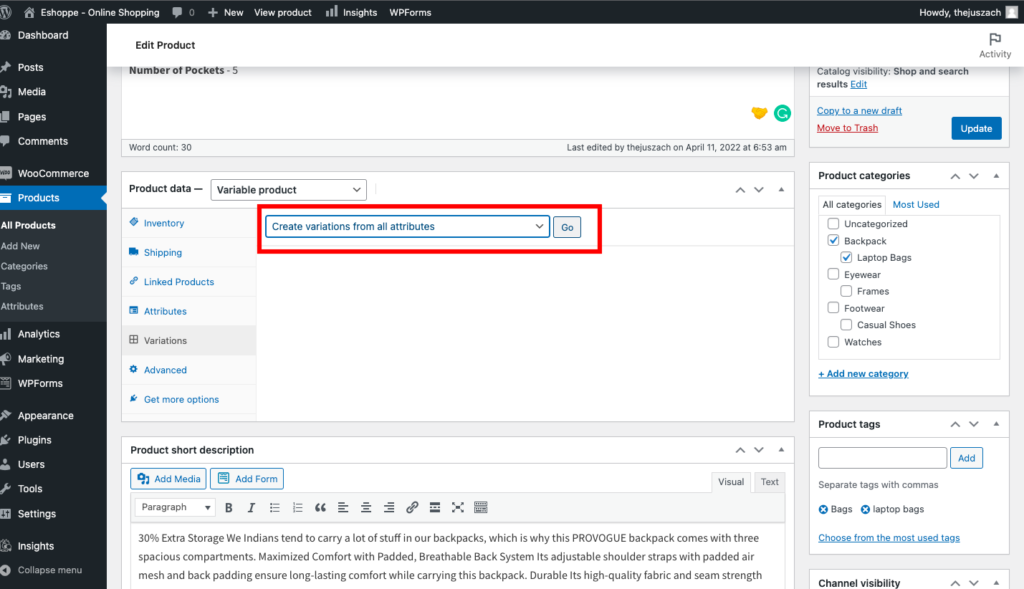
- Here also you can manually add each variation or choose to Create variations from all attributes. This will add all the possible variations for your product. For example Black 30 L, Black 32 L, Blue 30 L, Blue 32 L, etc.
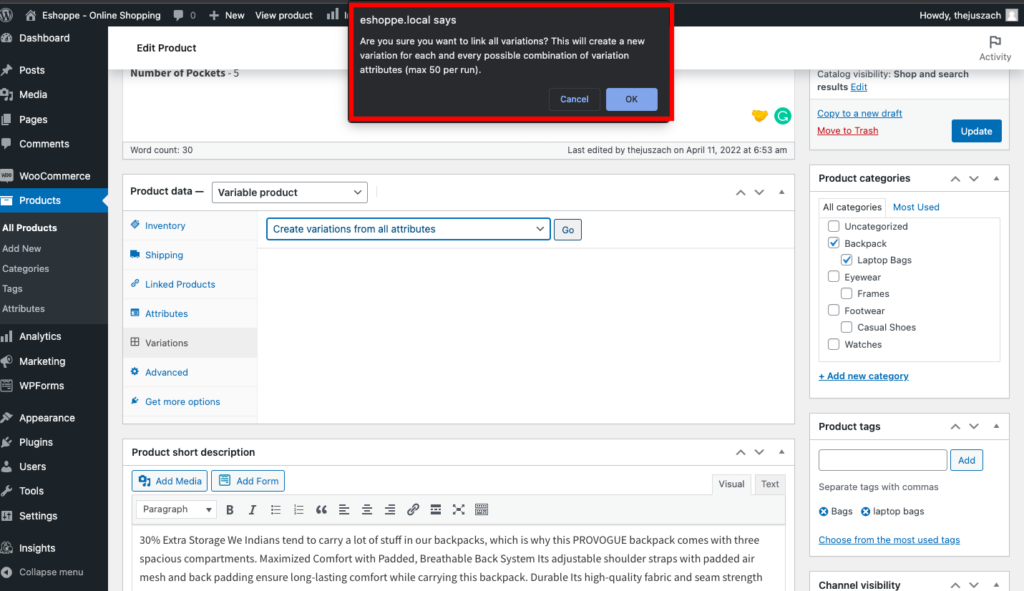
- On the alert popup, press Ok to add the variations.
- Select the default values in the Default Form Values option.
- Edit each variation, and add images, prices, and availability status.
- You can also remove variations if not required.
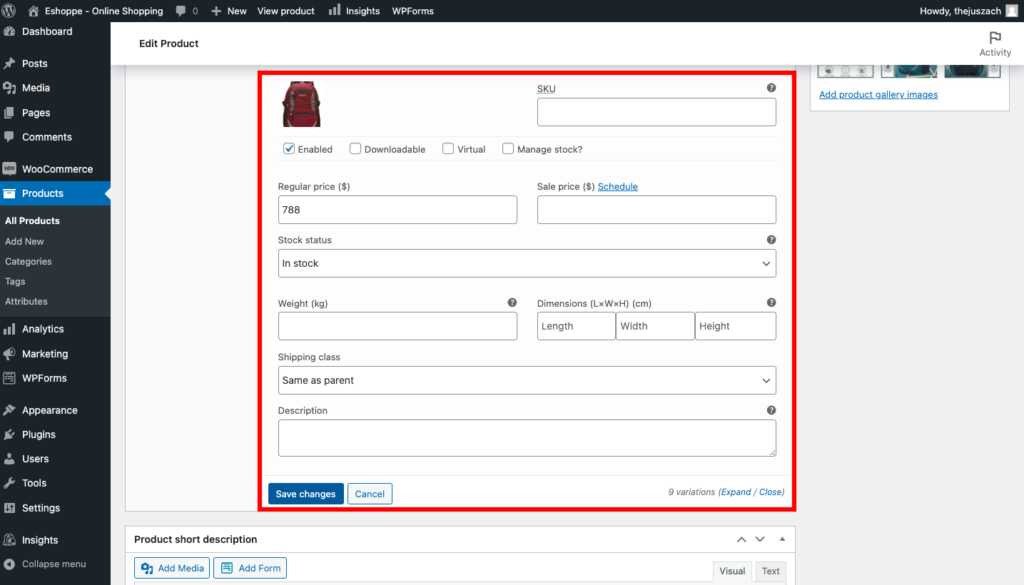
- Click Save Changes.
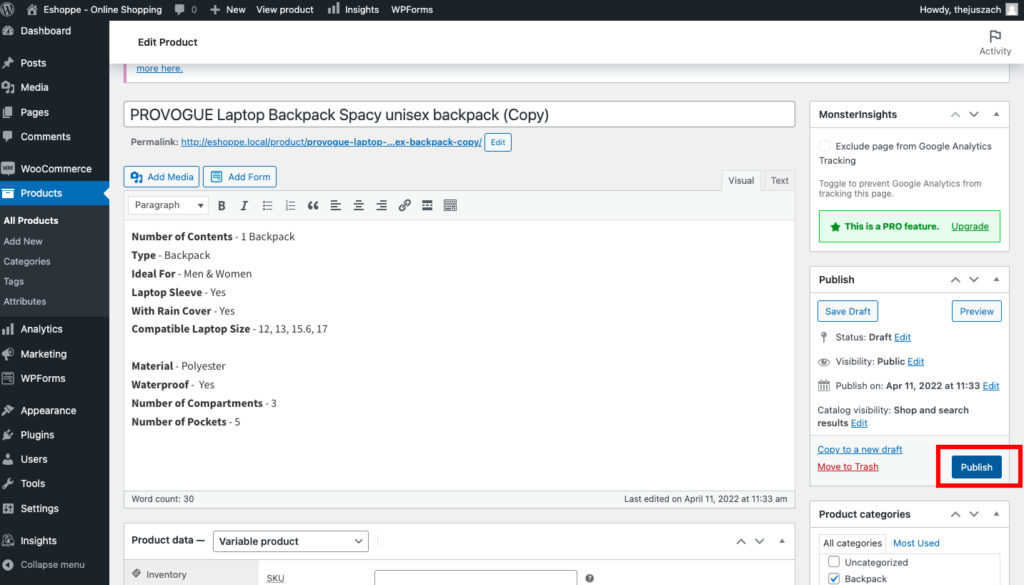
You can also Bulk edit the variations, set regular prices, discounts, etc.

Finally, review your product details and click Publish to add the product.
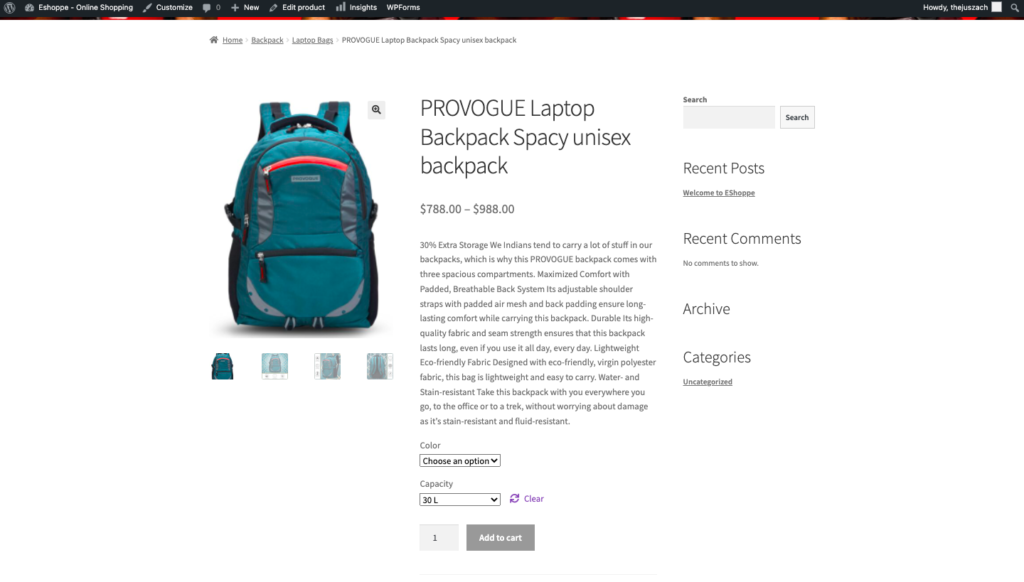
Click on the View Product to see how the customer will view your product.
Quick Tip: Don’t confuse your customer with too many variations or options.
Found this article to be useful? Please leave a comment below.
