Table of Contents
Are you messed up by your WooCommerce order dashboard with irregular Order IDs? Well, it’s not really you who made this a mess. WordPress post ID is the culprit here. WordPress generates a unique post ID for all the elements created on the website. This include, orders, products, pages, category, etc.
This means, that if you create a post, a page, a category, and an order on your website, the post IDs will be assigned in that sequence. For orders that are placed in between when different post types are created, this causes the irregularity of order numbers in your WooCommerce store.
Let’s say, for example, you have received two orders with Order IDs 001 and 002. Then you add a page to your WordPress site. WordPress will assign post ID 003 to the page you created. Later, you received another set of orders with Order IDs 004 and 005. Your WordPress Order dashboard will have products with order numbers 001, 002, 004, and 005. There’s no 003 as it is assigned to the page you created. It occurs because Order ID and Post ID in WooCommerce are the same. This creates a lot of confusion especially when you are managing bulk orders.
In this article, we will give you a solution to this trouble. There are numerous plugins that help you set your order numbers in sequential order. We will be using the Sequential Order Number plugin by WebToffee for this tutorial.
Step-by-step guide to set the WooCommerce Order IDs in Sequential order
Before we begin, let’s see how the Order dashboard looks by default.
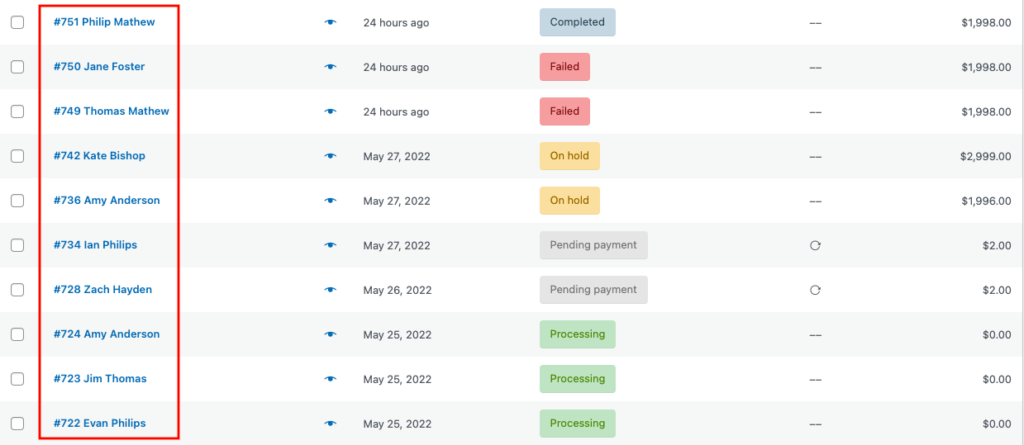
As you can see, the Order IDs are not in sequential order. We will fix this shortly.
Step 1- Plugin Installation
Open your WordPress dashboard.
Go to Plugins > Add New.
Search for Sequential Order Number plugin.
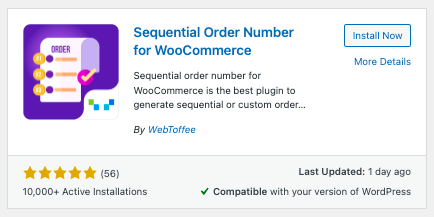
Install and Activate the plugin.
Step 2 – Plugin Configuration
Go to WooCommerce > Settings.
Select the Sequential Order Number tab.
Let’s see the plugin settings in detail.
Order Number Format
There are four options here:

- [Number]: The order number only
- [Prefix] [Number]: Add any prefix with the order number. (eg: wp001)
- [Date] [Number]: Add the date of purchase with the order number. (eg: 22/05/24-1)
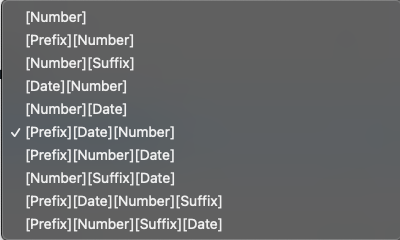
- [Prefix] [Date] [Number]: Add prefix+date+order number (eg: wp22/05/24-1)
Select a date format from a predefined list. You can use various alphanumeric characters (/, \, -, _, ) to your date. (eg: [y]/[m]/[d]-)
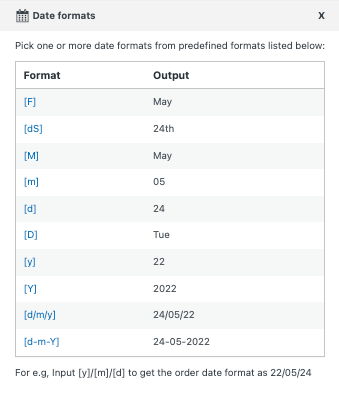
Order number length: You can set the order number length here. The length of the prefix or the date won’t count here.
Start Number: Set the start number for the order IDs.
Apply for all orders: If you want to apply the number format to existing orders, enable the check box. Else, leave it unchecked.
Track orders: Enable this option If you want to allow tracking the orders using Order IDs.
Search orders: Enable this option if you want to search orders in the WooCommerce order directory using the Order IDs.
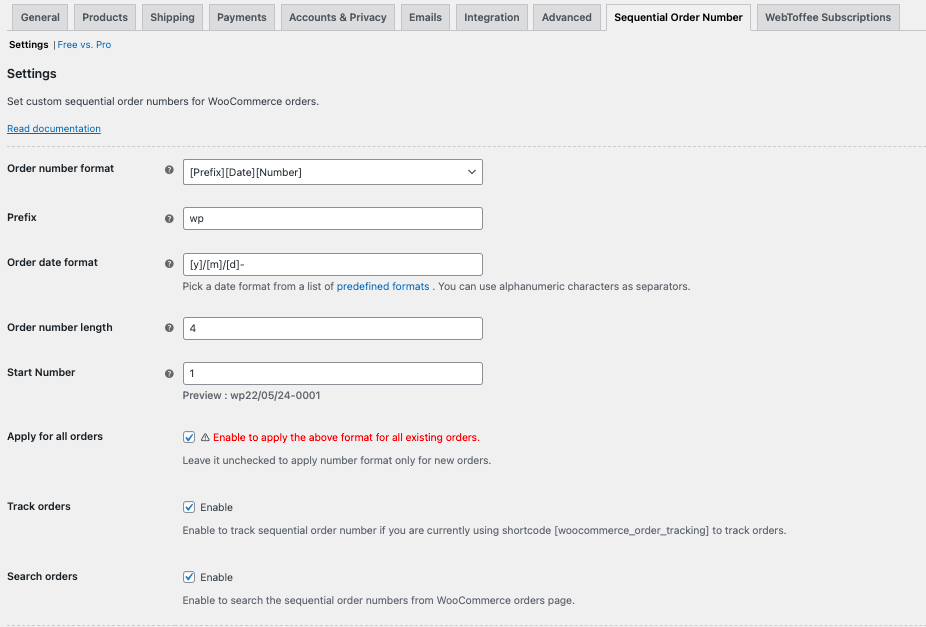
Click on Save Changes.
Step 3 – Testing the changes
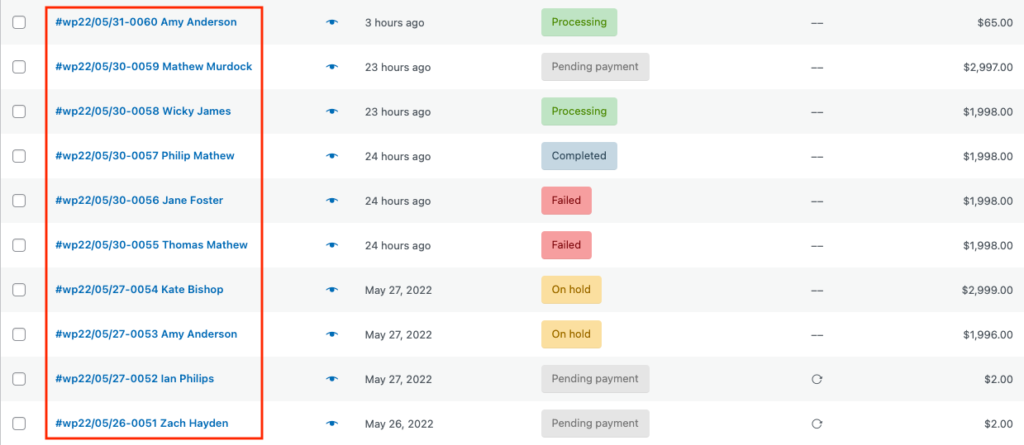
Now let’s see the changes made.
Go to WooCommerce > Orders.
As you can see, the order numbers are in sequential order.
Premium Features of the Plugin
As mentioned earlier in this article, the plugin has a premium version at $49. Let’s explore what the premium version has to offer.
Unique Custom Order Numbers
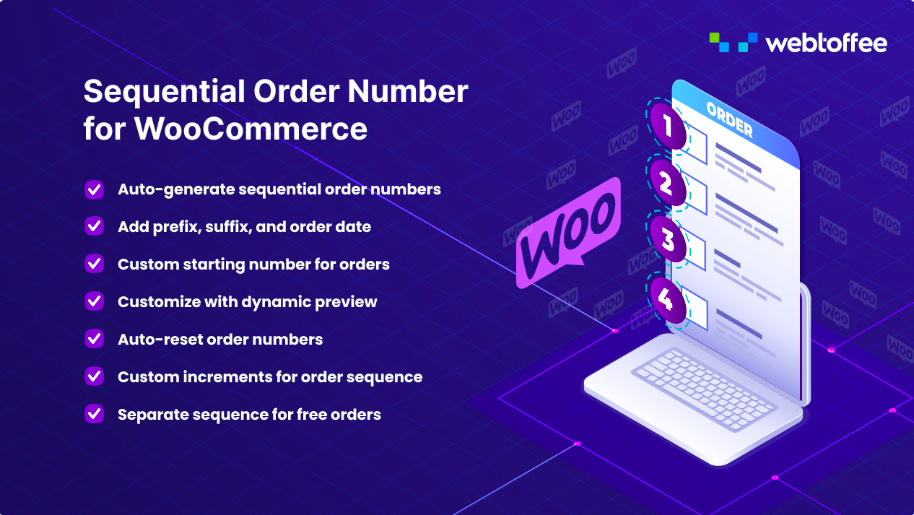
You can create unique custom order numbers with Prefix, Suffix, Number, and Order date.
Separate order sequence for free orders
Create a separate order sequence for free orders with zero cart total. In this way, you can easily monitor the revenue by filtering out the free orders.
Sequence with custom increments
You can set custom increments for the order numbers. (For example: if you set 5 as the increment value and 5 as the starting number, your order numbers will be 5,10,15….)
Auto-reset order numbers
You can enable auto-resetting order numbers daily, weekly, or monthly.
How to create a separate order sequence for free orders?
Now let’s look at creating a separate order sequence for free orders. As this is a premium feature make sure, you have purchased the premium version.
Go to WooCommerce > Settings > Sequential Order Number Pro.
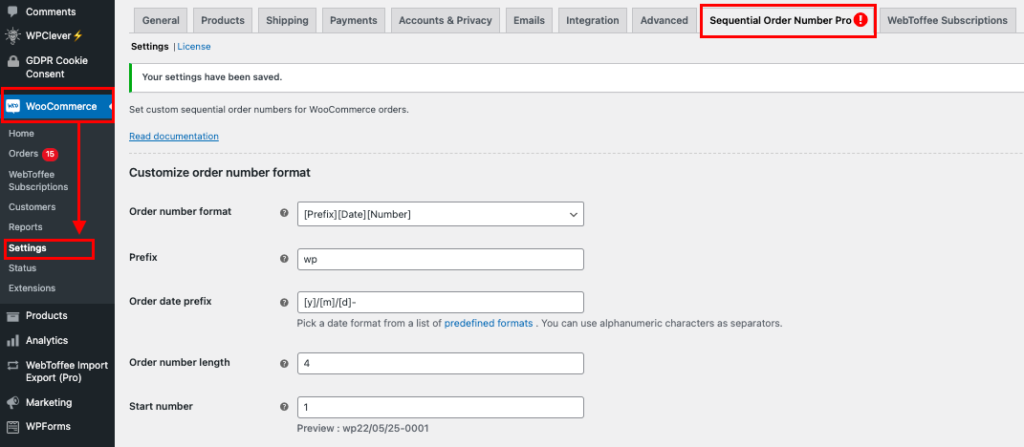
Enable the ‘Separate sequence for free orders’ checkbox.
Let’s set ‘1’ as the start number and ‘FREE’ as the prefix.
Click on Save Changes.
Now go to WooCommerce > Orders.
Here you can see Free orders have separate order numbers.

Creating custom sort orders can save you a lot of time and allows you to manage the orders efficiently. The plugin we mentioned in this article is very beginner-friendly and easy to use.
We are always looking for ways to share useful information with you. If you find this article to be helpful, let us know in the comments. Your feedback is our motivation.