Table of Contents
Do you wanna set up Buy One Get One Free (BOGO) offers in your WooCommerce store? Freebies are always a hit with customers, so let’s reward them with BOGO deals and boost sales in our WooCommerce store.
By default, there isn’t any option to add BOGO deals to WooCommerce. Hold on, that’s why we got plugins.
In this article, we will be explaining how to set up BOGO offers in WooCommerce using a free plugin. The following steps will guide you through the setup process.
Step 1: Install plugin for WooCommerce BOGO offers
There are only a few WooCommerce BOGO coupon plugins available in the WordPress plugin directory. We found the ‘Smart Coupons for WooCommerce’ plugin by WebToffee offers the easiest way to create WooCommerce BOGO deals.
Open your WordPress dashboard.
Go to Plugins > Add New.
Search for ‘Smart Coupons for WooCommerce’ plugin by WebToffee.
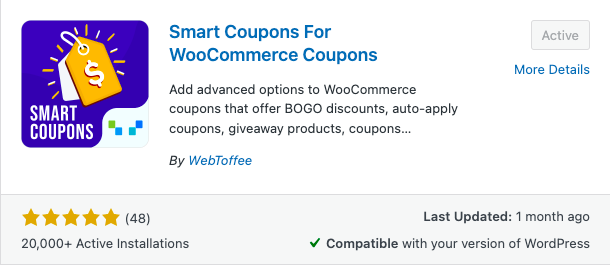
Install and Activate the plugin.
Step 2: Setting up BOGO offers in WooCommerce
Navigate to Marketing > Coupons from your WordPress dashboard.
Click on Add coupon.
Add a coupon code and coupon description.

Scroll down to the Coupon data meta box and select the General tab.
Choose Discount type as BOGO (Buy X Get X/Y) offer.
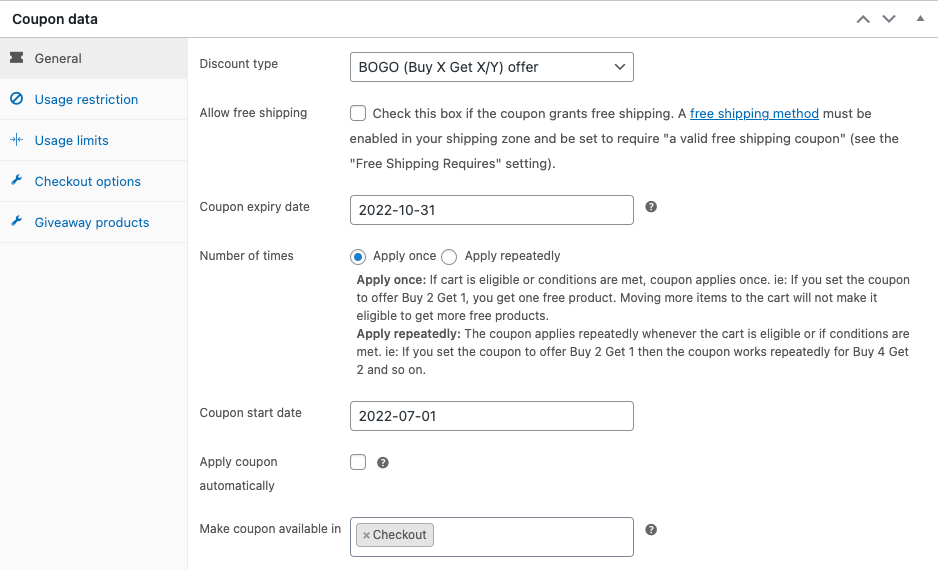
Set the coupon expiration date and the number of times the coupon is to be applied.
If you choose to apply repeatedly the coupon will be applied multiple times when the condition is met.
Let’s say, for example, you created a Buy One Get One deal for a product, and then added the product again, you’d get another free product and it will go on.
Set the coupon start date and check the Apply coupon automatically checkbox to automatically apply the coupon when the coupon conditions are met.
Select where you want to make the coupon available, you can choose the My Account page, Checkout page, or both.
Step 3: Adding conditions for WooCommerce BOGO offers
Go to the Usage Restrictions tab under the Coupon data meta box.
Select the minimum and maximum spend limit for the coupon to be eligible.
Check the Individual use only checkbox to restrict other coupons to be used along with this BOGO coupon.
Enable the Product/Category restrictions checkbox if you want to offer BOGO to specific products only.
If you want to set minimum and maximum quantity restrictions for each product, enable the Individual quantity restriction checkbox.
Specify the products for which you want to offer BOGO deals in the provided field.
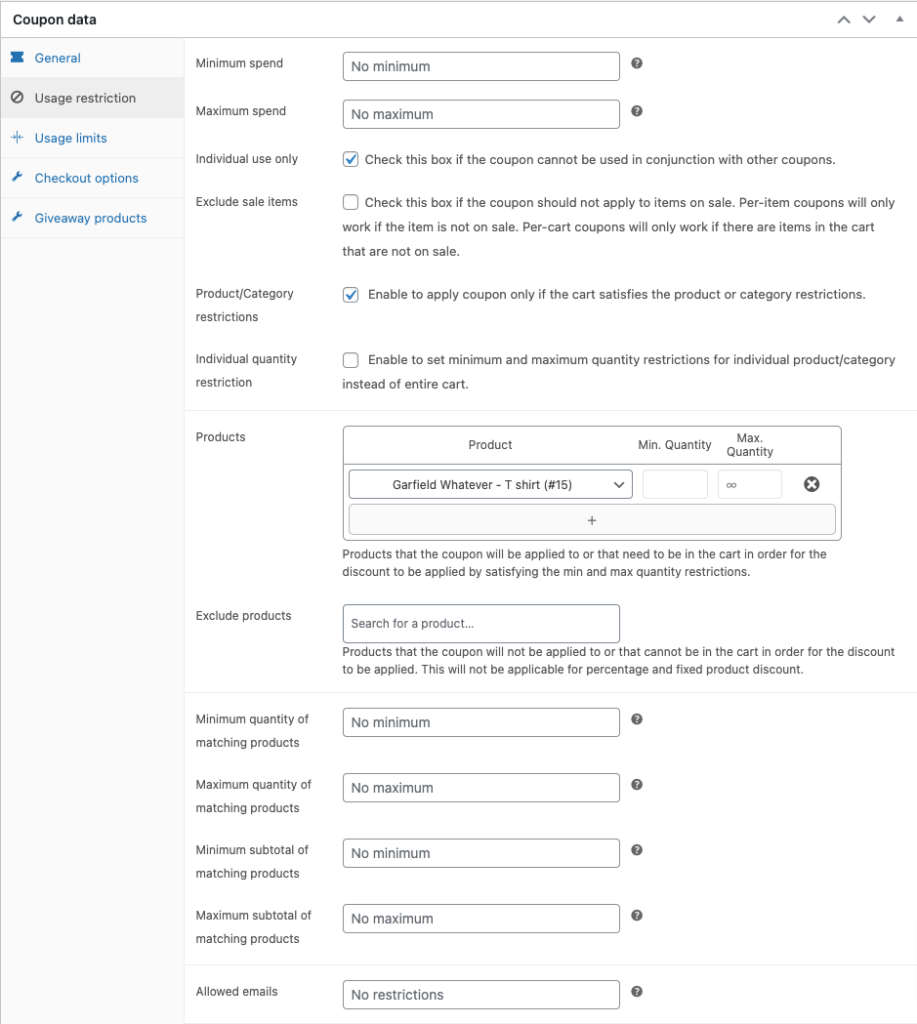
Leave the rest as default.
Step 4: Adding free product
Go to the Giveaway product section. Here you can specify the free product.

Choose the BOGO deal product you would like to offer for free. Select the quantity and the discount percentage or amount.
Click on Publish to save the coupon.
Step 5: Testing WooCommerce BOGO offers
Go to the product page and add the product to the cart.
Enter the coupon code and click Apply Coupon. The coupon will be automatically applied if we enabled the auto-apply coupons.
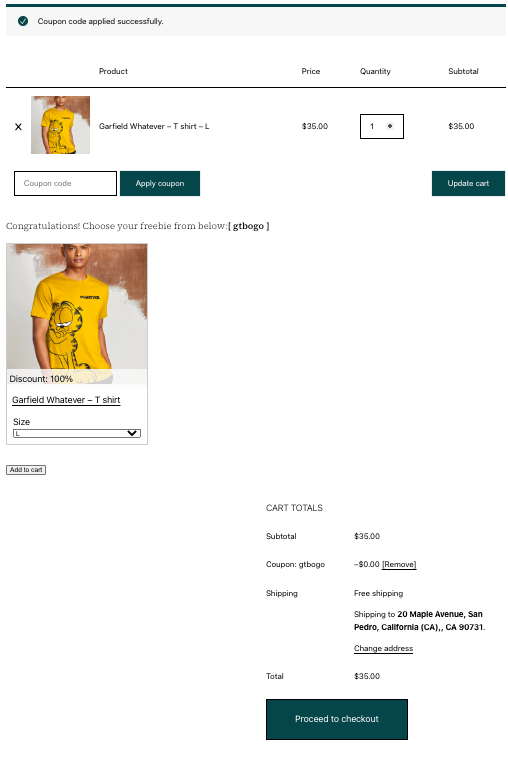
You can see the freebie product. Select the freebie product and add it to the cart.
The giveaway product will be added to the cart free of charge.
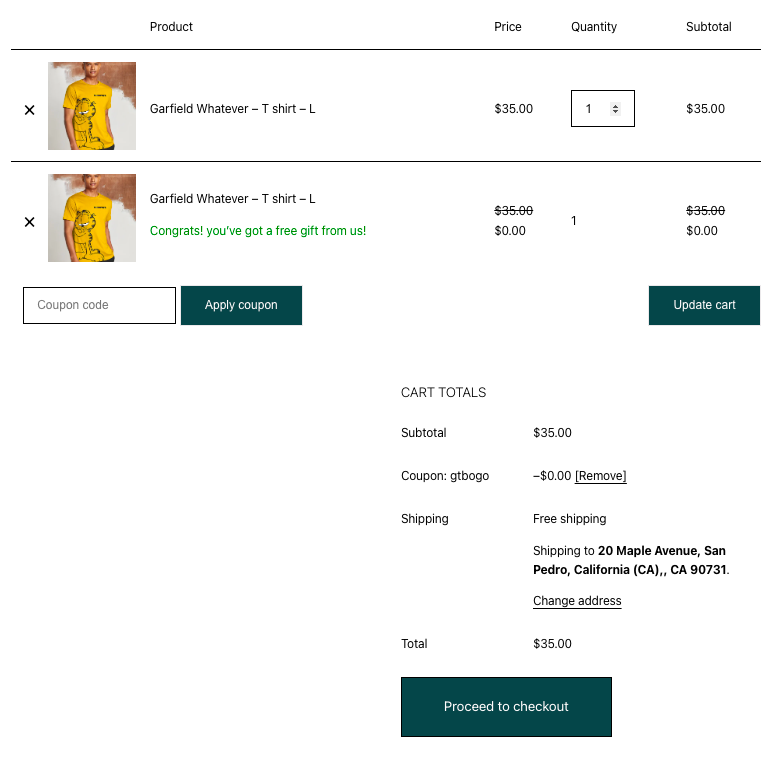
Proceed to checkout and complete the transaction.
You will be taken to the order confirmation page. There you can see the order details with the freebie product.
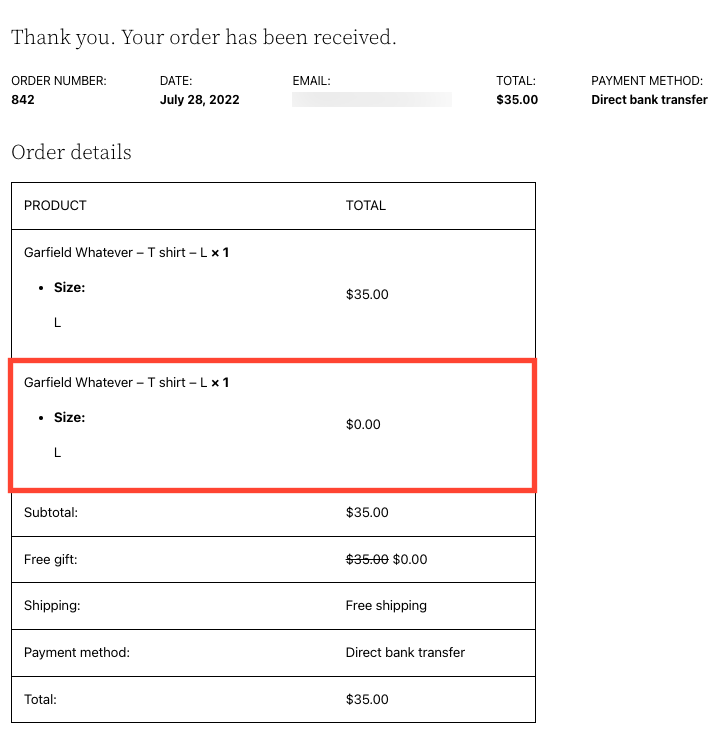
This way you can create Buy One Get One Free offers on your WooCommerce store.
Wrapping up
The plugin we discussed in the article has a premium version with all the WooCommerce advanced coupon features you are looking for in your store. It comes with store credits, cart abandonment coupons, and much more.
We believe, this article helped you in creating Buy One Get One Free (BOGO) offers for your WooCommerce store. You might also be interested in reading our article on the best coupon plugins for WooCommerce.
Have any thoughts on your mind? Drop them in the comments.