Table of Contents
As long as your website is available online accessible for the public, it is under the threat of hacking, data breach, etc. Although you can prevent these unfortunate incidents to a great extent by using advanced security measures, even a narrow flaw could cause huge losses.
Hence it is best recommended to keep a copy of your website that you can restore or reinstall later should something go wrong. This copy is also known as your website’s backup.
Backing up your website’s data is of grave importance if you do not want to risk losing your precious data forever. This article will guide you through the process of effectively backing up your website. Give it a thorough reading to find out how.
What is Included in a WordPress Website Backup?
To put it simply – everything. On a broad level classification, it can be divided into two WordPress files and database.
WordPress files include all your images and media uploads, your WordPress plugins and themes, and core WordPress files.
What are the Different Ways to Backup Your Website?
You can create a backup of your website in many different ways. Depending on your available resources, requirements, etc., you can pick the most appropriate method for backing up your website.
The following are the three most popular ways that people use to back up their websites.
- Backup through hosting
If you haven’t heard before, website backup through your host has become a popular backup method. Most website hosts today offer automatic daily backups along with their hosting plans thus leaving you worry-free about your website’s backup.
However, certain cheap hosts will not carry out a complete backup of your WordPress website. All they will do is the backup of My SQL database and it might be hard for you to even get a copy of the backup.
- Manual WordPress backup
Manual backup can be done either via your website’s control panel or using SFTP. This way you are in complete control of taking backups without relying upon anything else.
- Automatic backup using plugins
There are a number of WordPress backup plugins available for enabling automatic backup of your WordPress website. In this way, all you have to do is choose your favorite backup plugin and configure it to enable automatic backup of your website.
In this article, we will focus on how you can create a backup of your WordPress website with the help of a plugin.
UpdraftPlus is one of the most popular WordPress plugins for creating backups with over 1 million active installations. Let’s explore the steps involved in creating backups with Updraft plus.
How to Backup Your WordPress Website with UpdraftPlus (Free Version)
UpdraftPlus – A Brief Review

UpdraftPlus is an excellent backup plugin available in both its free and premium versions. It’s fast and requires only fewer server resources to do the job.
You can set up an automatic website backup and save the backup data directly into Dropbox, Google Drive, Amazon S3, UpdraftVault, Rackspace Cloud, FTP, DreamObjects, Openstack Swift, and email, etc.
You can avail of even more features with its premium version. Here they are.
- Incremental backups
- Easy website migration
- Multisite/multi-network compatibility
- Backs up non-WP files and databases to multiple remote destinations
- More storage destinations (e.g. OneDrive, BackBlaze, Azure, SFTP) and multiple destinations.
- Database encryption
- Advanced reporting
- Supports WP-CLI
- Free dedicated expert support
Steps to Backup Your WordPress Website with UpdraftPlus
You may follow the below steps to easily backup your website with UpdraftPlus.
Step 1- Install and activate the UpdraftPlus plugin
For this, you may navigate to Plugins > Add new from your WordPress dashboard and search for “UpdraftPlus”.
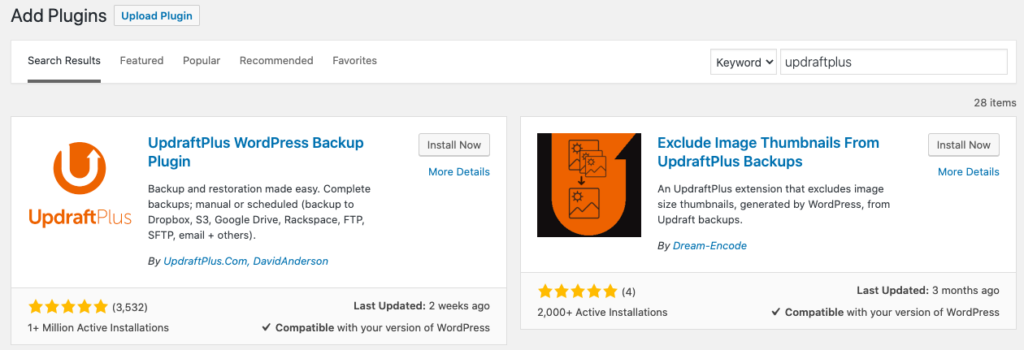
Click Install Now and then Activate the plugin.
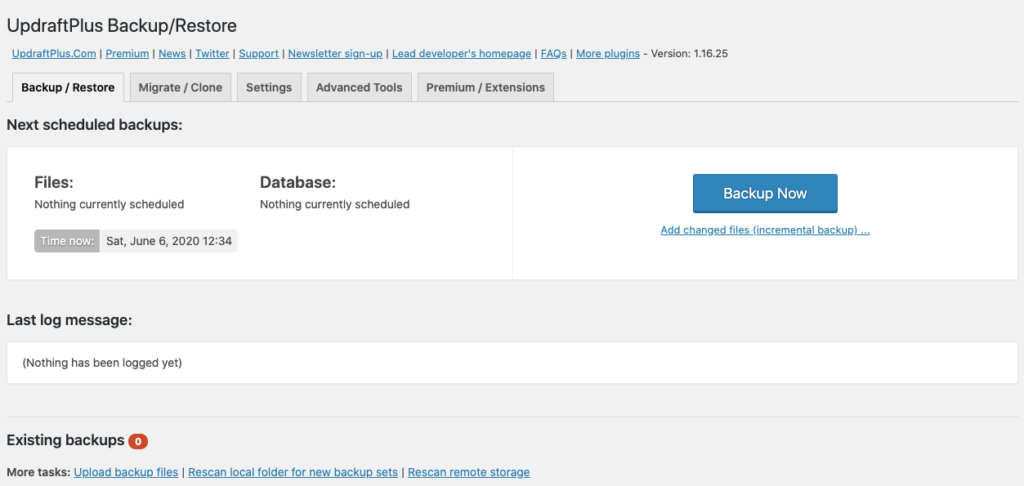
Step 2- Open the backup configuration window
You can navigate to the backup configuration page by going to Settings > UpdraftPlus backups from your WordPress dashboard.
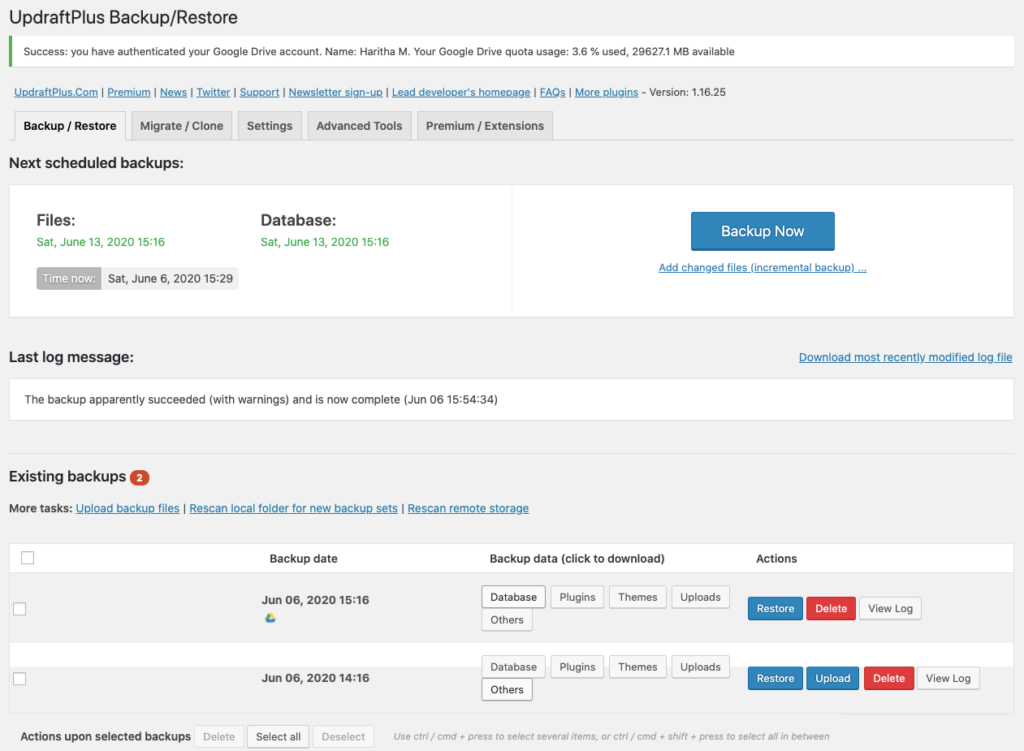
Open the Backup/Restore tab.
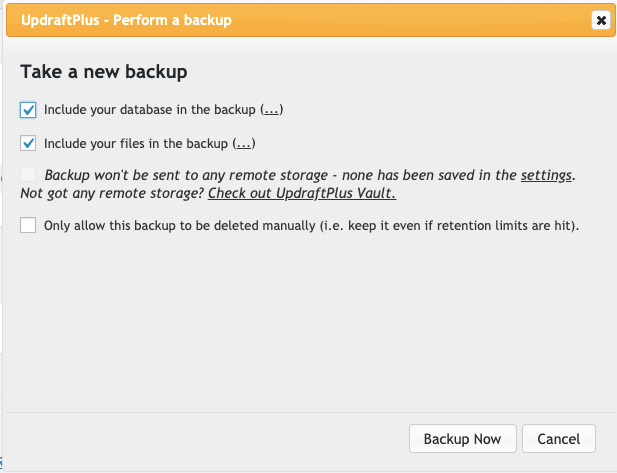
Hit the Backup Now button to create a backup of your website instantly.
This triggers a pop-window as shown below.
Step 3 – Click the backup now button.
This kick starts the backup process and once it’s complete you will be displayed as shown in the below screen.
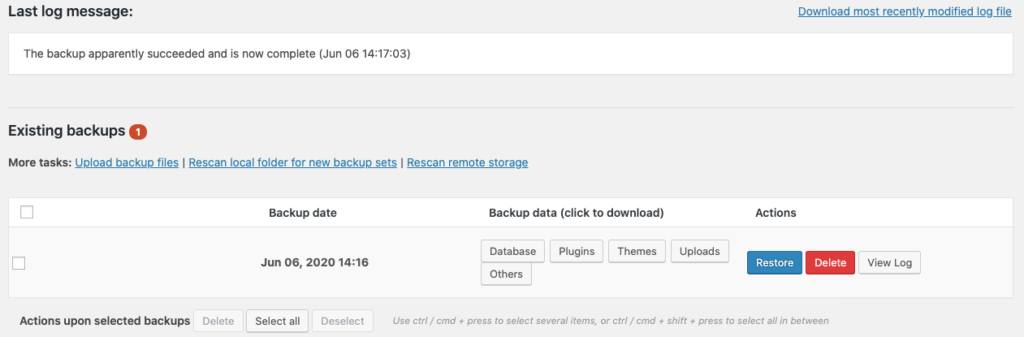
It shows the backup date, backup data by name for you to download, and the options to restore or delete your website’s backup data.
Scheduling Backups with UpdraftPlus
In addition to instant backups, it also allows you to schedule automatic backups. The following steps will show you how.
Step 1- Open the settings tab

Step 2- Select a backup schedule from the drop-down
You can choose to schedule backups on an hourly basis (every 2,4,8,12 hours), daily, weekly, fortnightly, and monthly basis. You have to choose a backup schedule for both files and database.
Step 3- Choose your remote storage location
You can choose a remote storage location from the available options for saving all your backup data. The plugin offers a number of different locations like FTP, SFTP, Dropbox, AmazonS3, Microsoft Azure, Google Drive, Google Cloud, and more.
You can choose one by clicking on the icon.
Now scroll down to the end of the page and click the Save changes button to save all your settings.
Now a pop-up window will appear asking you to configure the authorization settings for the chosen remote location. You can click the link on the pop up to authorize the remote storage.
For example, if you have chosen Google drive as your storage location, you will be going through the following authorization setup.
Step 4- Authorization of Google drive
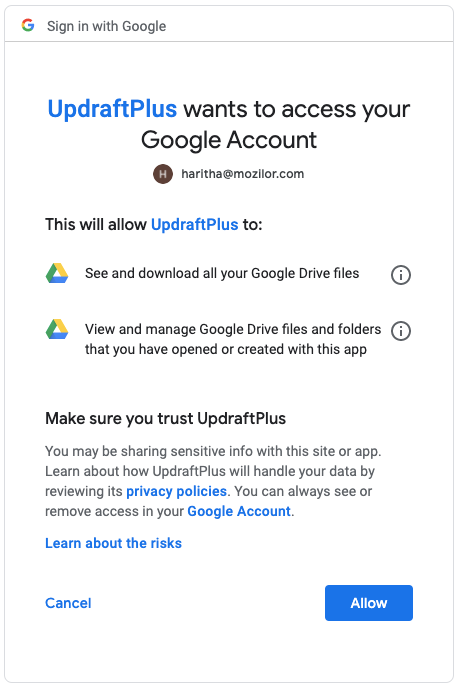
Hit the Allow button.
This will take you to the following page.
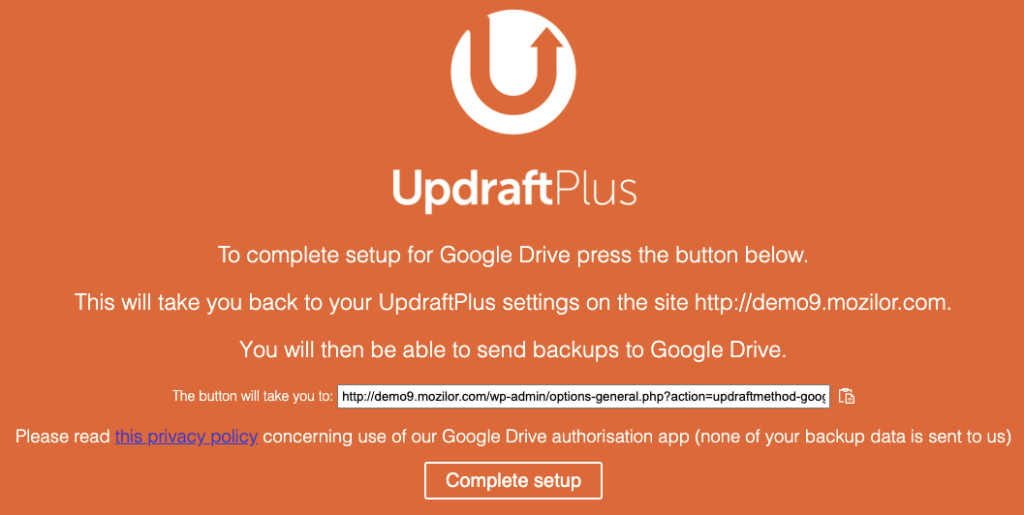
Click the Complete setup button to finish the scheduling backup. Now you will be redirected to the Backup/Restore page of the plugin where you will be able to see the next scheduled date of the backup (as you configured) and backup restore options.
Wrapping Up
Reading this article must have made you realize the easiness of creating a backup of your website. You don’t need any technical expertise to carry out this task. Thus make sure you create a backup as soon as possible to keep your data safe.
