Table of Contents
Imagine your WooCommerce store has some amazing coupon deals to offer your customers. But how would it help your store if no one is aware of your store’s offers? Your visitors should know about the offers in the first place to make use of it.
That’s when embedding URL to coupons come into the play. In this way, you will be able to embed the coupon URL to any blog post or articles where it’s easy for people to notice the availability of coupon deals in your store. Once they click on those links the coupon will be applied automatically along with adding the products to their cart, thereby making it easy for your customers to make purchases without having to remember the coupon code.
This method would be a huge help in reducing cart abandonment and in increasing conversion rate of your WooCommerce store. You can easily introduce it into your WooCommerce store by with the help of a plugin. URL coupons for WooCommerce is a great tool for the task. This article will explain to you the way in which you can enable this in your WooCommerce store.
Installation
After purchasing the URL coupon For WooCommerce, the plugin will be available as a zip file in the API Downloads section of your My Account page.
- Download the zip file from API Downloads by logging into your Webtoffee MY ACCOUNTS page.
- Log in as the WordPress Admin of your online store.
- Navigate to Plugins > Add New to upload the downloaded plugin.
- Choose the plugin file to upload.
- Finally, activate the plugin.
To make the most out of this plugin, you may use a combination of URL coupons and Smart Coupon Plugin for WooCommerce in your WooCommerce store so that you can configure attractive coupon deals in it.
Apply Coupons to URL’s
You can apply a coupon to URL in a few minutes by using URL coupon for WooCommerce plugin. Here are the few steps involved in the process.
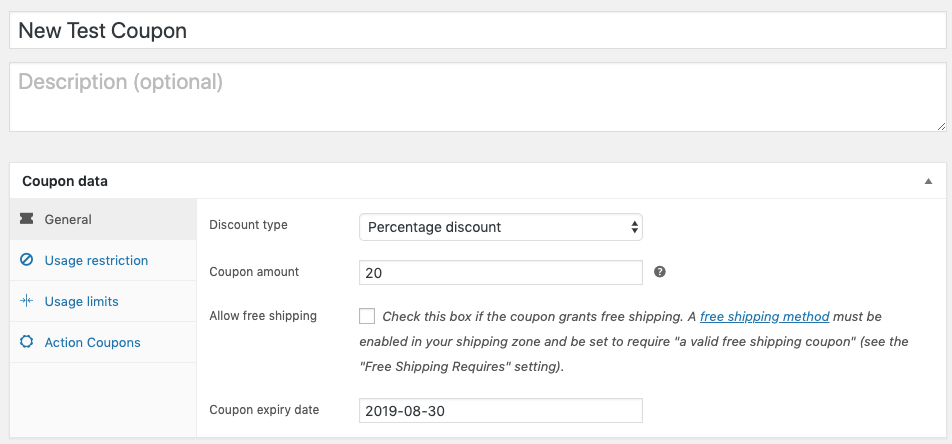
- Create a coupon offering a certain discount.
Eg: Here is how to configure a coupon offering a 20% discount.
- After filling up the usage restriction and usage limits according to your preferences you can move to the Action Coupons tab to configure coupon URL settings.
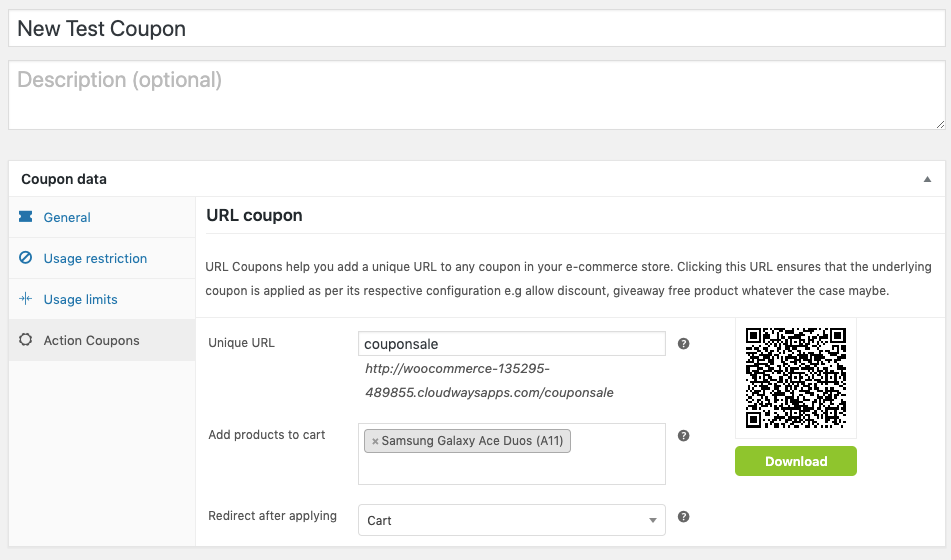
Unique URL – Here you have to enter a parameter which will be used to form a unique URL combined with your site’s URL. This URL will be copied to apply coupon.
Add products to cart – Here you can choose a product/products that this coupon applies to. This will automatically add these products to the customer’s cart when they click on the coupon.
Redirect after applying – This field allows you to choose a page on your site to redirect to after applying.
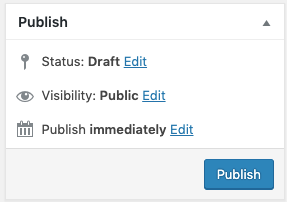
Now you may publish the coupon.
Once the coupon has been created, the next step is to apply the coupon to a URL. If you have already created a blog for the promotion of the coupon, you can use it or you can create one for the purpose.
Once you created the blog, you can embed the created unique URL to the blog content. Here, I have applied the coupon URL to an image.
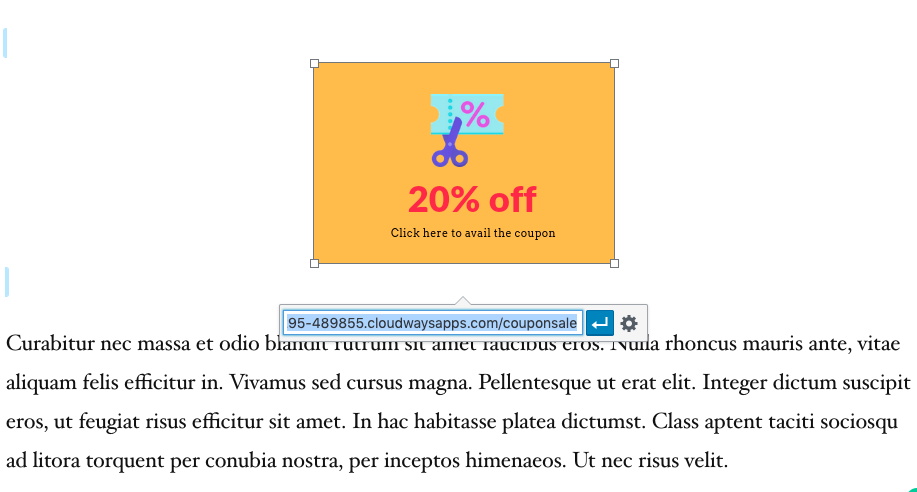
Here is how the blog would look on the front-end.
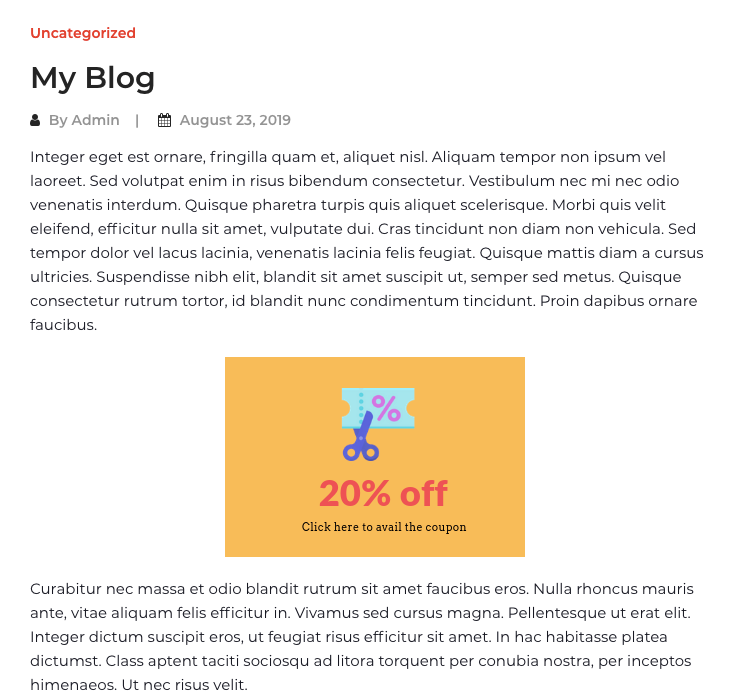
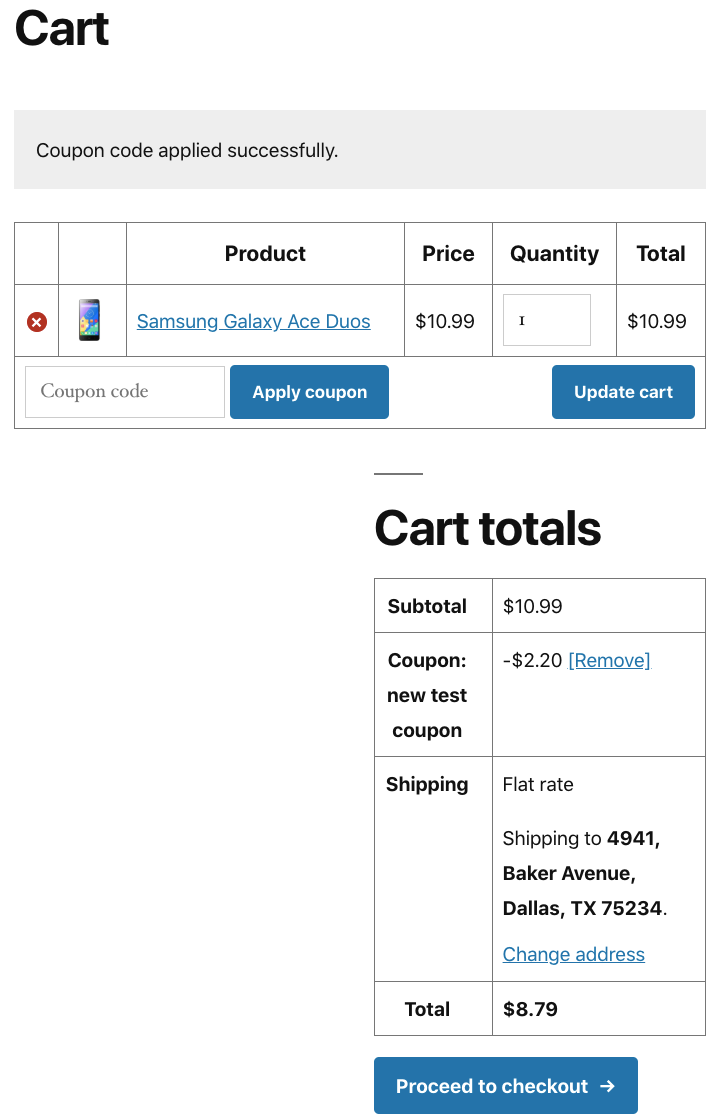
Now, while reading your blog a customer would click on the image and will be taken to the cart page just as you configured when creating the coupon.
Following is a screenshot of the cart.
Conclusion
While cart abandonment is at a rise, employing these smart methods to persuade people to purchase from your store would be a very brilliant move. This plugin would be the best choice to do just that. I hope this article will make it easier for you.
