Table of Contents
Are you looking for a way to create and customize invoices for your WooCommerce store?
If that’s the case, you’re in the right place. In this article, we will guide you through the step-by-step process to create and customize WooCommerce invoices. WooCommerce by default does not provide the option to create PDF invoices or customize invoice templates.
We will be using a third-party invoice plugin for this purpose. The plugin is equipped with advanced features and customization options. We will give a detailed description of the plugin at the end of this article.
Let’s begin with the obvious question.
Why do you need to create WooCommerce invoices?
If you run an eCommerce business, then you probably know how important invoices are.
Invoices are documents issued by the seller to confirm a purchase made by the customer.
They serve as a legal agreement between the seller and the buyer for the sale of goods and services.
Businesses issues invoices to ensure that they get paid by their customers. Invoices also help in tracking sales and managing the finances of a business. For customers, invoices can be proof of purchase and sometimes can be used for claiming a warranty.
Invoices reflect your brand’s identity. It is important to create professional invoices as it creates a sense of trustworthiness for your business.
Now that you know why invoices are necessary for businesses, let’s see how to create them.
How to create WooCommerce invoices? Step-by-step guide
As we said at the beginning of this article, we will be using a third-party WooCommerce Invoices plugin to create PDF invoices for WooCommerce.
Follow the below steps to create WooCommerce PDF Invoices.
Step 1: Installing the plugin
Login to your WordPress account.
Navigate to Plugins > Add New from your WordPress dashboard.
Search for the ‘WooCommerce PDF Invoices plugin’ by WebToffee.
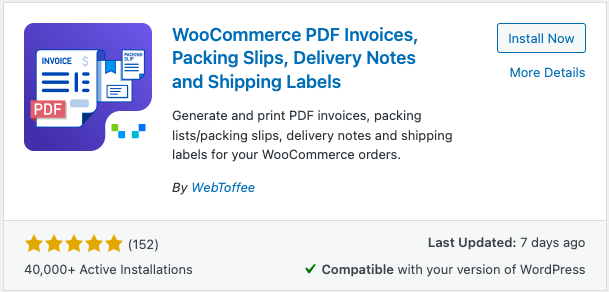
Click on the Install Now button to install the plugin. Then activate the plugin.
Step 2: Configuring general settings
From your WordPress dashboard, navigate to Invoice/Packing > General Settings.
Go to the General tab from the plugin settings page.
Here you have to configure some general settings.
- Enter your company name.
- Add a logo for your company. If you have configured the logo, it will automatically appear.
- Now add other fields like Company Tax ID, Footer, etc.
- Then, enter your company address details and contact information.
- Scroll down and configure the advanced options available.
- Choose whether you want to display the state name in your invoices.
- Enable the Preview before printing checkbox to preview the invoice before printing.
- For RTL support, enable the corresponding checkbox.
- Then, choose whether to include or exclude the tax amount for displaying the price in the product table.
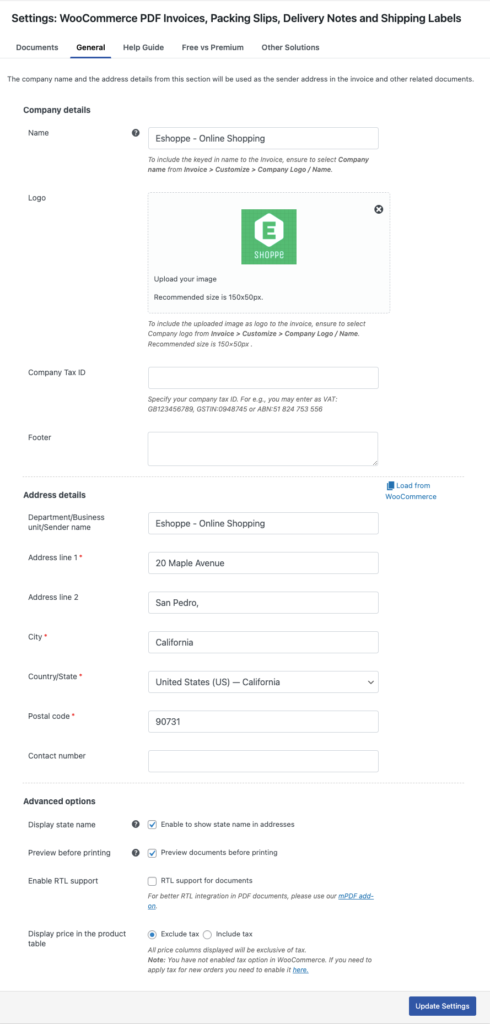
- Click on the Update Settings to save the settings.
Invoice settings
Now go to the Documents tab and select Invoice.
Under the General tab, configure the settings for WooCommerce invoices.
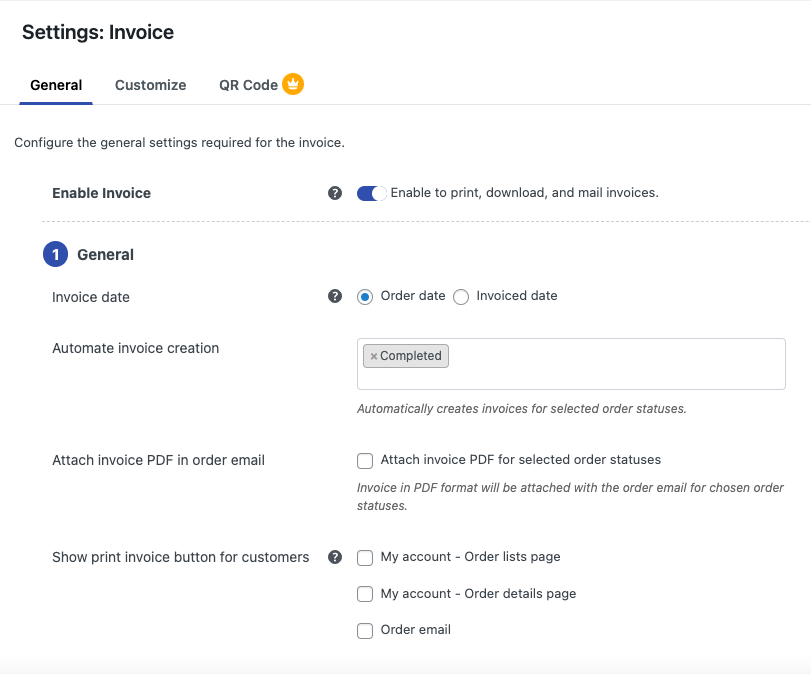
- Enable Invoices using the Enable Invoice slider button.
- Choose whether to use the Order date or Invoiced date as the date in the invoice.
- Then select an order status to automatically generate the invoice. The completed order status will be selected by default, you can change it accordingly. You can select multiple order statuses here.
- Enable the Attach invoice PDF in order email to attach invoice PDF for selected order statuses.
- Select where you want to show the print invoice button for customers.
Invoice number settings
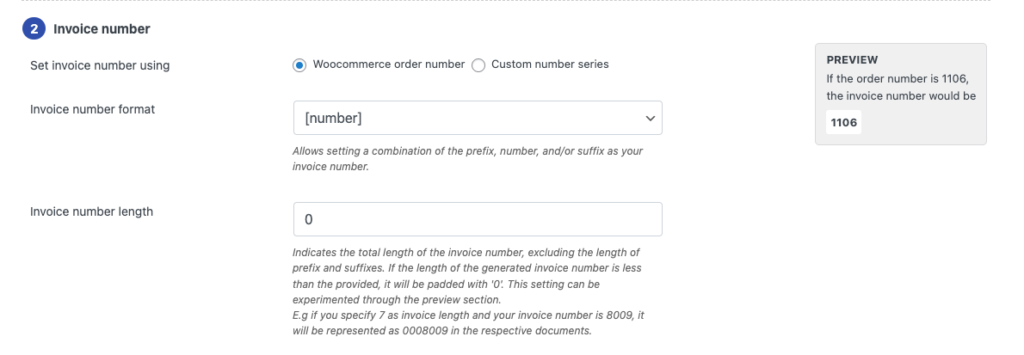
- Choose whether to set invoice numbers using WooCommerce Order numbers or custom number series.
- Then select an invoice number format. You can add prefixes or suffixes to invoice numbers. Choose it accordingly.
- Set the invoice number length.
Invoice details settings
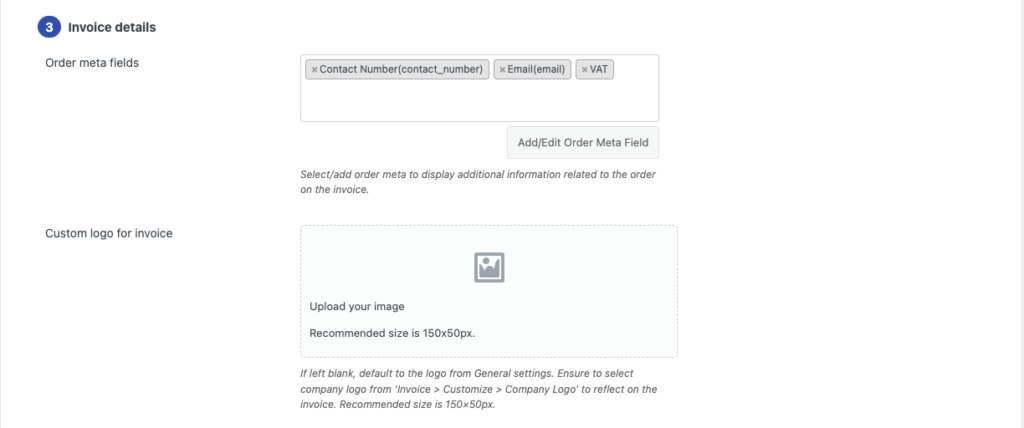
- Select the order meta fields to be included in the invoice.
- Then choose a custom logo for the invoice. If you leave this field blank, it will default to the logo we selected earlier.
Other settings
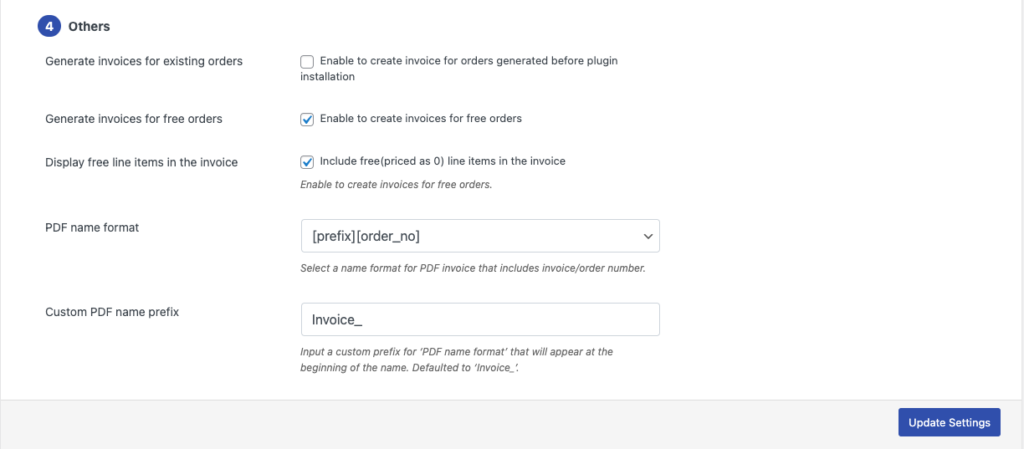
- Here you have the option to generate invoices for the orders generated before the plugin was installed. Choose it accordingly.
- Then, choose whether to generate invoices for free orders.
- Enable the Display free line items in the invoice to include free products (priced as 0) in the invoice.
- Choose a name format for the PDF file.
- Enter a custom name prefix for the PDF.
Click on Update Settings to save the settings.
Step 3: Customizing WooCommerce Invoices
- Go to the Customize tab from the Invoice settings page.
- Here, you can use the Visual editor to customize the invoices.
- From the right side menu, you have different options to customize different fields of the invoice.
- You can change the font size, alignment, color, etc.
- Use the preview option to preview the template.
- After making the necessary changes, click on Save to save the template.
- Enter a name for the template then save it for future use.

Here is a sample invoice generated by the WooCommerce PDF Invoice plugin.

So now we have successfully created a PDF invoice for WooCommerce. You can attach the invoice with WooCommerce order emails.
Now, let’s have a quick walkthrough of the WooCommerce PDF Invoices plugin by WebToffee.
WooCommerce PDF Invoices, Packing Slips, Delivery Notes, and Shipping Labels
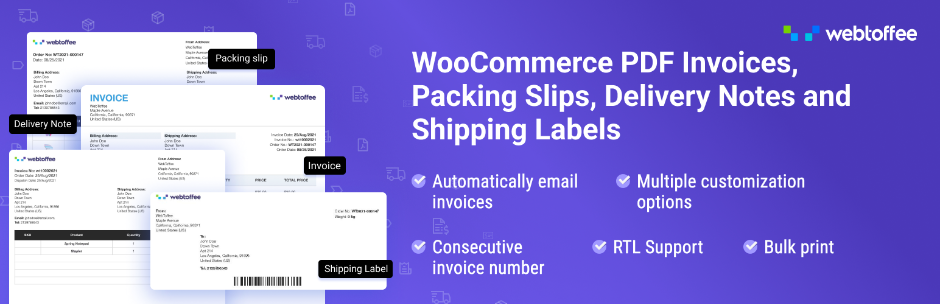
This invoice plugin lets you easily create and customize invoices for your WooCommerce store. It supports multiple orders and shipping-related documents for WooCommerce. You can download PDF invoices and packing slips from the WooCommerce order admin page.
The plugin lets you customize invoices by adding your store logo, store name, VAT, etc. You can customize shipping labels by adding barcodes, tracking numbers, and more. It also provides the option to bulk print the invoices from the orders page.
This plugin lets you create custom invoice numbers for WooCommerce invoices. You can send PDF invoices to your customers via email and let them download the invoices.
There is a premium version of the WooCommerce PDF Invoices plugin that lets you auto-generate invoices, packing slips, and credit notes and have advanced options like the ability to show a payment link on the invoice.
Apart from the premium version, the plugin also has some exclusive add-ons for different purposes.
Wrapping up
Invoices are really important for eCommerce business. It adds to the professionalism of your website. With the help of the WooCommerce invoice plugin we used in this article, you can easily create and customize different documents for your store.
If you are new to WooCommerce and want to learn more about WooCommerce invoices, we recommend you read our detailed guide on WooCommerce invoices.
Was this article of interest to you? Let us know in the comments. Your feedback is our motivation.
Thanks for reading!
