Table of Contents
Learn how to start and run your first ever Online Store using WooCommerce. Learn to add products, ship them to the countries of your choice, and track your inventory at all times. All that and more without using a single line of code.
Introduction
Starting an eCommerce store to help customers purchase with ease is always a great choice. Platforms like WordPress and their likes make it super-easy to build stunning websites in a matter of hours.
We wanted to help you build your eCommerce website from scratch without intimidating you with any tech jargon or terminologies.
It’s a fairly long piece of writing, so feel free to bookmark the page for future reference. Better yet, start building with us right away!
The first step in starting your online store is to have a memorable, good looking, and easy-to-guide-through website that your customers love to visit. Here’s how you do it:
Domains
Your domain or Domain name is a fancy term for your website name. It’s the address that your viewers would type into their browser to reach you.

A little back story: your ‘web’ ‘site’ is a collection of information you save on a computer that you’d want your customers to see. The computer/device is assigned with an IP address when it accesses the internet.
Website names were actually created to make IP addresses memorable. An IP address is a combination of numbers that are given to identify devices. This means that you are accessing a computer whenever you are searching for a webpage.
So Instead of say 11.083.0292920something, you type the name of the website and your browser will take you straight to the page in the computer where the information is saved.
Just like naming your residence, it’s really important to have the right website name.
Make sure your customers don’t confuse, forget, or misspell your website name for another. Read more about the best services that let you decide and buy the most suited domain name for your website.
Hosting
As you buy a domain, you own an address where your website can be built for the whole world to see. The next challenge is to build your website and find a computer to save the contents of your website and run it 24 hours a day, every day.
By this logic, it’s normal to think that you can host your website on your computer. The reason why you shouldn’t is this: You do not want your website to disappear the moment you shut down your computer.
As we saw earlier, websites live in computers, the address of which is the domain or website name. Companies offer special computers called servers to store – host – your websites and are called web hosts or hosting service providers. These companies save your website and all it’s contents for your viewers to read at all times.

There are tons of host service providers out there. Bluehost, Hostgator, Godaddy, the list goes on. It all comes to how much you’d want to spend on your website hosting for the features they provide.
For a complete guide on how to select your hosting service provider, read the step-by-step guide to hosting your website.
Website Builders
After choosing a host that’d best fit your website requirements, it’s time to build your site from the ground up. This was daunting work in the past, but not anymore. Website builders have made stunning and responsive website building as easily as they can ever be.
Here’s a list of our top picks:
Website builders such as these come with ready to use templates that reduce your website building efforts altogether.
All you need to look for in them would be:
- How well the appearance matches your website’s core requirements
- The flexibility to customize the website to your needs.
For a review of our most loved website builders in 2020, check out our research on the best website builders.
We love to build websites using WordPress. It’s a free, secure, and user-friendly website builder that offers the best in class features for any builder out there.
WordPress

Home to over 38% of all the websites (75 million websites!) that run today, WordPress is the most familiar tool out there that helps you build awesome websites and blogs.
There are other platforms that can help you create functional websites, but we favor WordPress a bit more for their simplicity in design and the provision to make websites truly our own using custom themes and plugins. More on this in the coming sections.
We’ll use WordPress to help you create your first eCommerce store. Through the building process, you’ll realize the extent of features that WordPress offers its users to create the website of your choice, making the websites truly your own.
Plugins
WordPress already provides the bulk of the options a regular user could ask for. For users who want to truly customize their websites, there are even more tools made available by WordPress.
This is where you’ll need specialized functions that are relevant to your business. Well, plugins do exactly that, without distorting the website’s look and feel in any way.
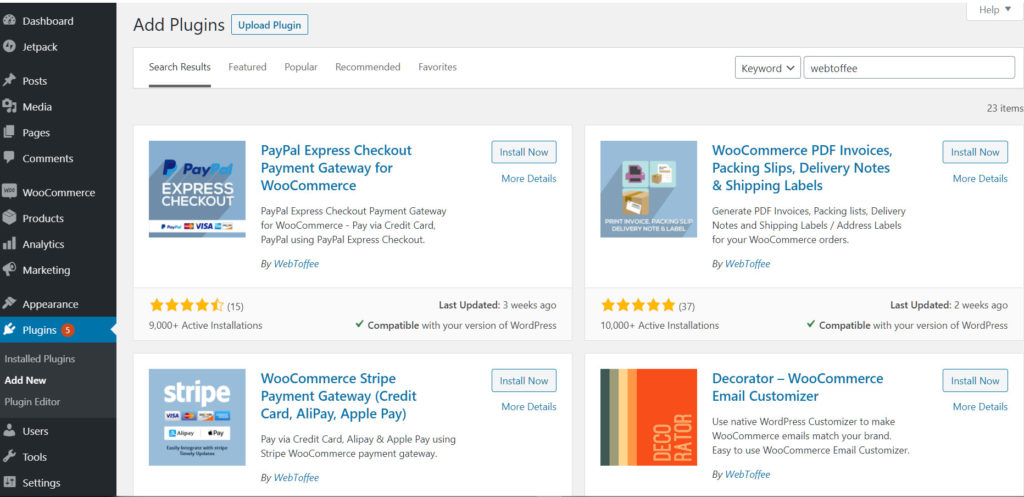
Personalize your store with what your customers may need – coupon banners, a different carousel, even a fancy contact form – using Plugins. To activate plugins, go to Plugins > Add New.
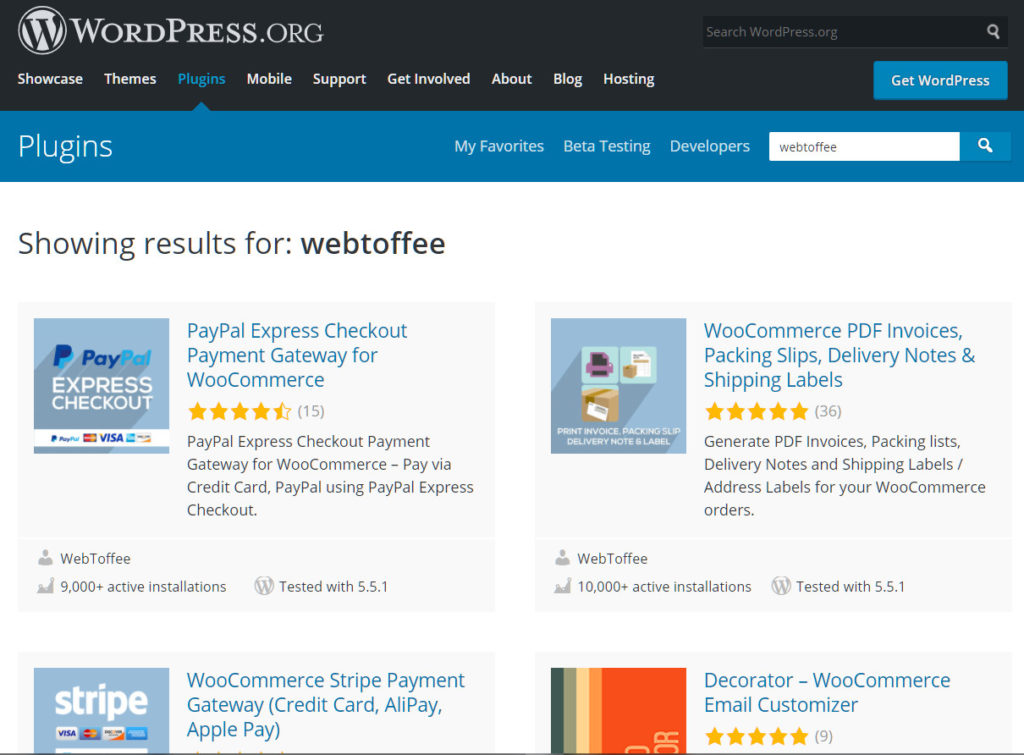
Search from over 57,000 trusted plugins from WordPress suited perfectly for your purpose. As a rule of thumb for selecting plugins, look for the number of downloads and ratings they’ve received over time.
Free plugins will get you a lot of features for your website. Yet if you require specific features that aren’t quite common, or is a bit complex for your liking, you can find them on the premium plugin section. For a fee, buy plugins that suit your functionality and get your website up in no time.
WooCommerce
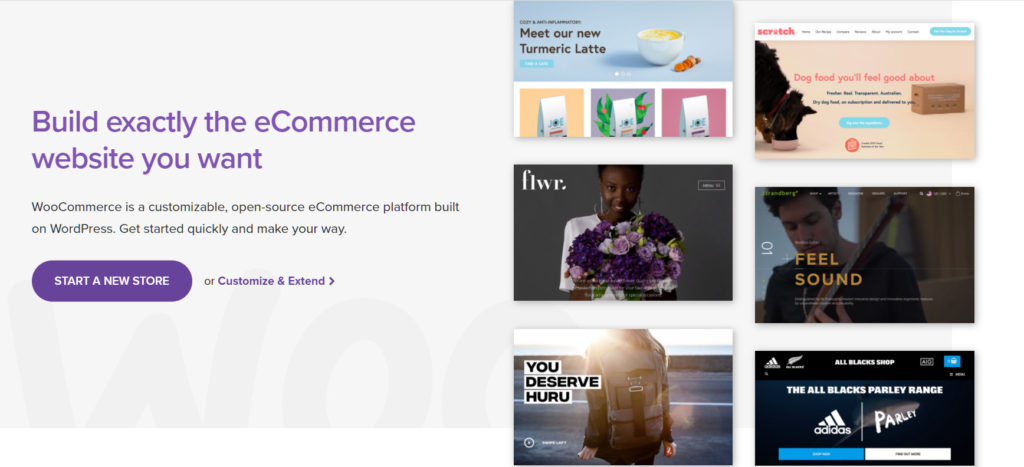
You’ve seen how plugins can be used to enhance your website. Let’s now explore WooCommerce – a plugin that’s specifically designed to help all kinds of merchants to open online stores with ease, and yes, with no need for coding.
There are a lot of paid features in WooCommerce, except we’ll only need the basic version to build our store from scratch.
Check out WooCommerce Features for the entire range of functions that WooCommerce offers.
It’s quick to install and gets you up to speed really quickly. Like any plugin installation, go to the Plugins tab on your dashboard and click on ‘Add New‘.
On the search bar, search for WooCommerce and click ‘Install Now‘.
You may remember that your plugin hasn’t quite made any changes to your existing website. For that, go to ‘Installed Plugins‘ on your Plugins Dashboard and click on ‘Activate‘.
Your page will now reload with a brand new list of options on your Dashboard sidebar. Congrats, we are halfway there.
Your page will now reload with a brand new list of options on your Dashboard sidebar. Congrats, we are halfway there.
Setting up Shop
Let’s run you through the setup as it takes less than 15 minutes to get your first product up and ready for sale.
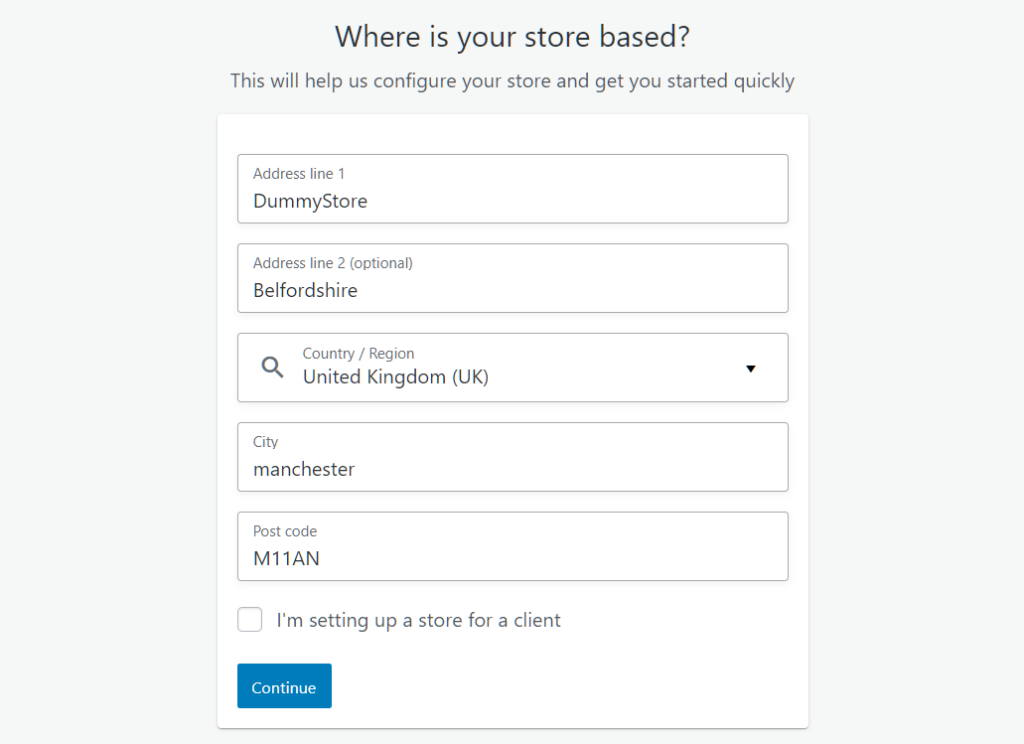
Step 1: Click on the WooCommerce tab on your Dashboard.
On the resulting page, add in your store details – location, country, the basic stuff. You can even add your postcode, so add in as many details as possible.
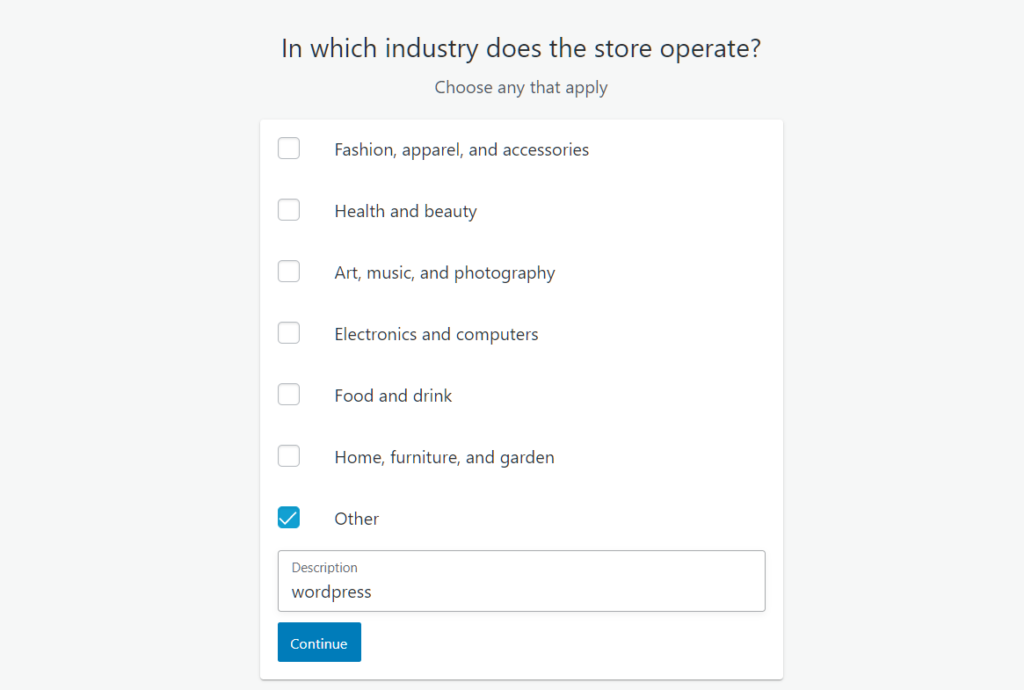
Step 2: Choose the industry to which your business belongs to.
You could choose from the list of options or add in your niche industry through the ‘Other‘ option.
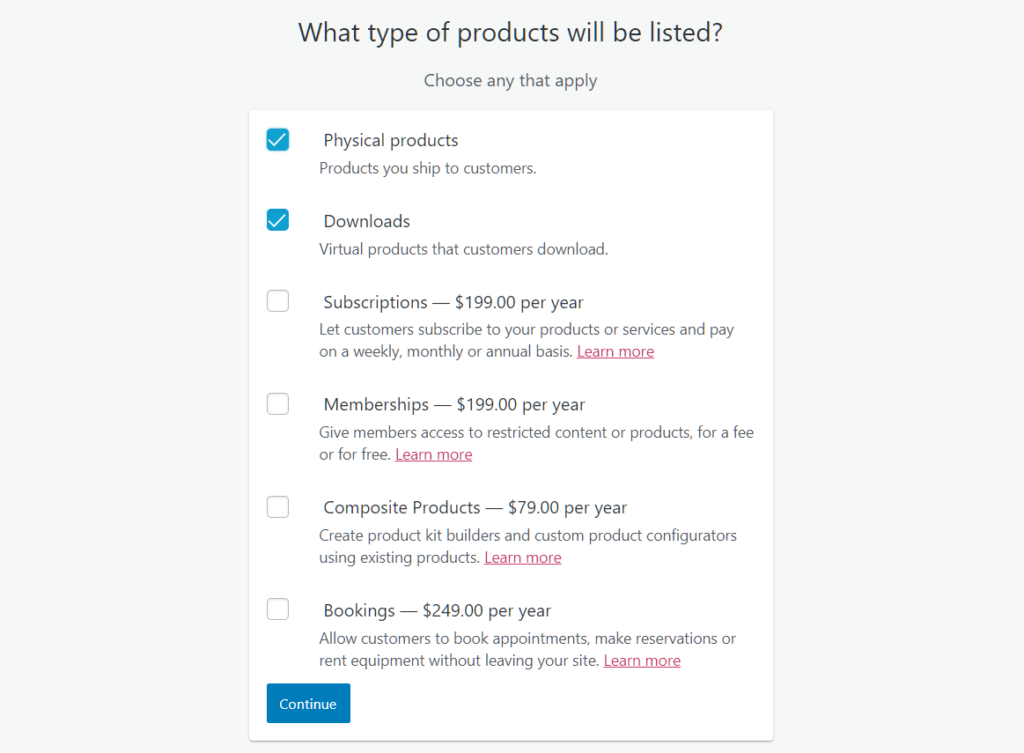
Step 3: Choose the type of products that you’ll list in your store.
You can add physical goods, downloadable products, or even virtual products such as booking an appointment.
Other options such as subscriptions, membership, composite products, and bookings will incur yearly charges to be set up, but general product sales can be done cost-free using WooCommerce.
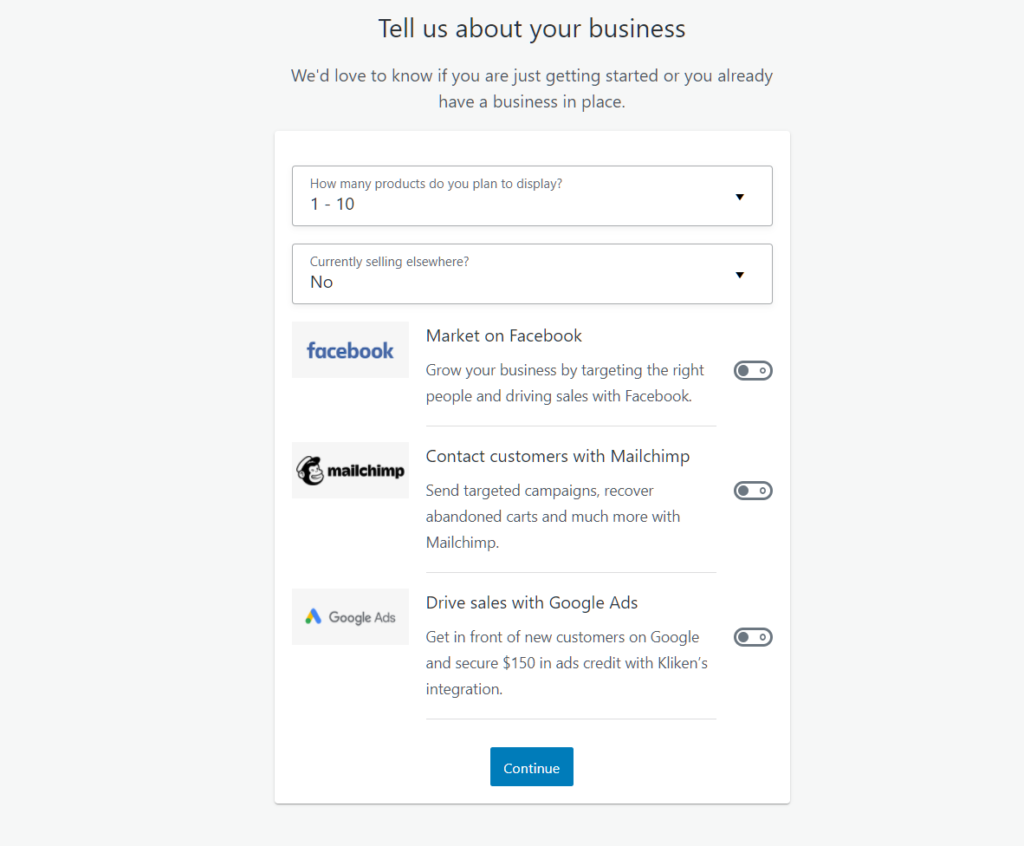
Step 4: Tell WooCommerce a bit more about your business.
Add in your business-specific info such as your average annual revenue, store location, and the number of products you have to sell.
This is to make sure that you get the right support from WooCommerce in terms of marketing.
You can also enable a few other optional features that come with WooCommerce, such as Facebook and Google Ads and Mailchimp integration, which is a great choice, but let’s skip that for now.
Step 5: Next up, Themes.
WooCommerce comes up with a huge selection of themes for you to choose from. While some are free and some are expensive, you always have the option to use your existing theme of the website to be used as well.
Click on the ‘Live Demo‘ option under each theme to see if it fits your ideal view of the store.

Store themes differ based on the industry and the type of products they offer. They primarily give the website a character that could sit well with your customers – increasing engagement and loyalty – improving chances for sales of course.
Start building with free themes first, as it gets the work done for the short term. But as you begin to expand your business, it’s beneficial to stand out among the crowd using specialized themes that portray your identity a bit better. We’ll cover more on themes in the future.
Told you that was easy.
Now before you go on to add your first product, let’s add some key information about your shipping, taxes, and payment options so that when you finally add products to your store, everything will be set for sale right away.
You can always add more information at a later time, so no pressure.
Now would be a great time to look around your Dashboard and tinker with the options available. It’s important that you get a feel for your website before we move further.
If you are all set with your WooCommerce setup so far, let’s add your first product shall we?
Adding Products
This is where things get real. Your efforts so far were to get a visual output that you could then work on to entice your customers.
Adding products in WooCommerce is fairly easy, and gives you a long list of options on how well you want to detail them on your web store.
Let’s make some key data collection before we begin to make sure that products can be added without delay. Although it’s totally up to you, it’s way cooler to have a checklist of items before you start adding them:
- Good quality images
- Title, description, and attributes of products
- A clear understanding of your product categories
Providing high-quality product images along with clear info on dimensions is crucial for your store in three core areas.
- It makes your website pretty
- It helps when you calculate shipping costs
- Customers could understand your products better
Read more about image sizes and optimization from our complete guide to WordPress images.
Before we begin, let’s make sure some key settings are enabled that reflects all throughout your website.
Go to WooCommerce > Settings > Products. You’ll find three categories of options that would decide the general nature of your store. These are the General, Inventory, and Downloadable product options.

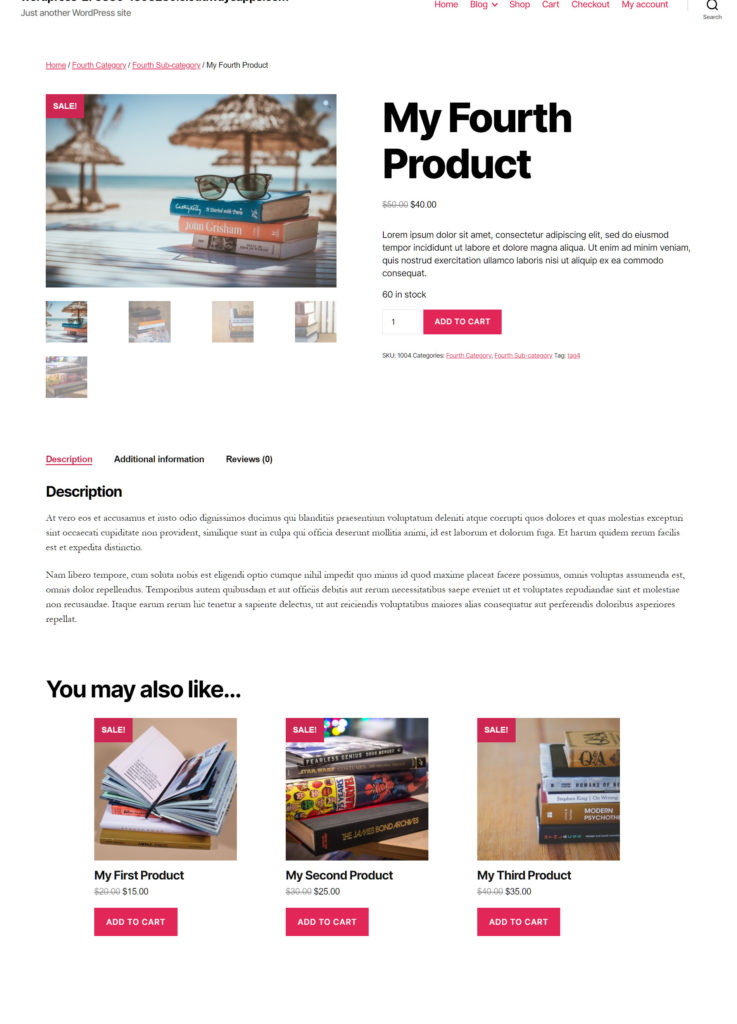
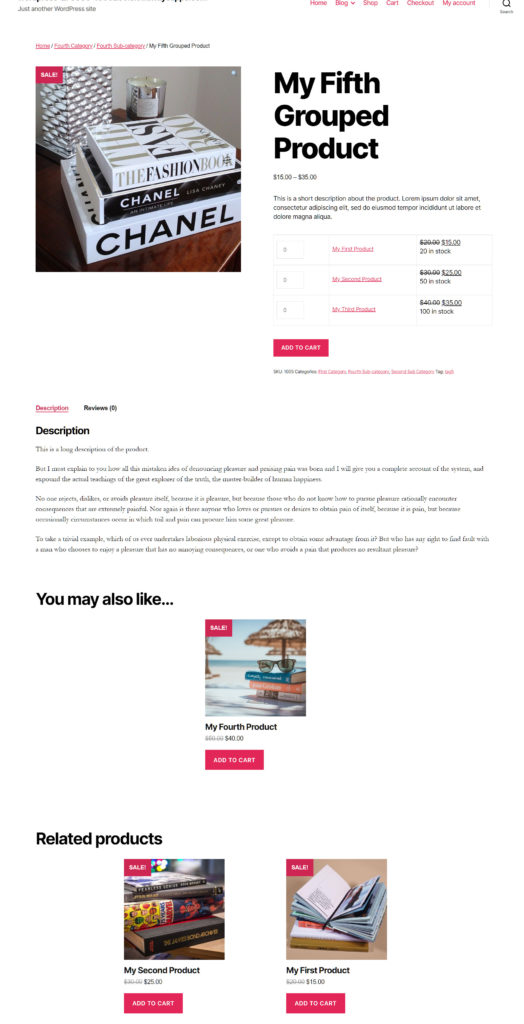
On the 2020 free WordPress theme, a simple product page will look something like this:

Here’s how it would look like from the products page on your WooCommerce Dashboard:
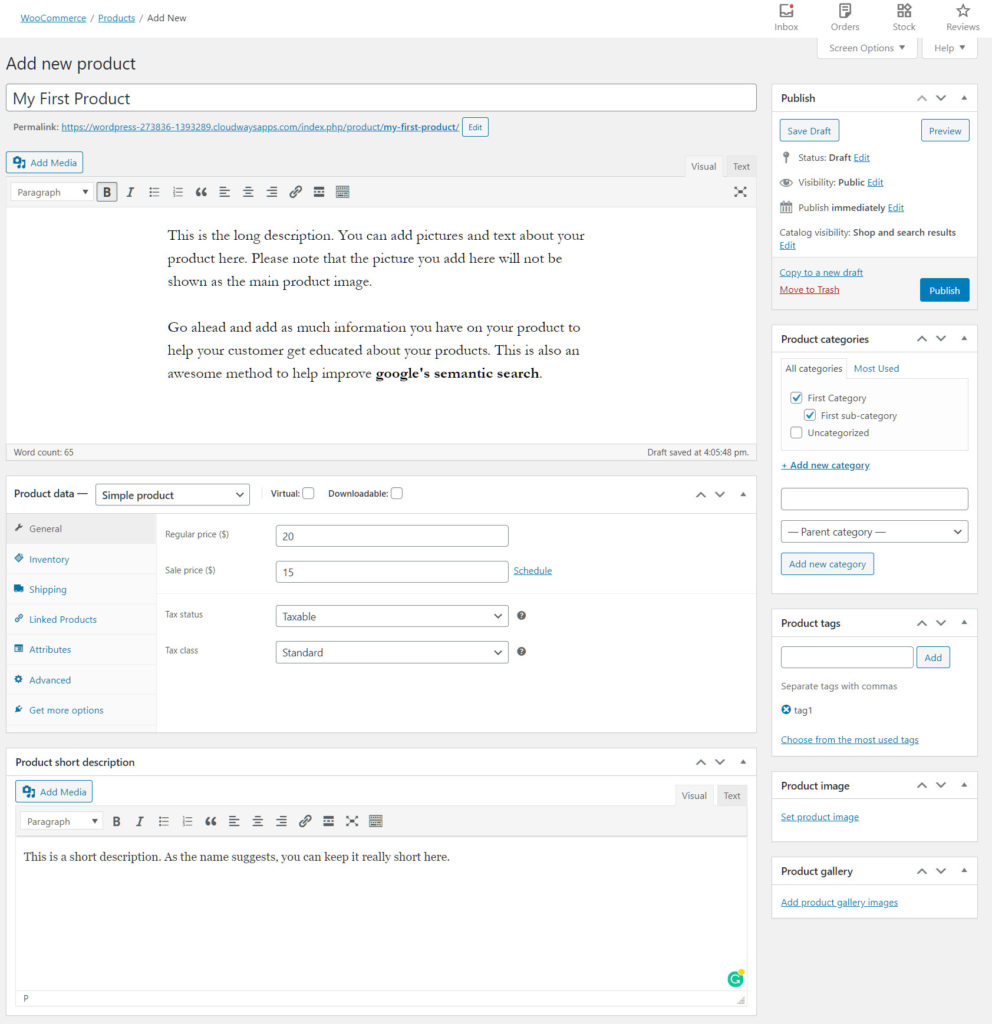
The top half of this section is where you add in your product title and a description suited for it. Your long description can be long enough to help your customers know about the features of the product.
Descriptions can contain images, lists, or even links to other relevant information, so be sure to use all of that to your advantage.
Furthermore, it would help your products to be easily visible through Google’s semantic search as well.
You can add finer details of the product in the product data tab. Choose the type of product, add tags to make customer’s search simpler, add categories, insert images, and more.
Make sure to add a short product description as well which will show up next to your product image. Since different themes position their content differently, keep that in mind while you add content to your website.
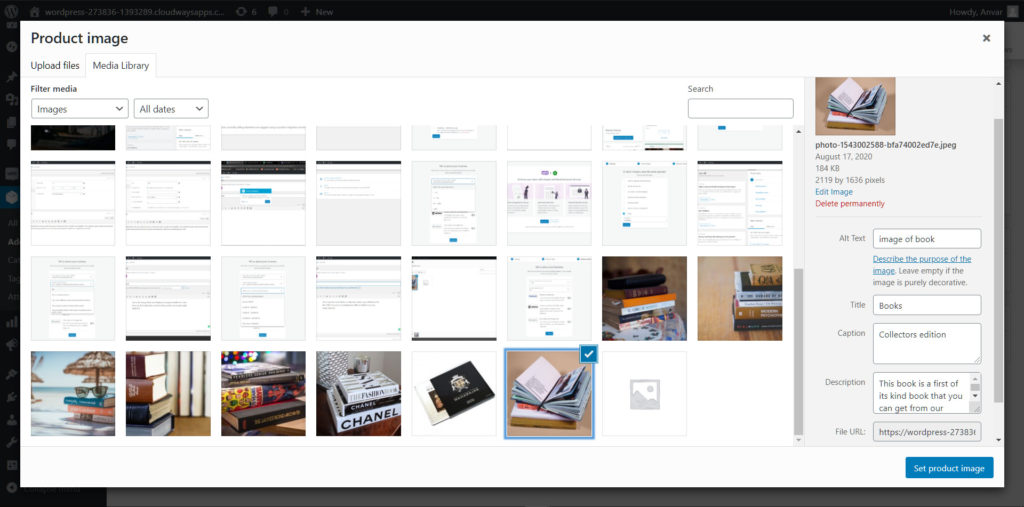
After descriptions, be sure to add a Product Image and sufficient product gallery images to help customers better understand your product before purchasing.

Every detail about your images can be added to the attachment details section after you upload your image.
Make three things a habit while you add images to improve your website’s SEO score:
- Add Alt text
- A memorable title
- Caption for every image
Product Data
Based on the type of product – which we’ll discuss in a minute – you get to add several basic information about the merchandise which will all be shown in the store. Prices, up-sell items, attributes, and stock details are all part of this section so don’t miss this step at any cost.
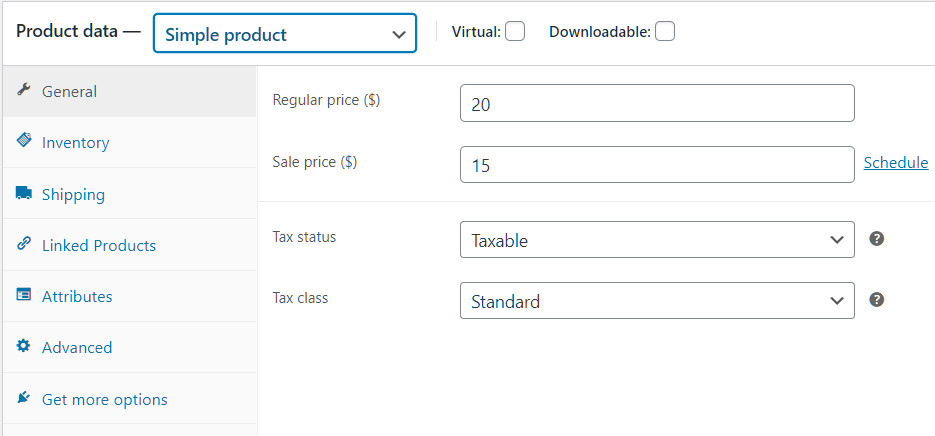
1. General Data
The price of the product and the sale price, if any, can be added here. Always ensure that you have added the price for your products. Failing to do so will show stock unavailable on the shop page.
2. Inventory Data
Identify each of your products with their ‘Stock Keeping Unit’ or SKU, in case you have a decently large inventory. Click on the ‘Manage Stock‘ button to enable WooCommerce to keep your inventory in check. It will also provide clear notifications on inventory that needs to be replenished.
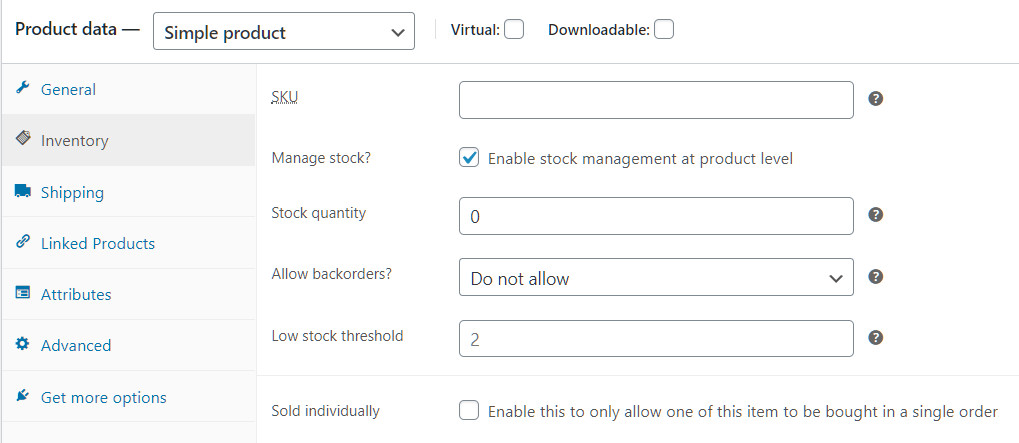
Backorders can be enabled for items on your inventory. The option also allows you to notify your customers if such an option is available to them.
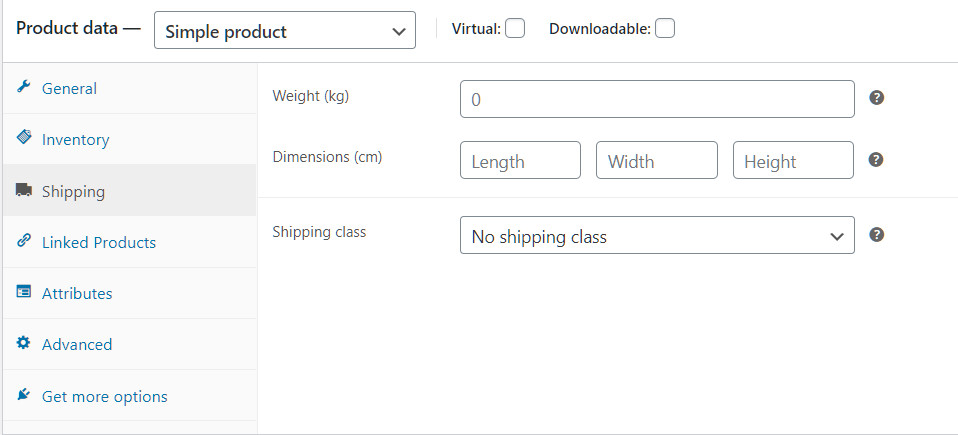
3. Shipping Data
Here’s where you add the weight and dimensions of your products. Shipping data will come in handy while we calculate shipping costs for within and overseas shipping. You can edit the primary units of weight and dimensions under WooCommerce > Settings > Products.
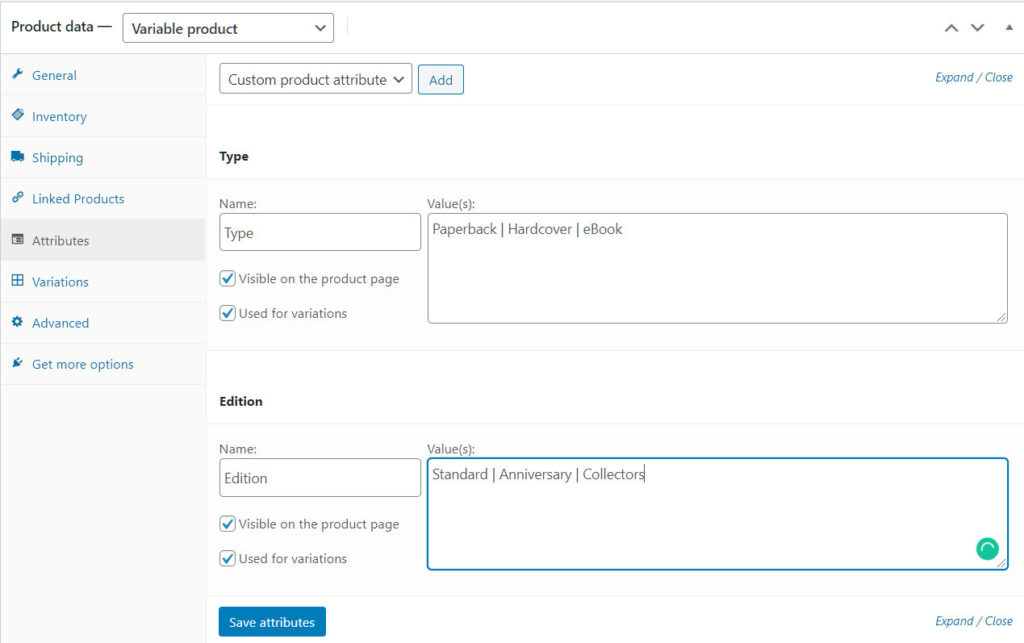
4. Attributes
You may have products that may be of the same category but vary slightly based on minor factors like color, size, type, etc.
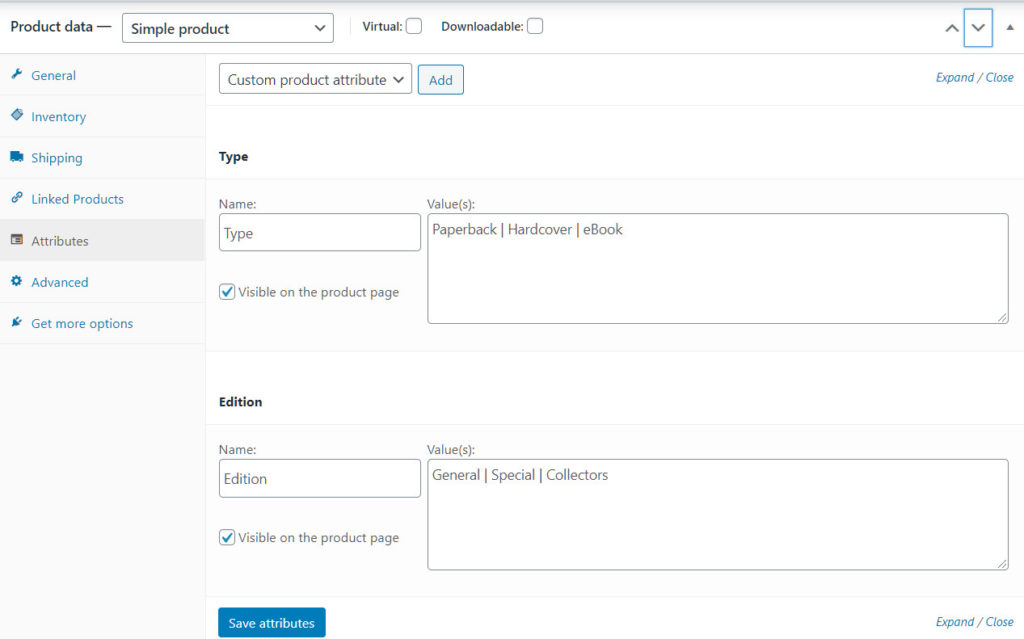
WooCommerce gives you the option to add these custom product attributes easily. Just add in the name of the attribute and type in as many values for the particular attribute separated by an ‘|’ symbol.
These data will show up under Additional information on your product page.
5. Advanced Options
These are the options that come after a customer places an order on your website. You can add a custom purchase note to be sent to the customer after he makes a purchase.
Purchase notes could be anything ranging from simple thank-you notes all the way up to the detailed step-by-step description on the steps in the shipping process.
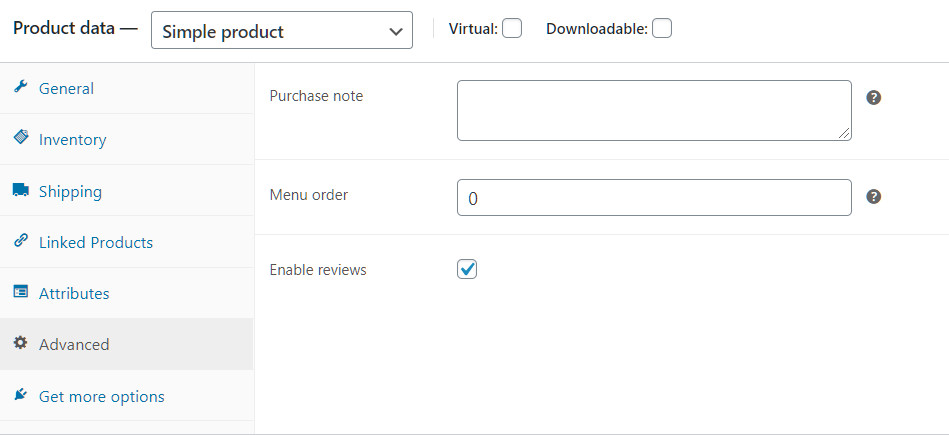
Anything which you find relevant for the customer after he makes a purchase can be added here. You can also add the menu order number and enable reviews for the product by your customers.
6. Customize even more!
WooCommerce offers a wide range of extensions for your store to make it well suited for your business. Extensions such as these are all optional and come with a premium at the time of installation.
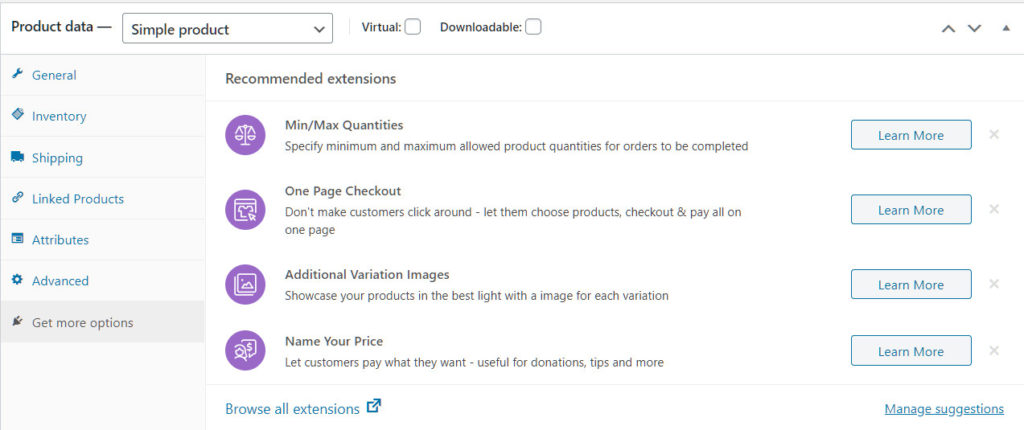
Tinker around until you find the best option for your eCommerce store.
Product Types
As we mentioned earlier, Product Data differs for different types of products. Let’s explore the different types of products you could add to your WooCommerce store.
1. Simple Products
This is the basic version of product addition that you’ll find in WooCommerce. Add unique products with just the right amount of information about them such as the price, stock, image, and description.
Businesses that sell a handful of merchandise will find simple products the only option they’ll need to set up stores. It also forms the building blocks for Grouped products.
2. Grouped Products
These are quite simply a collection of simple products grouped together. Grouped products are useful when you have more products to serve a particular need of your customer.
Following is a screenshot of the grouped product settings in WooCommerce.
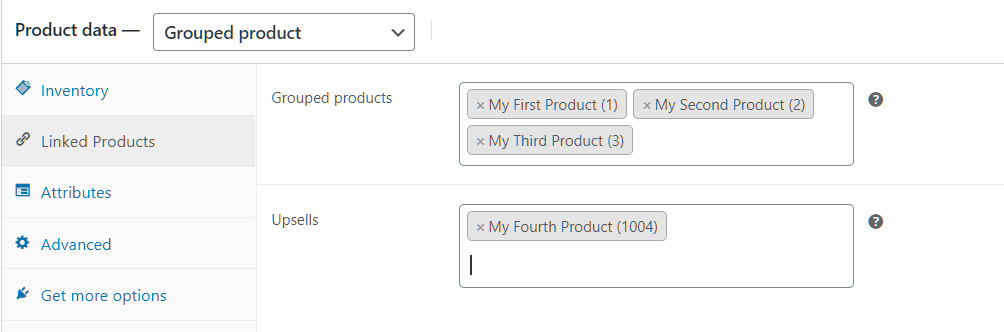
Choosing the color of any product is a classic example of a grouped product. Instead of showing two different listings based on the color of each one, your customers could make their choice faster.
Note: the products you add under grouped products can still be bought individually. This is because all we did was club simple products into a grouped product listing. Hence each product will have its own simple product listing which customers could choose to buy from.
This is a crucial distinction from Variable Products that we’ll see next.
For more information on Grouped products, check out the detailed study on WooCommerce Bundled Products.
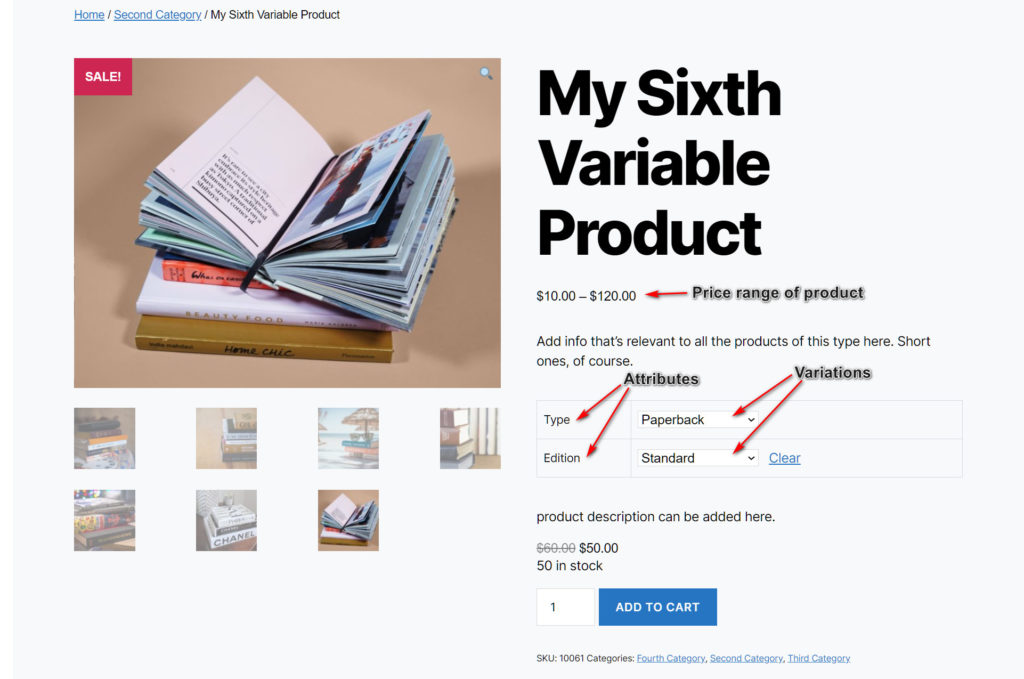
3. Variable Products
WooCommerce is at its best when it comes to adding variable products. These are products of the same type but with different attributes, such as color, size, material, and so on.
The prices change based on the attributes you set for each product. For example, you may want to charge more for an XL T-shirt in red color than a Small T-shirt in white provided both belong to the same brand.
The first step in adding Variable products is the setting up of all the attributes for the products that you wish to sell. Create custom attributes with different values and make sure each of your products will come under some combination of the attributes as shown below.
Variable product type gets an additional option below Attributes known as Variations. To enable Variations, you must have saved your attributes first.
On the variations tab, you can choose one of two options:
- add a variation through the attributes you previously created
- let WooCommerce to Create variations from the attributes you’ve provided.

If you create variations from all attributes, you will get as many products as the total number of combinations of attribute values. This means, adding two attributes with two values each will create the option to add four products with unique attribute values.
Click on each product and the tab expands to accommodate as much data to be added as there was in the simple product, all in a single tab. You can individually add the product details, price, dimensions, and even add specific descriptions for the products as well.
For a much more in-depth analysis of this type of product addition, visit Variable Products under WooCommerce Docs.
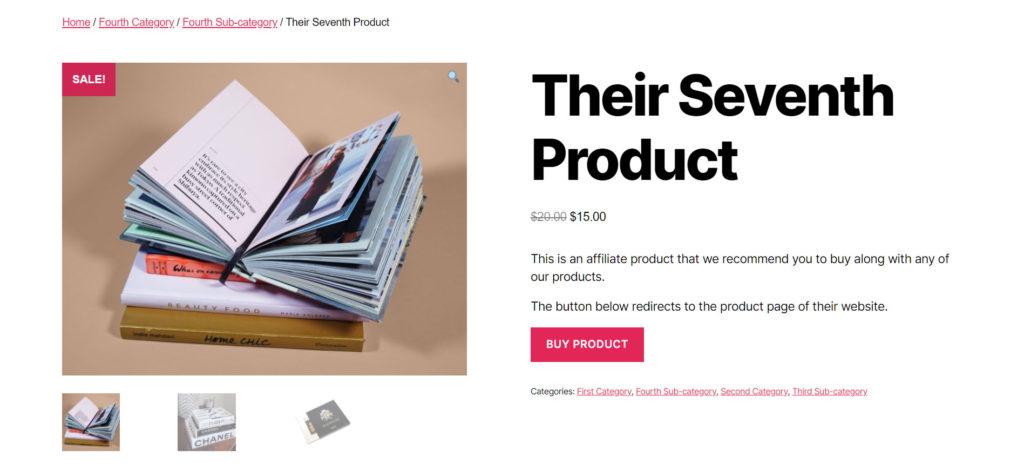
4. Affiliate/External Products
You can encourage customers to buy products from other websites that you think your customers may benefit from. Through External/Affiliate products, you can describe the products you promote, and the purchase of the item will be completed on the external website.
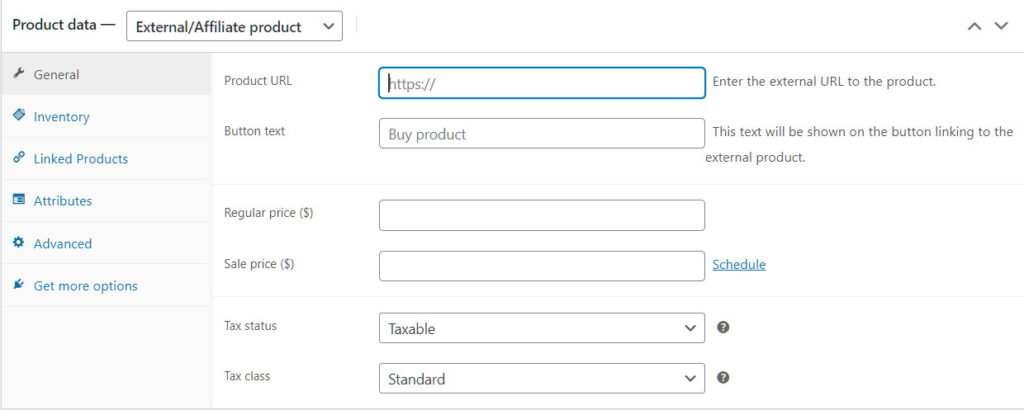
You can add adequate Call to action buttons and guide customers to their respective websites for purchase. Even though you can enable an SKU for an affiliate product, there will be no further options under your inventory settings as it is in another website’s inventory.
Apart from the above-mentioned core product types, you can also sell virtual files like eBooks, songs, whitepapers, and more in WooCommerce.
5. Virtual Products
Buying an appointment, a coaching call, or live webinar are all examples of Virtual products – things that do not require shipping.
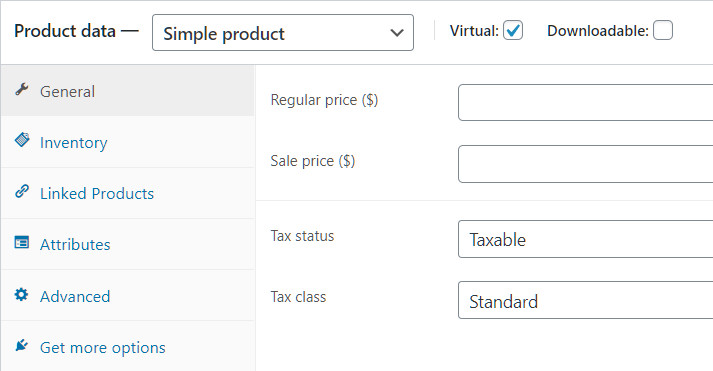
You can enable virtual products under simple, grouped, and variable products with the exception of External/Affiliate products.
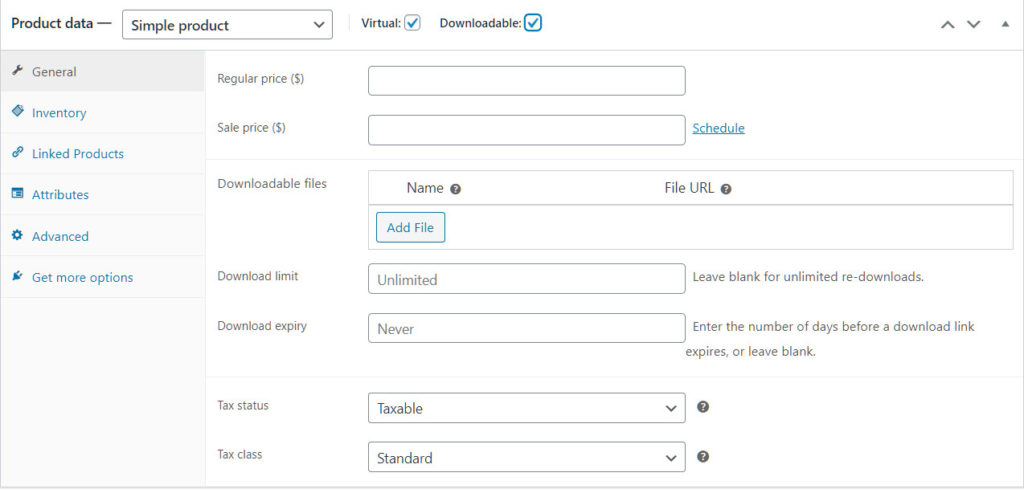
6. Downloadable Products
Intangible goods such as E-books, owner’s manual, whitepapers, etc. can be made available by enabling the Downloadable products option.
Downloadable products are goods that can be used without waiting for the business to deliver the product at a later time.
Personalizing your Store
There are three things you can add to your store at this point:
- An eCommerce theme that’s personalized by WooCommerce
- A custom logo
- A new store notice.
These steps are optional as you may have learned how to customize your theme at the beginning of the WordPress website building process. You can have a dedicated homepage to display more information about your business.
You can add a dedicated shopping page as your Homepage in one of two ways:
- Activate the personalized theme from WooCommerce Home
- Go to Settings > Reading on your WordPress Dashboard. Select either the ‘Shop‘ or ‘Homepage‘ from the dropdown for the Homepage.
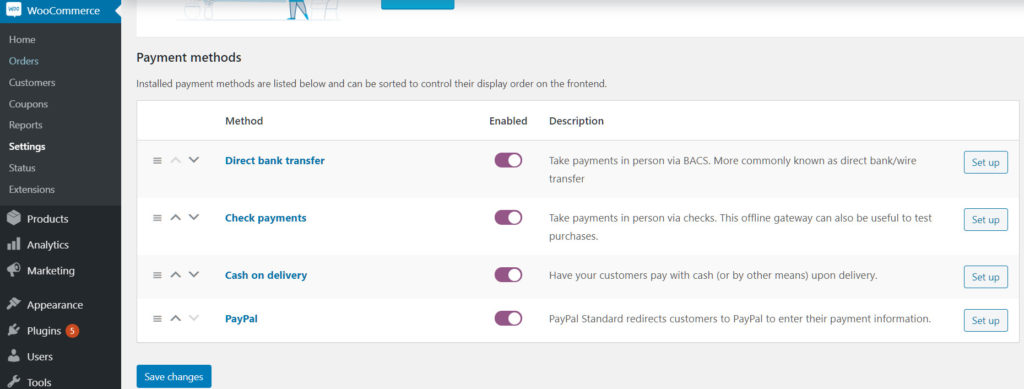
Adding Payment Options
It’s easy to set up payments for your eCommerce website using WooCommerce. Just head to WooCommerce settings on your WordPress sidebar menu and click on Payments. What you’ll see there are four options that you come standard with WooCommerce.
These are the Core Payment Options that WooCommerce comes with, and you can enable any or all of the payment gateway options that are relevant for your business and easy for your customers. Here’s a bit on each of them to get you started.
1. Direct Bank Transfer
Also known as Bank Account Clearing System or BACS, Direct Bank Transfer doesn’t require the customer to make any payment online.
Orders made using BACS are set ‘On Hold’ until you actually receive money from the customer through your bank – not through WooCommerce.

After payments are received on your account, you can move forward to shipping your product to the customer, with provisions for marking ‘Processing’ or ‘Complete’ for your customers to know the status of their orders. You can find more information on this at the Managing Orders section on WooCommerce Docs.
2. Check Payment
You can also enable Check Payments, even if it is not the most popular option for checkout.
Here too, the payments are not done online and the owner has to confirm the checks received before shipping the item.
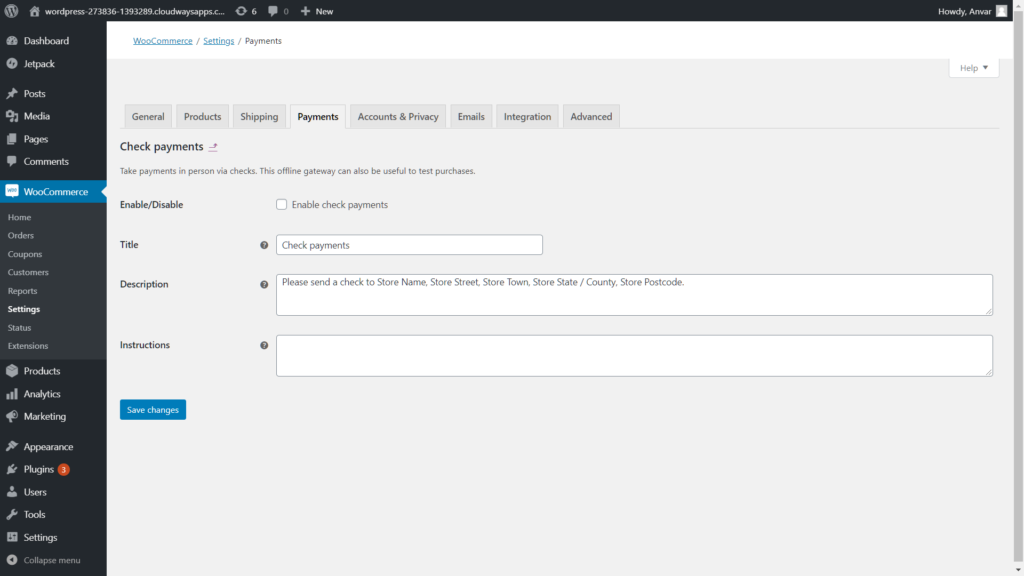
It’s best used as a payment gateway for test orders and to check the details of emails and order success pages.
We suggest you make your switch to online payments as it reduces the number of steps to get the product and increases transparency for your customers. For more information on this, please visit WooCommerce Check Payments.
3. Cash On Delivery
COD is an attractive choice for customers as it doesn’t require them to pay anything upfront, increasing the chances of impulse purchasing.
This would also mean that the products you deliver must be up to par with customer standards or it can be returned without paying.
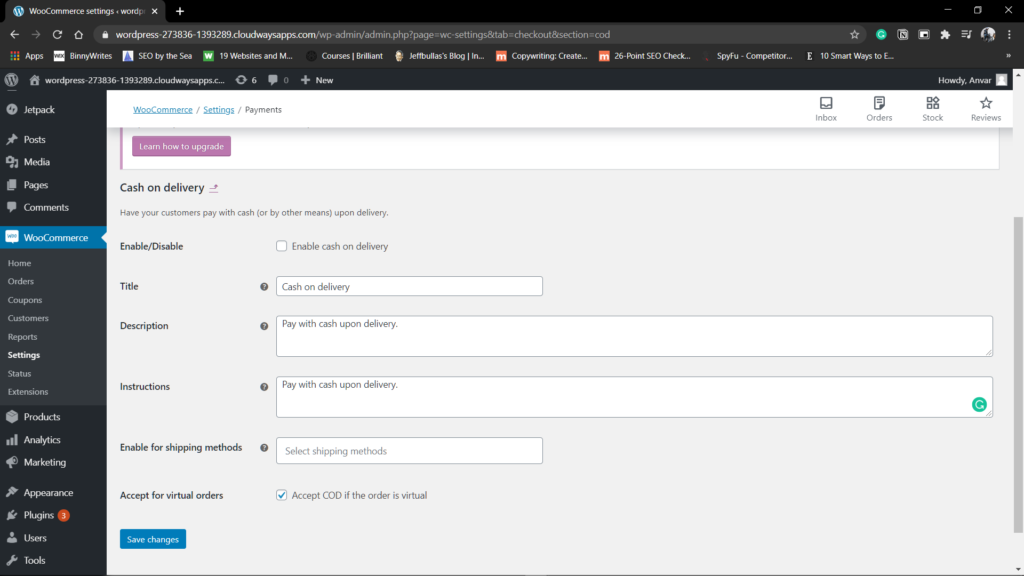
Payments in this option, as the name suggests, are not through WooCommerce and you have to manually clear each order after you receive payments from the customer.
This requires a robust courier service that you trust to get the payments in order.
4. PayPal Standard
WooCommerce comes with a PayPal Standard option where customers are guided to PayPal’s secure site to complete their transactions.
To set up PayPal on your eCommerce store, all you need to have is a PayPal Business Account.
if it’s your first time setting up payments, enable the ‘PayPal Sandbox‘ option to test how checkout works without the fear of losing money while setting up shop.
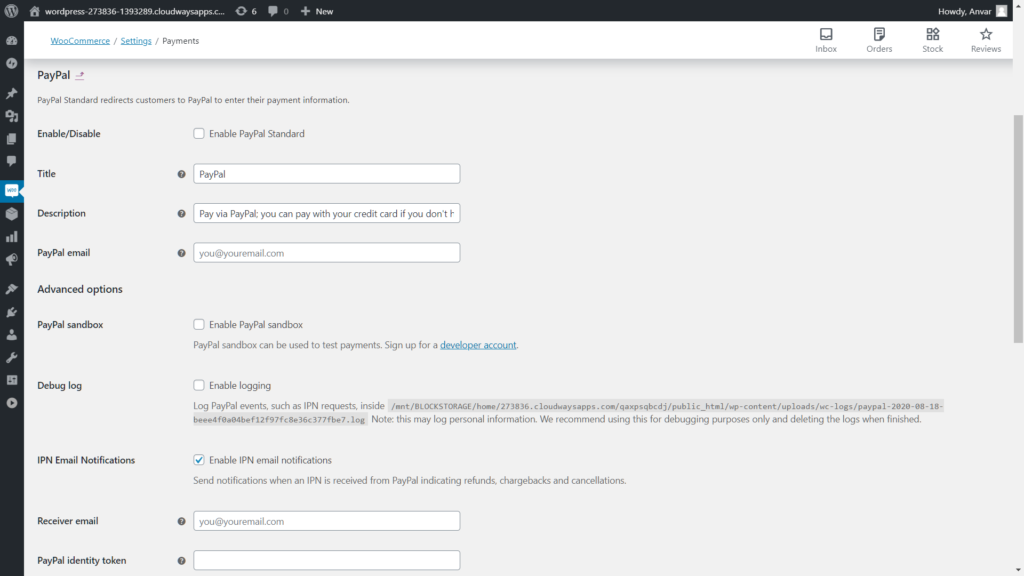
There’s even an Instant Payment Notification option that you can turn on to receive notifications on payments, refunds, and cancellation.
With that said, now we see a truly online interaction with customers and businesses taking place without the need for them to move away from their computers or mobile phones to complete their transactions.
This is always a good step for a business to truly function as a seamless online store. As with any other feature, you can add other payment methods to your eCommerce store as well.
Popular payment options such as Stripe, Amazon Pay, and other payment gateways simplify your customer’s purchase journey. We have explained it in detail in our Ultimate Guide to Payment Gateways
How to Manage Shipping
You may have seen free shipping, flat rate shipping, and other fancy terms on most websites that sell things.
These are just the rates businesses charge customers for delivering products from their warehouses/shops to your doorstep. Shipping rates differ based on the country your customers are in and the number of goods that are being shipped.
For every product you add to a store, it’s important to note the change in the final price after considering shipping charges and taxes. This helps you determine whether it is affordable to your customer in addition to providing you a sufficient profit margin.
This balance is quite tricky and different shipping services offer different rates to make matters worse.
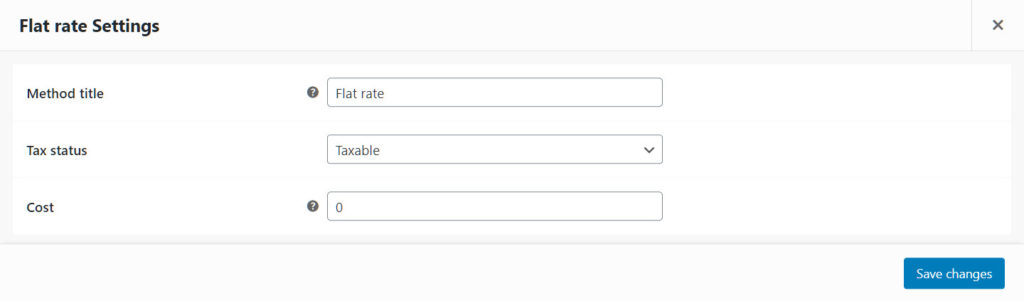
One way to tackle this is to add a Flat Rate on products as a shipping fee. This helps customers to have a fair idea of the net total they have to pay before reaching the checkout page.
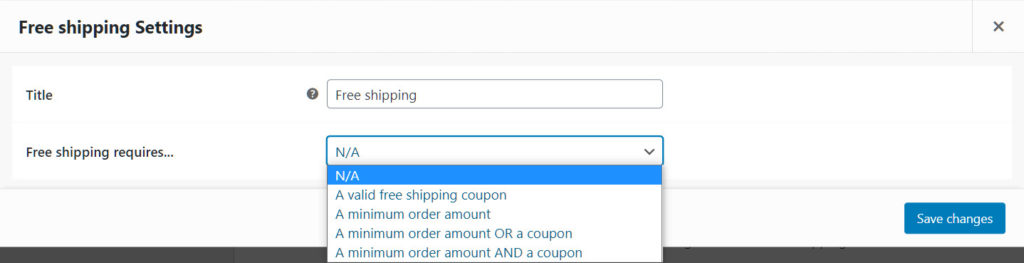
You can also provide Free Shipping to customers by adding slight margins to your products in a way that your customers qualify for free shipping once they add enough products into their cart.
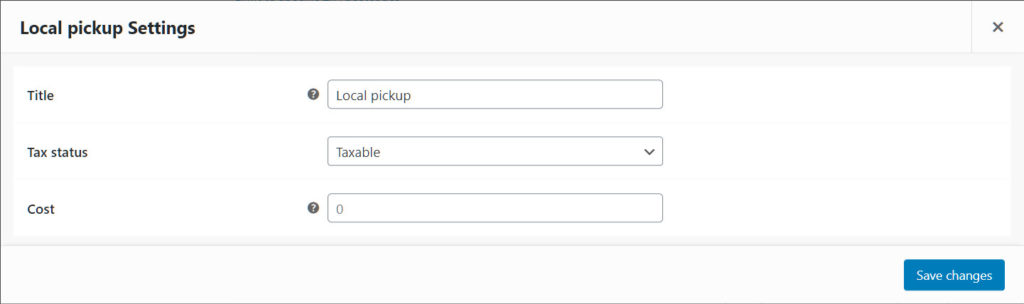
If you are operating a business locally, you can also set up a Local Pickup option where your customers can come and collect the product at a particular outlet for a small fee.
These are the Core Shipping Options that come with your WooCommerce plugin. Let’s now see how you can set up each one of these on your Store:
Add a Shipping Zone
Step 1: Go to WooCommerce > Settings > Shipping and Add a Shipping Zone.

Step 2: Add a Zone name to which you need to ship your products. Remember, you can set up multiple shipping zones with different rates of shipping for each zone.
Step 3: Add the regions to which you need to set up shipping. You can search for the states within countries or entire countries as well to come under a specific shipping zone. For precise control, choose the option to limit shipping to specific zip codes/postcodes.

Step 4: Add your shipping method for the particular shipping zone. All the methods of shipping that we discussed before are available to you. After enabling the shipping method, you can edit specific details within each shipping method.
Add your Shipping options
These are helpful information about shipping that helps you display shipping calculations on the cart page and also help you choose the right address when it comes to printing your shipment label.
The shipping destination is a piece of key information and sometimes this information could get jumbled when setting up shipping with your courier service. Discuss with your courier service providers and set up your shipping destination accordingly. You could even enable force shipping to the customer billing address.

Conclusion
With that, we’ve now covered all the basics of building your first online store using WooCommerce. There is a lot more to learn on WooCommerce that could better streamline the website experience for your customers. We advise you to read more about WooCommerce and the best practices of doing business online. For more reading material, visit our WooCommerce blogs.
Happy building!
