Table of Contents
You may have various reasons to export the product data in your WooCommerce store, so we don’t bother asking. We are here to help you export your WooCommerce product data with images. WooCommerce product data include titles, descriptions, stock availability, images, etc.
In this article, we will introduce you to an amazing plugin that lets you export WooCommerce product data with images using a CSV file that too for free.
Before we begin, we assume that you have basic knowledge of adding products to the WooCommerce store.
With that being said, let’s kick into the topic.
Follow these steps to export the product data in your WooCommerce store:
Steps to Export Products with Images using a CSV file
By default, the WordPress Export tool does not export the product images and the products in your WooCommerce. This would require you to include the images manually if you are using the export file to import to another store. If you have several products in your store, manually updating each product is not a practical solution.
This is where you need to use a plugin to assist you with that. Below we have explained the steps to export products with images in detail using a product export plugin.
Step 1: Plugin Installation
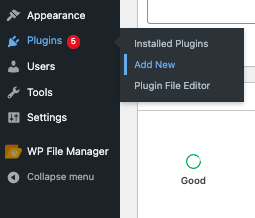
Open the dashboard of your website.
Navigate to Plugins > Add New.
Search Product Import Export for WooCommerce in the plugin directory.
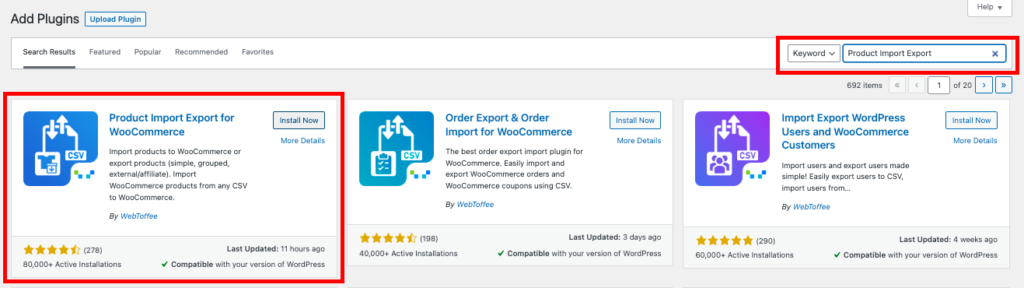
Install and Activate the plugin.
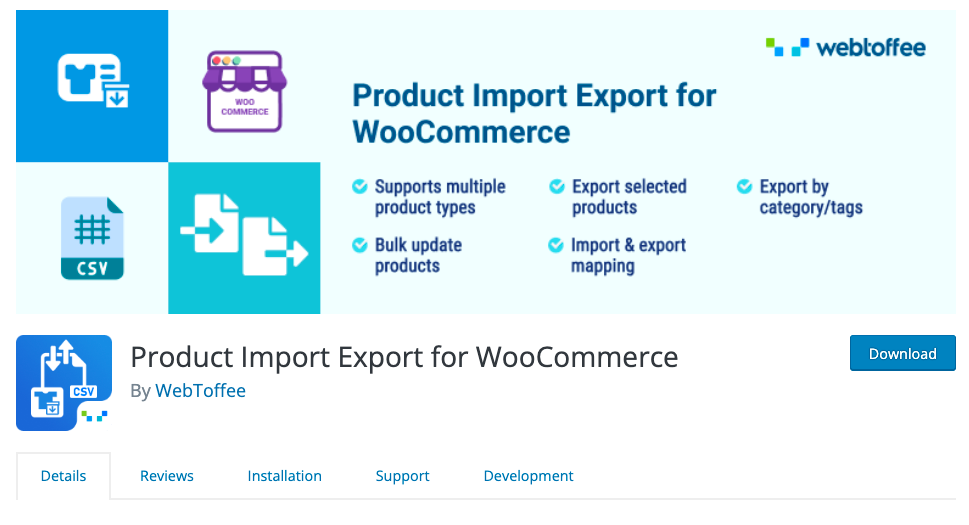
You can also download the plugin file from WordPress.org.
Step 2: Plugin Configuration
After installation, the plugin will add WebToffee Import Export (Basic) menu to your WordPress dashboard.

The plugin also allows you to import product data from CSV files, but now let’s focus on exporting.
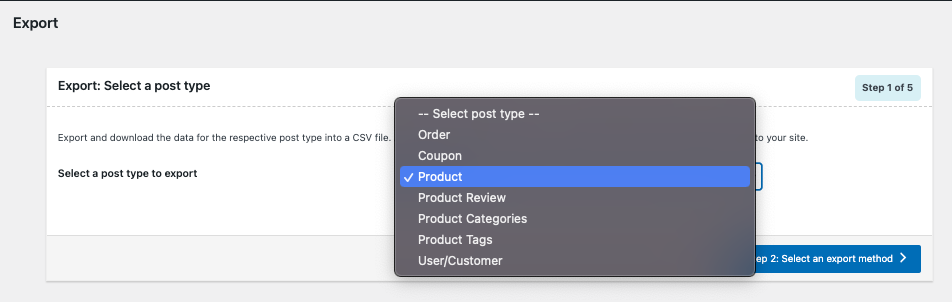
Navigate to the Export option.
Select Product from the dropdown menu.
Proceed to the next step for selecting the export method. There are 2 export options available in this plugin.
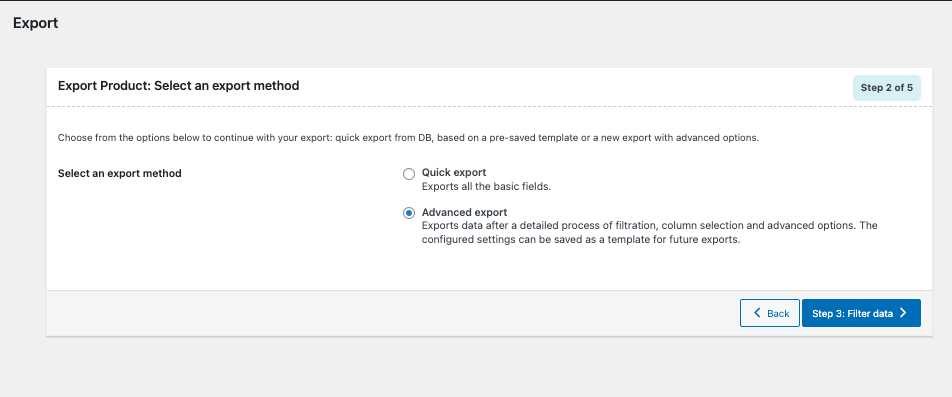
Quick Export: Lets you export the basic product data quickly.
Advanced Export: Lets you export data after a detailed process of filtration, column selection, and advanced options.
If you are selecting Quick Export, enable the Taxonomies and Attributes checkbox to ensure that all the fields from the respective groups are included in your export.
Let’s select Advanced Export for this demo.
Click Filter data to proceed to the next option.
Let’s see what are the options available.
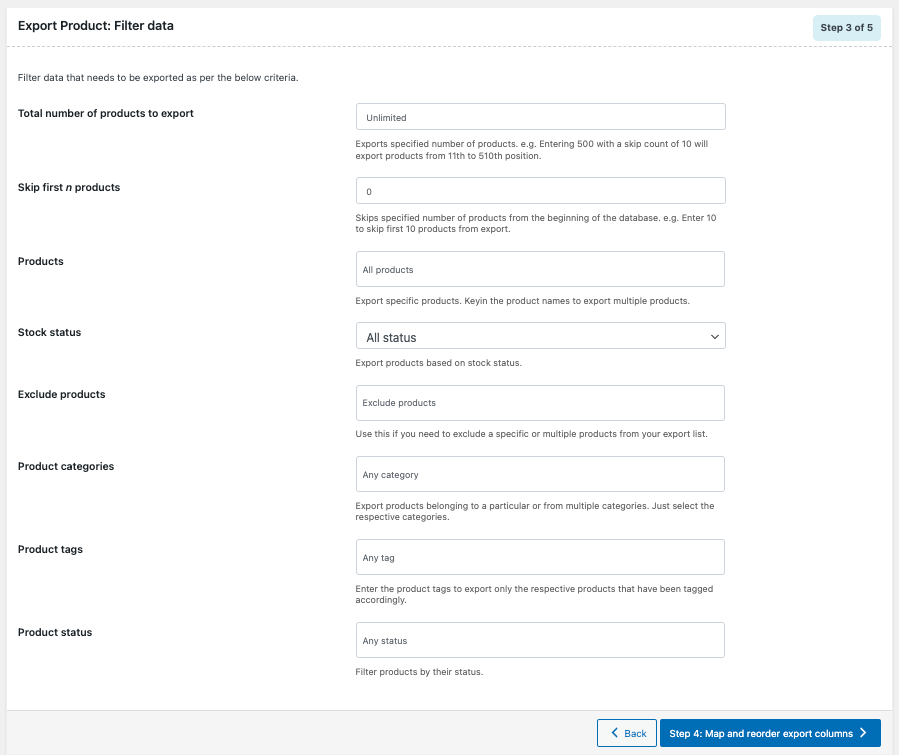
- A total number of products to export: You can set the total number of products to export here, leaving it blank will export all the products in your store.
- Skip first n products: If you want to skip the first 10 products from exporting you can enter the value 10 here.
- Products: If you want to export specific products from your store, enter the product name here.
- Stock Status: This lets you export products based on stock availability. There are four options – All status, In Stock, Out of Stock, or On backorder.
- Exclude products: This lets you exclude any specific product from exporting.
- Product categories: Lets you export products from a particular category. You can also export multiple categories.
- Product Tags: Enter the product tags to export only the respective products that have been tagged accordingly.
- Product status: This lets you export products based on their status. – Publish, Private, Draft, Pending, Future, All Status.
Proceed to Map and reorder export columns.
Step 3: Mapping the products fields to the CSV file
Below is the screen for mapping the product fields with the correct header in the resulting export CSV file.
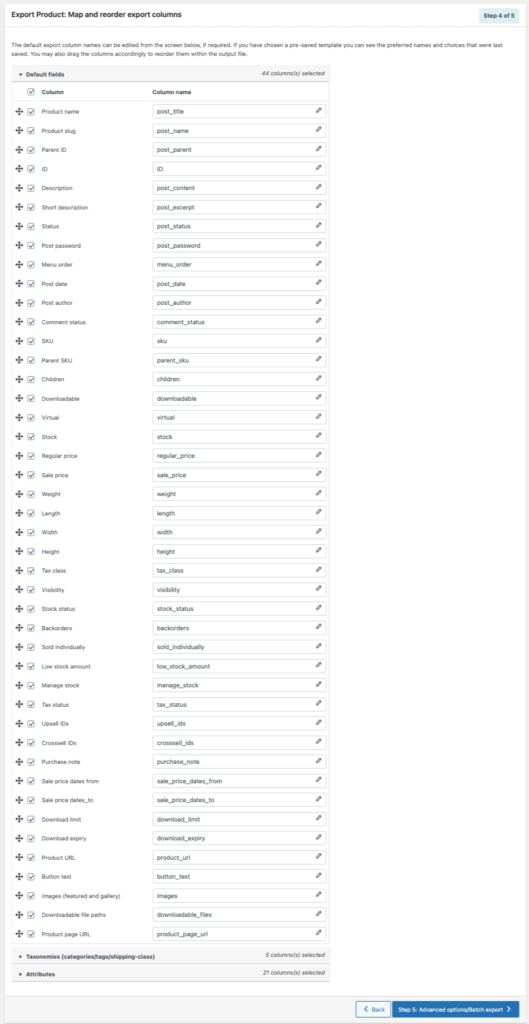
From this screen, you can reorder the columns and edit/modify the column headings and ensure that the product fields are mapped to the right header in the CSV file
Make sure you have enabled the Images checkbox. (This lets you export featured images and image gallery)

You can uncheck any checkbox to exclude them from exporting.
Step 4: Export the Product CSV file
After setting up the data that you want in your export file, proceed to Advanced options/Batch export.
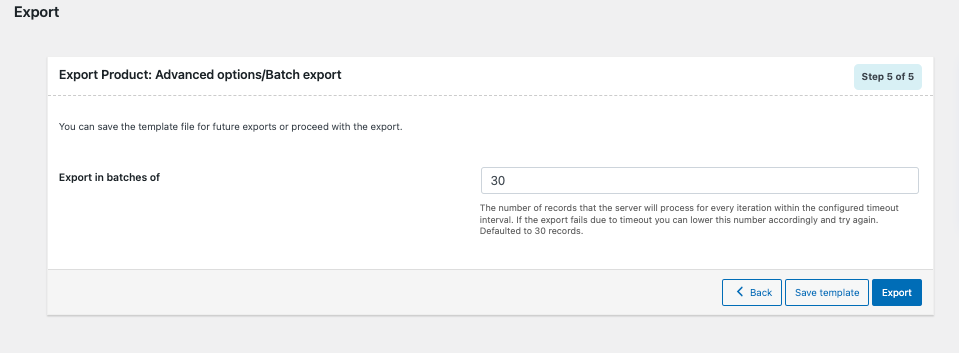
This lets you export the data in batches to avoid export fails due to timeout.
Click on Export.
You can see a message saying Export file processing completed.
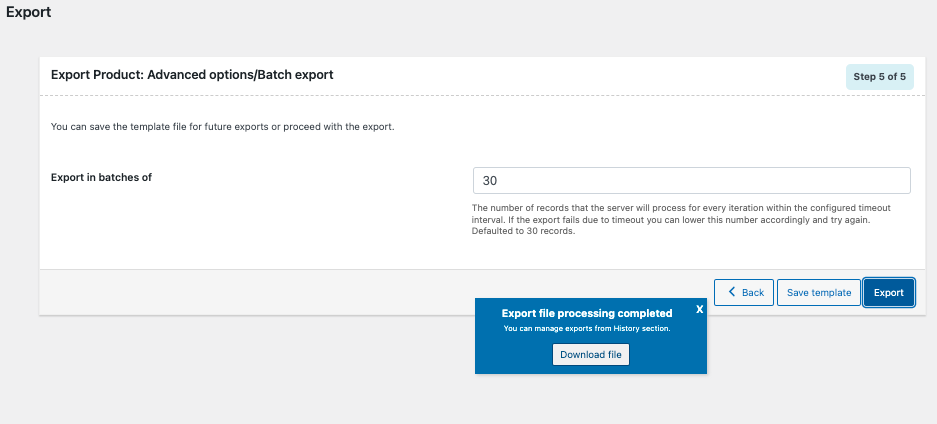
Click on Download file.
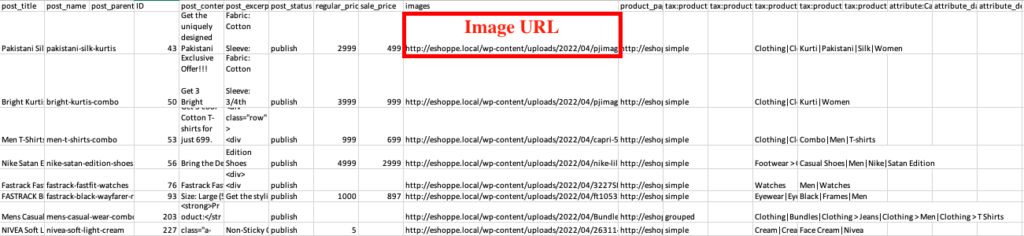
This will download all the product data in a CSV file along with the URL path to images.
Concluding:
Exporting your product data can be helpful in many ways. You can keep a backup of your products so that you can restore them at any time. The resulting CSV file can be used to import the WooCommerce products with images to another website.
The plugin also helps you migrate your products from one WooCommerce store to another easily with this plugin.
We hope this article helped in exporting products to your WooCommerce store easily.
If you liked this article, please share your feedback with us.
