Table of Contents
Blogs are a good way to share your thoughts and expertise with the world. If starting a blog is a scary thought for you because you don’t have technical expertise, let me tell you, you shouldn’t be.
Getting a blog up is as easy as ABC. If you have a great idea for a blog that you want to share with the world, you should go for it. Not having technical expertise should not hold you back.
When you are starting a blog, the first thing you should do is choose the right blogging platform. WordPress is the most popular blogging platform today. Many popular brands choose WordPress to build their website. Primary reasons – one, it’s very easy to learn and use, and two it is completely free. Yes, you read that right. WordPress is completely free.
But, there are two versions of WordPress; hosted(WordPress.com) and self-hosted(WordPress.org) versions. If you are using self-hosted WordPress, the only cost that you going to have is the hosting and domain name. You will have to buy a unique domain name and a hosting plan that suits your blog’s requirements.
But it does not mean that you won’t have any cost to start your blog. You will need to buy your domain name and hosting space. There are a number of domain & hosting providers out there for you to choose from. Hostgator is one of the prominent ones among them.
With a simple setup and affordable prices, you would love to choose Hostgator as your blog’s hosting partner. This article gives you a basic outline of the step-by-step process involved in building your blog with Hostgator.
Step 1: Get a Domain name
Step 2: Choose your hosting
Step 3: Install WordPress
Step 4: Get a theme, Customize it
Step 5: Add useful plugins
Step 6: Start writing your blog
Step 7: Monetize your blog.
Now let’s see each of these steps in detail.
Step 1: Get a domain name
For any website to go online you are going to need a domain name. The domain name is your blog’s unique identification through which your users will use to reach out to you.
While choosing a domain name, try to give an extra thought. Apart from the fact that your domain name affects your rankings in search engines, your domain name will help create an impression of your blog on your users. So, there are certain things to take care of when choosing a domain name.
1 – Ease
Create a domain name that is easy to remember, easy to type, and easy to pronounce. Make the domain name short. This will make the domain name more memorable and easy to type.
2 – Brandable
Make your domain name as unique as possible to stand out from your competition. Know your competition and try to create a domain name that in no way bears any resembles with that of your competition and thus avoid any confusion.
3 – The Domain extension
The domain name extension is also indicative of the kind of website or blog yours is. Domain names like .gov, .edu, etc are pretty explanatory as to what kind of institution the website or blog the domain name belongs to. Other than the usual .com, .net, etc. there are many other domain names that you can go for like .biz, .bank, .info, etc. But it is better to stick with the ones familiar to the users so that you don’t risk losing traffic.
You need to register your domain name with a domain name registrar. But most of the time your hosting provider also acts as the domain name registrar.
Since we have already decided that Hostgator is going to be our domain and hosting provider, let’s see how it is done with it.
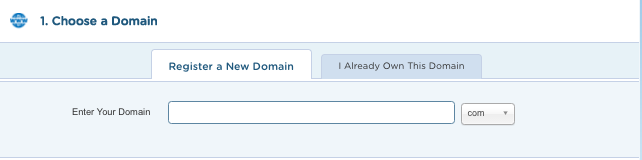
After you have entered the chosen domain name for your blog, scroll down and go to choosing your hosting plan.
Step 2: Choose a Hosting Plan
After you have decided and purchased your domain name, you are going to need a web hosting space – This is where all your blog’s content will be stored and accessed from.
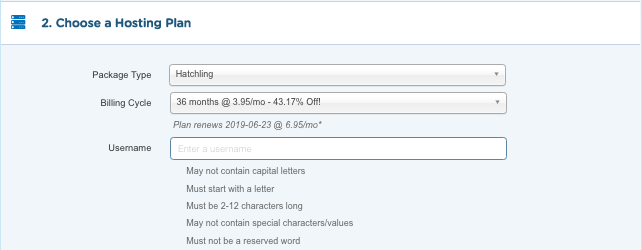
For that, you need to choose a hosting plan. Depending on the traffic you have or you are expecting on your website, you can go for shared hosting, Virtual Private Hosting, or managed WordPress hosting. When starting out it is wiser to go for the shared hosting since it is cheaper, and you can always go for a better plan as the traffic of your website increases, and hosting requirements increase.
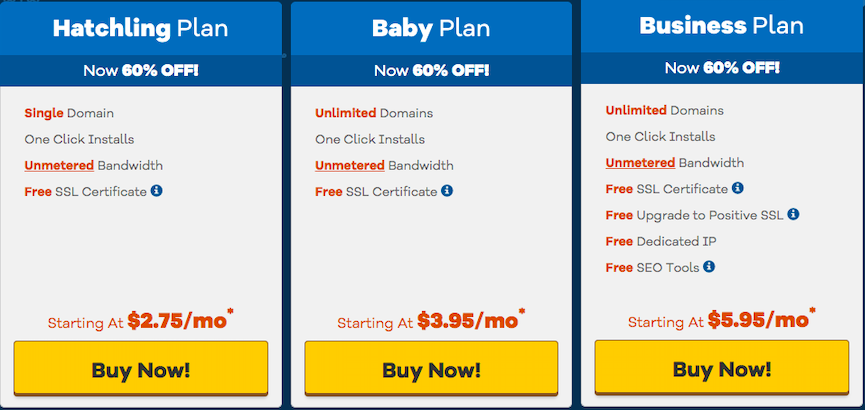
These are the three plans offered by HostGator in their shared hosting plan. You may choose the one you like.
Once you have made your choice its time for confirmation.
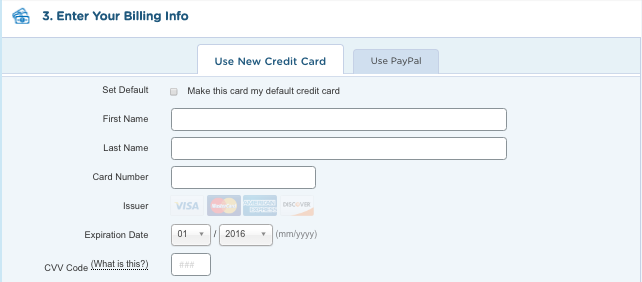
Now you have to make the payment. Enter your account information in the appropriate fields.
Once the payment process is completed, you will be directed to the below window.
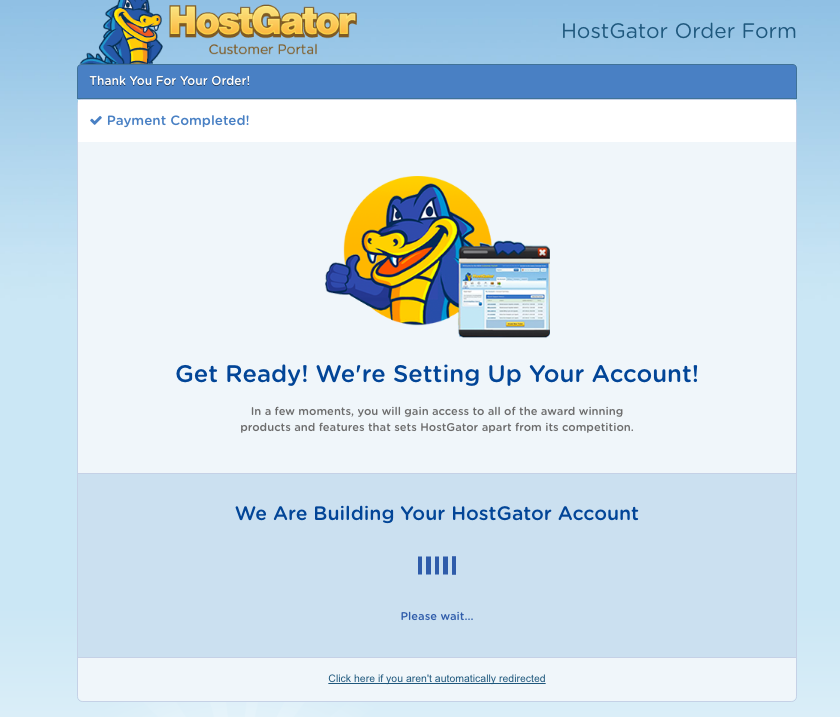
Now you are all set with your hosting and domain for your blog. You can move on to the next step that is installation of WordPress.
Step 3: Install WordPress
Installing WordPress is as easy as it can possibly get.
There are two ways that you can install WordPress. The one-click installation or the manual installation. Both methods are incredibly easy and can be implemented in a matter of minutes.
The one-click installation literally takes one click to install. All the things you need to do is create a database, a database user, connect the database to WordPress and create a WordPress admin account. It is not as scary as it sounds. The manual installation of WordPress requires some added steps to install. But that’s all it is. A few added steps. All the installation can be done in a matter of minutes.
We have a whole article on how to set up a WordPress website, that you can find here.
Step 3: Get a Theme, Customize
This is a very important step in getting a blog ready for the public to see. The theme you select will determine how your website is seen by the outside world. Put in a little effort to find the right theme that suits your blog’s identity. It may take time to find the right theme. There are a lot of free and premium WordPress themes that you can get for your blog. When starting out free themes are just enough for your blog. The safest place to get a free WordPress theme is WordPress.org and you should only get your free themes from there.
Once you have decided upon the theme that you want to use, install it on your WordPress blogging site. To install a theme on WordPress, head over to the WordPress dashboard.
Go the Appearance > Themes. On the Theme page, click on add new.
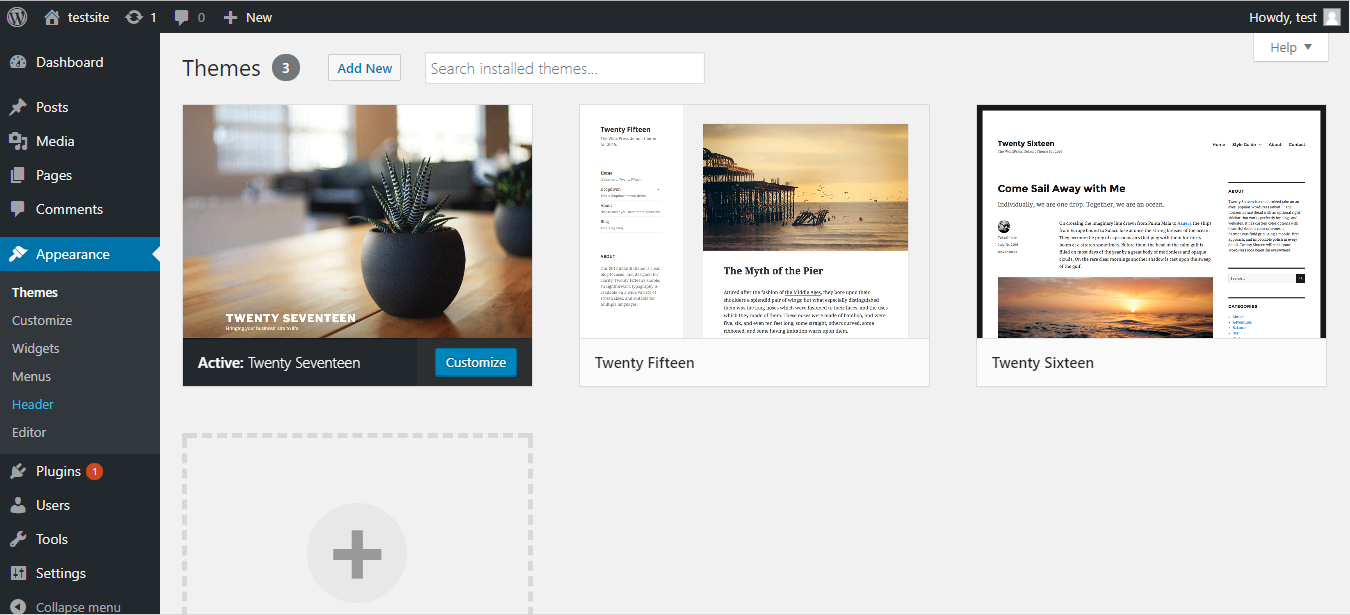
From the Add Themes page, you can install a theme in two different methods.
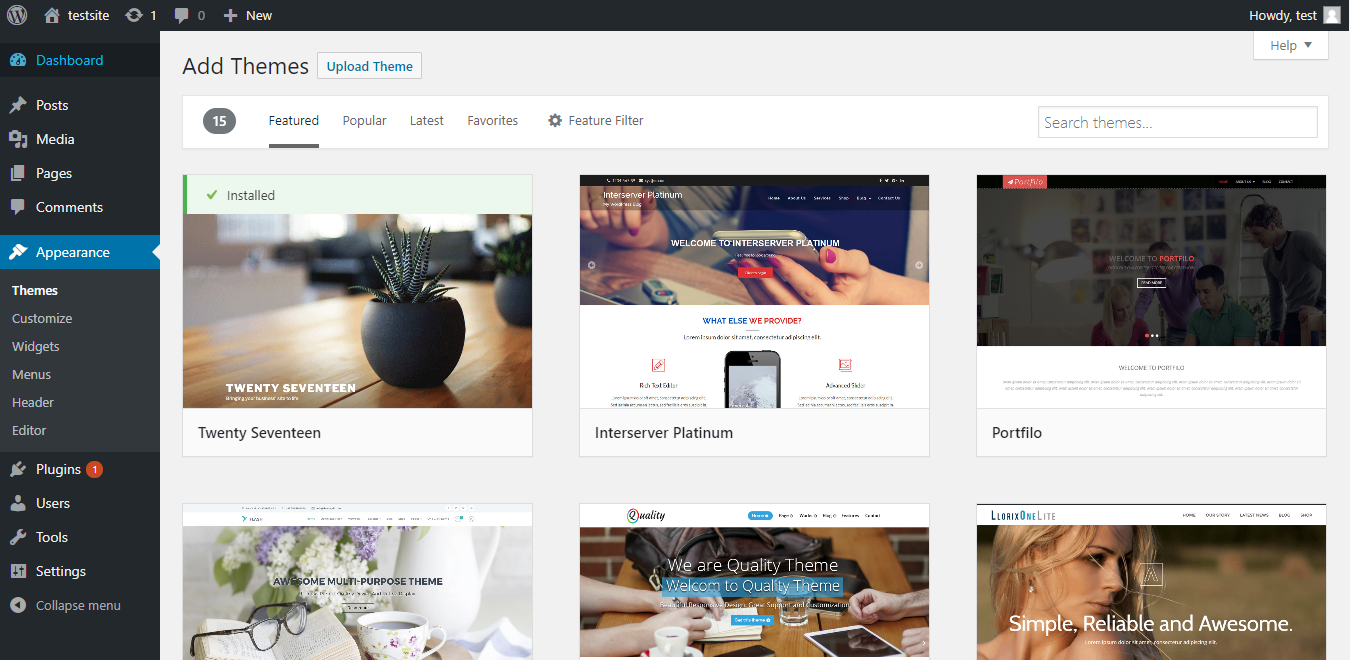
Method 1:
Select a theme from the Featured, Popular, Latest or Favorite themes. Choose one theme and click install.
You can also search and install a specific theme of your choice. If you know the name of the theme you want, enter the name in the search box and you will get the theme if it is present in WordPress.org.
Also, if you are not quite sure which theme to pick, but know what features you want in your theme, you can do a feature filter. Click on Feature Filter and select the Subject, Feature, and Layout that you would like in your theme. After you have selected what you need, then click on Apply Filter. This will give you the theme or a list of theme that matches those requirements.
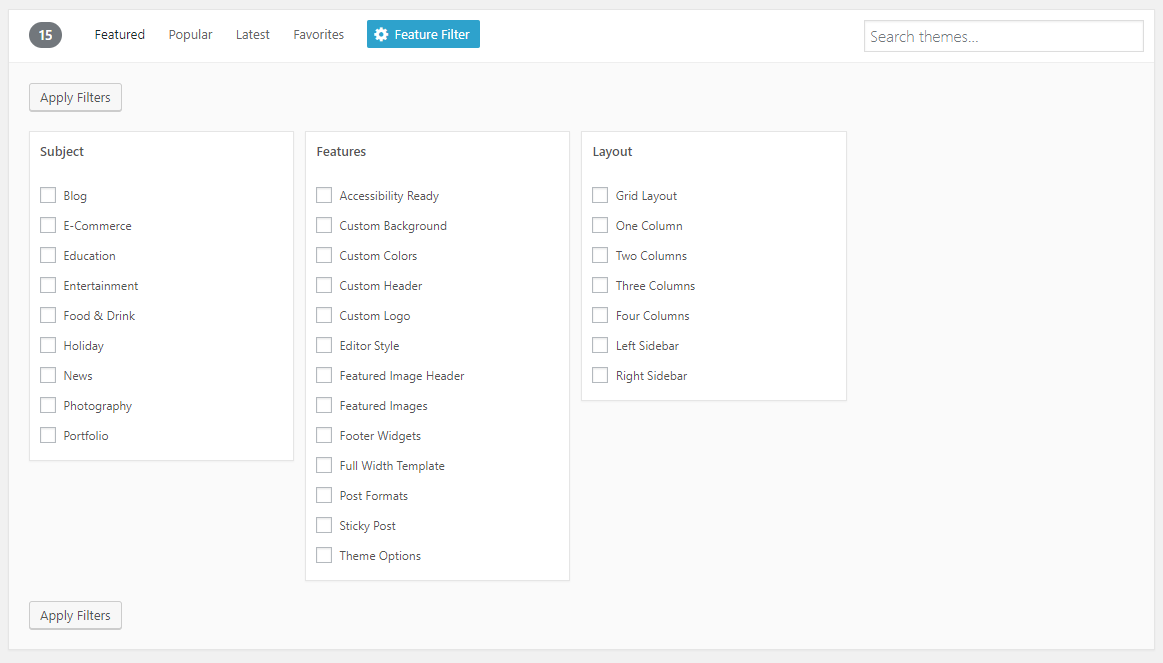
Select the theme that you like the most and then install and activate it.
Method 2
Upload the zip file of a theme. If you have got a theme from another source, you can upload the zip file of the theme and install it.
From the Add Theme page, click on Upload Theme. Then choose the zip file from your local computer and then install and activate.

After you have activated the front end of your blog will be determined by the theme you have activated. But, for certain, you are going to have to customize the template. For this go to Appearance > Customize from the left sidebar.

From the Customize page, you can customize everything from the heading of your website, the navigation, layouts, homepage settings, or add additional CSS, etc.
Step 4: Add Useful Plugin
To get the best out of your WordPress blog, you will need the help of plugins. There are some plugins that you must have for your WordPress blog in order to make the most out of it. Some of these plugins help in optimizing your website for the search engines, some for the security of the website, some plugins help you understand the traffic analytics of the website, etc.
All you need to do is choose the right plugins that you would need for your website and install them.
Step 5: Start Writing Your Blog.
There are two ways you can create your content on your blog. Pages and Posts. The blogs are usually created using posts. To create a post, Go to the WordPress dashboard and on the right sidebar, click on Posts and then Add New. This will take you to the post editor.
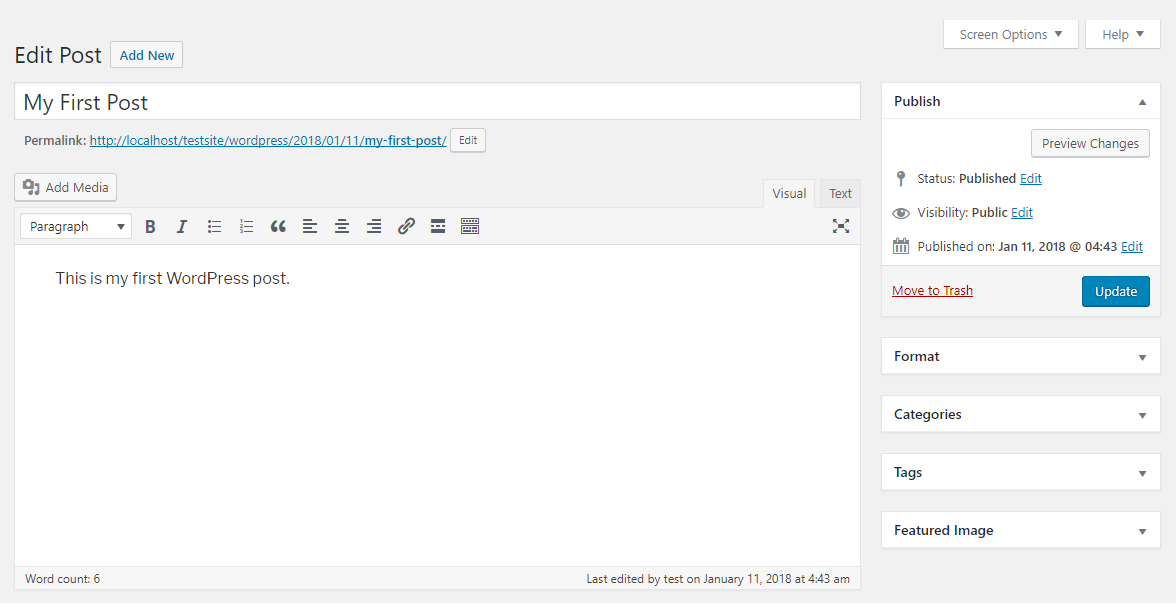
From the post editor, give your post a heading, in the title area.
In the content area, add the content of your website. to add the media files to your content using the Add Media button. Use the standard editing tools to add internal or external links or format the content.
When you have entered the title of the post, WordPress generates a permalink for your post. This is the hyperlink that can be used to access your blog post. You can change the permalink by clicking on edit, to change the link with some other keywords. When changing the permalink of your post make sure that you use the right keywords. The permalink plays a very important role in the SEO of the website. Also, don’t change the permalink when you have considerable active traffic to the blog. It will affect the traffic to blog in a very bad way.
From the publishing tools, you can save a post as a draft, preview how your posts look like on the website and publish when you are ready to publish the content.
Make your posts more user-friendly using the Format, Categories, Tags and Featured images.
Organize your content using Categories and Tags.
The blogs on the WordPress website are listed in reverse chronological order. Which means the last entry appears first on the list. So to navigate through the blogs and to find a particular blog, you will have to go through every single blog in that published after that. Categories and tags give a better way to navigate through the content. Also, they can give you a better search engine optimization and help rank your website better in search engines by letting them know what your website’s content is all about.
What is the difference between categories and tags?
Categories and tags can be confusing as sometimes it’s hard to decide whether a topic should be a tag or a category.
To understand the difference between the tags and categories, consider categories as the chapters of a book. By looking at the chapters of the book, you can very well understand the structure of the book and identify the topic that each chapter cover. Thus, categories help in a broad grouping of your posts. Categories are hierarchical – which means they a particular structure and adding or removing the categories means a structural change in the organization of the posts.
Tags are more like the indexes of the book. They include a much longer list of topics the book covers. They describe the specific details of your posts like search engine keywords which makes it easier to find a particular post. Unlike categories, tags are not hierarchical.
How to add categories and tags to a post?
On the right side of every WordPress post editor, you can see two boxes where you can add categories and tags that particular posts belong to.
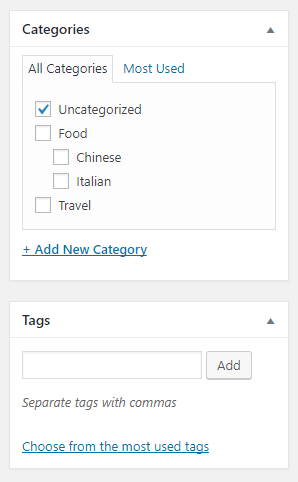
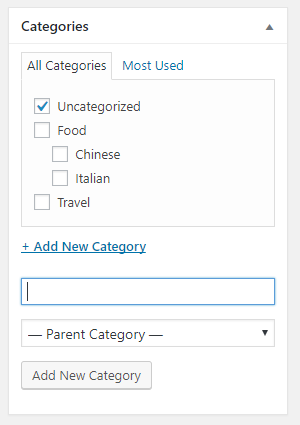
To add a category, go to the Categories section, and add click on Add New Category. Since categories have a hierarchical structure, you can add a category to another category. All you need to do is a select a Parent Category for the new category you are adding.
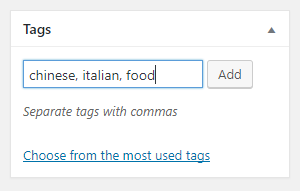
To Tags for the post, go the Tags section and add the tags that are related to the post. You add as many tags as you want by separating the tags with commas.
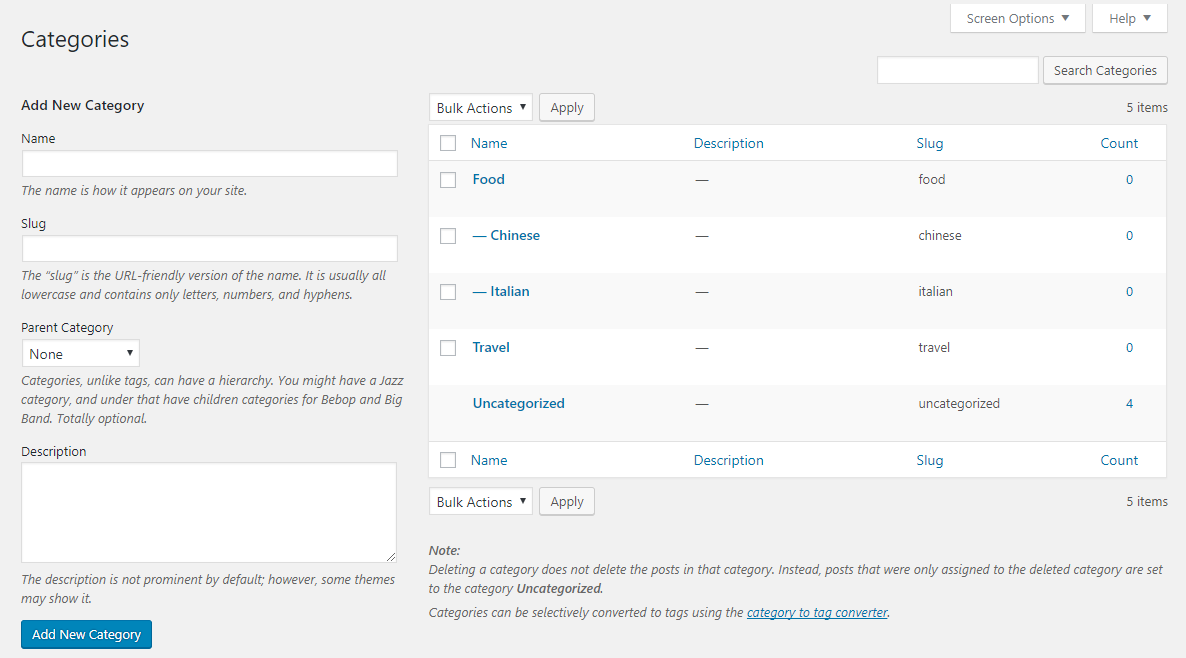
With the post editor page, you can not rearrange or delete the categories. This can be done from the categories and tags page respectively. To manage the categories, go to Posts > Categories.
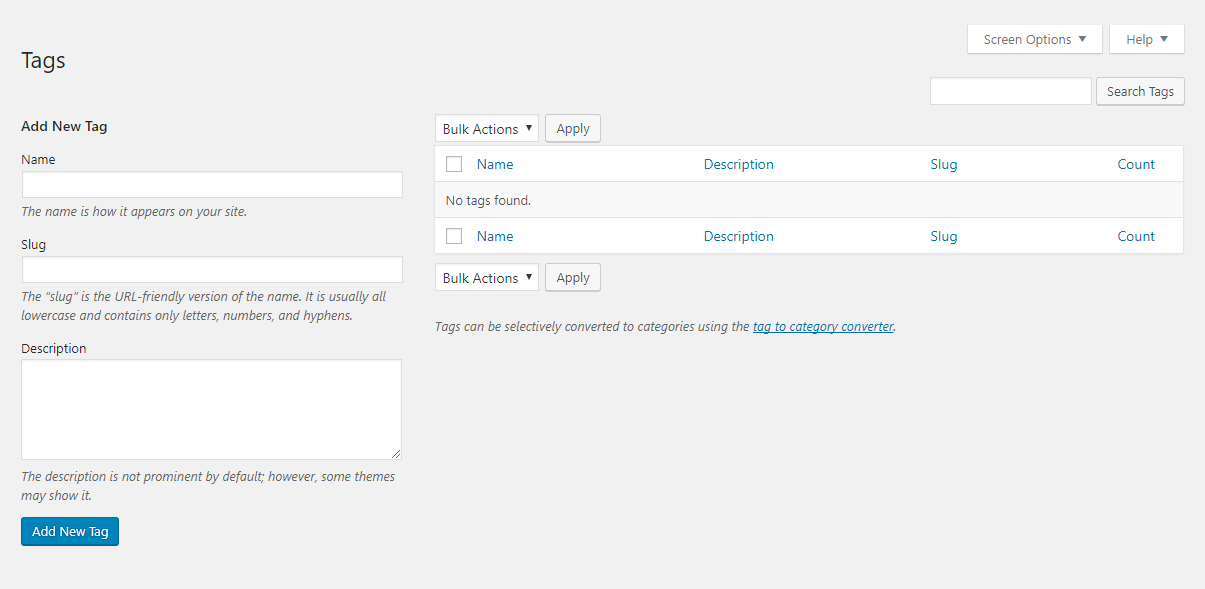
To manage tags, go to Posts > Tags
Step 6: Monetize your Blog
To start monetizing your blog, you need to first establish your website and generate traffic to your site. For establishing the website, you would need to create a decent amount of content beforehand and publish them on a regular basis. Making some content ready beforehand and keeping them in drafts can help you in publishing them regularly without running short of posts to publish. This can also help you find time to create content that in between that is relevant to the current affairs.
When creating contents, make sure to:
- Use compelling headings, that can attract the eyes of the users. Use breaks in lines and paragraphs to make the content more readable, and more enjoyable.
- Always be aware of what is happening in the world that is relevant to your niche. Make sure you include them in your posts.
- Credit the sources when you are quoting from others. This will not only avoid any legal issues for you but also can improve your credibility.
- When citing from an external source, make sure you that you always refer to an authoritative source and provide a link to it. This will help in increasing the credibility and the trustworthiness of the website.
Promote Your Blog
After you have created the content for your blog, the next thing to do is promote your blog.
Social Media
The best place that starts with would be social media. Let your friends and followers know what you are writing. If they find it worth their time, they will share it with others and you can increase your reach. And also is a great way to know what other people think of it and start a conversation.
Know some SEO basics
Some basic knowledge of SEO can help you create content that can rank higher in the search engines. Know the right keywords for the blogs that are related to the topic you are writing on, how you can use those keywords, how to use the structure of the contents that is more SEO friendly.
Publish regularly
Make it a point to publish regularly on your website. Keep some content ready in drafts for the times when you are not able to publish contents. Always remember, out of mind, out of sight.
These are some of the techniques that can increase and sustain traffic to your website. The more people visit your website, the more money you can make.
To get started with making money, here are few ways you can do that.
1 – Affiliate marketing
This is when you recommend to your user a certain product through your blog. So, when every time a user clicks on the affiliate link on your website and buys that product, you get a certain percentage of that sale.
2 – Pay per click ads
CPC for short, by displaying such ads using Google Adsense, every time an ad is clicked by a visitor you get a fee. The fee per click is determined by the advertiser. This is an easy way to make money using blogs. All you need to do is add a script from your website and start displaying ads.
3 – Pay for membership
You can ask for a certain amount of fee to get the membership or subscription to the content of your website.
4 – Accept donations
This way you can provide your website content for free and ask the users to provide an involuntary donation to support you create more content.
You can find more on how to monetize your blog in our article dedicated on how to monetize your blog.
Wrapping up
Blogging can be a very effective way to get your ideas, experiences, and expertise known to the outside world. Creating a blog has been made easy and cheap by WordPress. Blogging can be a really good way of making money online. There are many more ways that you can monetize your blog. But that’s for whole another article which you can read here.

Comments
Bianca
Hey are using WordPress for your blog platform?
I’m new to the blog world but I’m trying to get started and create my own. Do you require any html coding expertise to make
your own blog? Any help would be greatly appreciated!
December 9, 2021
Safwana
Hi Bianca, we use WordPress as our blogging platform. You do not necessarily need HTML expertise to run your blog, however, it definitely helps. If you can find a theme and the plugins that fit your blog’s requirements, then that would be enough when starting out.
December 23, 2021
Judi
This is the most beneficial and uncomplicated guide
to blogging i have come across.
January 6, 2022
Hulda
Hurrah! After all I got a web site from where I be capable of genuinely obtain helpful facts regarding my study and
knowledge.
September 15, 2022
Sharron
each time i used to read smaller posts that also clear
their motive, and that is also happening with this piece of writing which I am reading here.
September 21, 2022